Monday 31 December 2012

First Foot Shortie


shortbread biscuits


It’s the end of 2012, New Year’s Eve, or Hogmanay as we call it in Scotland. When it comes to New Year, I am a bit ‘bah humbug’. It’s never been my favourite time, and I always find folk are either Christmas or New Year fans. I am most certainly the former.

Anyway, a quiet Hogmanay for us this year. It’s been a busy month, what with a couple of weddings, Christmas nights out and so on, plus we are off on our annual January pilgrimage to London very soon.

Back to New Year however, and we will be visiting family over the next couple of days. Usually Disneyboi’s family on the 1st and then my family on the 2nd – which is also my aunt’s birthday, where she makes us a gorgeous meal. In Scotland the tradition of visiting folk at New Year, and taking them a gift, is known as First Footing. It’s supposed to be a tall, dark, handsome stranger who crosses your door after the bells, who is your first foot and brings with him luck – and a lump of coal(?). But any visiting of people over the first few days in the New Year is generally referred to as first footing.

For my gift to take to the family this year, I decided to literally take a First Foot or Feet. Some shortbread (adapted from Nigella) and cut into the shape of feet, with a little nail varnish icing for the toes! A very easy to make shortie, if you are ‘short’ on time!

Adapted from Nigella.com

Ingredients:

100 grams icing sugar
200 grams plain flour
100 grams cornflour
200 grams unsalted butter, softened
½ teaspoon vanilla extract
granulated sugar for sprinkling

Method:

In a food processor, blend together the icing sugar, flour and cornflour. Dice the butter into cubes and add into the processor, along with the vanilla. Blitz until it forms a dough. Plop this into some clingfilm  and wrap tightly, shaping into a flat disc. Chill in the fridge for about half an hour. Preheat your oven to 160oC and line a couple of cookie sheets with baking paper.


Remove the dough  from the fridge and roll it out, using icing sugar on the rolling pin and work surface to prevent sticking. Cut out feet shape with the cookie cutter (or whatever cookie cutter you are using). Place them on the prepared sheet and sprinkle with some granulated sugar. Chill them again for 15 minutes, then place them in the oven for 11-12 minutes. The edges should start to turn golden brown. Place them on a cooling rack immediately, and allow to cool completely.


I iced my toes with some icing, using a recipe from my friend Debs over at Debs Dust Bunny.

This is a different shortbread recipe than I have used before, what with the cornflour and icing sugar. It results in a very light cookie and is very delicious.

Happy New Year to you all when it comes and I wish everyone a very lucky 2013!
(Oh and Happy Birthday Auntie Dola when it comes! Don’t worry I won’t give the game away!!)

Saturday 29 December 2012

After Eight Cereal


Chocolate Mint Granola


Christmas morning and if you are anything like me, you eat chocolate for breakfast. Totally unhealthy I know. Disneyboi loves his After Eights – well we usually get up after 8 on Christmas day so it’s probably legit.

If I am lucky enough to get a few days off in-between Christmas and New Year, I love the lazy mornings and grazing through all your sweets I received as gifts. In fact I usually try to eat all the sweets I get before New Year, so I can start to be a bit more virtuous come January. Anyway, I digress.

I was pottering about the kitchen one day and came up with something that wasn’t intended. But the result was actually quite tasty. And it ties in with sweets, breakfast and being ‘slightly’ healthy. I came up with an After Eight (or After Dinner Mint) flavoured breakfast granola.


I combined chopped dates, porridge oats, dark chocolate, marshmallows and peppermint extract and the result - with milk poured on top of course – was absolutely delicious. Disneyboi, the After Eight fanatic approved (but hates dates), so I must have invented something quite good.

Yield: A few bowls worth

Ingredients:
200 grams pitted dates
100 grams porridge oats
50 grams mini marshmallows
50 grams 74% plain chocolate
1 teaspoon peppermint extract


Method:
Pop all of the ingredients into a food processor and blitz for two minutes until it whirs about freely.


Directions:
Pour into a bowl, splash on milk of your choice and eat something akin to after dinner mints, which is maybe a wee bit healthier, what with the fruit, oats and antioxidant-full chocolate!

Enjoy…

Chocolate Mint Breakfast Cereal

Thursday 27 December 2012

Key Lime Pie Trifle


key lime parfait


Christmas seems like ages ago now! But the heartburn continues. I have gorged myself with festive food. Including the remains of this year’s delicious trifle.

Now, what with Trifle Layer Cake and Trifle Cupcakes, I was a tad tired of the traditional variety. I knew that I wasn't going to make trad trifle for this reason, but was unsure what to make. Then somebody at work mentioned an article they had seen in a magazine about a Key Lime Trifle. Disneyboi’s favourite dessert is Key Lime Pie, so I decided to concoct my own version, using an old recipe I had for the pie. 

Key Lime Pie is nothing without the delicious buttery crust, as well as the tangy sweet citrus filling, so I made sure my crust had a big part to play. I wanted this to feature throughout the dessert, so I had it in the jelly layer, above the custard layer and sprinkled on top of the cream, when ready to serve.

The ‘custard’ would actually be the pie filling, minus lime zest, which I decide to add through the cream, and sprinkled on top of it also.

I made the trifle in my old bowl, which I always use. It’s not classy or modern, but it wouldn’t be trifle to me without it!

Adapted from BBC Good Food

Yields: A big bowl of the stuff

Ingredients:
I pint of lime jelly prepared
375 grams digestive biscuits, crushed
150 grams unsalted butter, melted
Zest and juice of 4 limes
570 ml double cream
200 grams sweetened condensed milk

Method:
Line an 8” cake tin with Clingfilm. In a bowl, mix together the crushed digestives and butter and place this into the lined cake tin. Press down hard, into a smooth flat disk. Pop into the fridge to set, at least two hours, but preferably overnight.


When set, remove the film from the piecrust and chop this into bite size pieces. Sprinkle two thirds of the chopped crust into the base of your trifle bowl. Pour your prepared jelly over the top, until it just covers the crust. Place back into the fridge and allow to set.


When the jelly has set, prepare the pie filling. In a bowl, place 285 ml of the double cream, all of the condensed milk and limejuice. Whisk for two minutes, or until the mixture is whipped and stiff. Place this on top of the jelly and smooth with an off set spatula. 


Sprinkle on half of the remaining piecrust pieces. Then in another bowl whisk the remaining double cream until stiff, and fold through three quarters or so of the lime zest. 


Spread this on top of the pie filling and smooth over, with an off set spatula. Sprinkle the remaining lime zest on top. If you are not going to be eating this immediately, cover tightly with Clingfilm and place back in the fridge.


When ready to serve, scoop into bowls and on top of each serving, sprinkle over more of the remaining piecrust. This will ensure that it stays crunchy and not turn soft.

I made the mistake of cutting the piecrust into wedges and placing them in the bottom of the bowl (see below), but this made it near impossible to get a spoon through! So, chop the base into chunks.


My mum and Disneyboi loved it - although we had to wait a while after our main course to eat it! It tastes deceptively like Key Lime Pie, what with the buttery crunch of the base and sweet citrus flavours going on. The jelly adds another layer of freshness. Christmas may be over, but this would a lovely dessert anytime of the year. Enjoy!

Wednesday 26 December 2012

Cartoon Time - Cake Box

Time to box up all those gifts! Hope you all are having a great time!


And I am pleased to announce that the winners of the Cakeyboi 2013 calendar are (after inputting the entries into the Random Number Generator) Janice at Farmersgirl Kitchen, Nix at the Nom! The Indulgent Baking Blog and  Cakeyboi follower Audra (Snowflake Day). I will be in touch very soon to arrange delivery.


Thanks to everyone who entered and here's to a very lucky 2013 for us all!

Monday 24 December 2012

Christmas Cartoon Time - Greetings

Last one before the big day...


Saturday 22 December 2012

Red Velvet Snowball Cupcakes


cocoa free red velvet cupcakes

We were having a Christmas buffet in my office the other day and I put myself down on the list for cupcakes. I decided to make two varieties, my trifle cupcakes that regular visitors to Cakeyboi might have seen before. The other type - my red velvet cupcakes.

I have made this recipe for the past few years at Christmas, before red velvet cake was even a ‘thing’ here in the UK. This particular recipe which I found on the Martha Stewart website doesn't contain cocoa and for years I never realised that regular red velvet cakes contain cocoa powder. When I did try one with – only last year - I actually didn't like it as much and I will remain cocoa free red velvet.

I have adapted the recipe to make cupcakes instead of one big cake. And I haven’t frosted it with the normal cream cheese frosting. Instead, I made my marshmallow frosting and dunked this sticky topping into desiccated coconut – the snowball aspect of my bake.

Last year, I had a nightmare when I used a supermarket brand of red food colouring (who shall remain nameless – Associated Dairies anyone?!) and they turned a horrid shade of sludgy brown. But I have learned my lesson and bought ‘Red Extra’ food colouring paste. I also bought cute little card cupcake cases, which i thought looked tres festive!


Adapted from Martha Stewart

Yield: 20 regular sized cupcakes

Cupcake Ingredients:
250 grams self raising flour
1 teaspoon bicarbonate of soda
340 grams granulated sugar
350 ml vegetable oil
2 large eggs
1 teaspoon white vinegar
1 teaspoon pure vanilla extract
250 ml buttermilk
½ teaspoon red food colouring paste (or 2 ½ teaspoon liquid)

Frosting Ingredients:
3 egg whites
250g white sugar
60 fl oz water
½ teaspoon cream of tartar
pinch of salt
2 teaspoons vanilla extract

1 small package of sweetened desiccated coconut

Method:
Preheat your oven to 180oC and line a cupcake tray with liners. Sift together the flour and soda into a bowl and set aside.

In the bowl of a mixer add the sugar, oil, eggs, vinegar and vanilla. Beat on high for two minutes. The mixture should turn pale and creamy. Add one third of the flour and beat to incorporate. Add half the buttermilk and incorporate. Add half the remaining flour, beat, rest of the buttermilk, beat and finish with the remaining flour and beat until just combined. Add the red food colouring and mix thoroughly.


Spoon the batter into cupcake cases, two thirds full. Pop into the oven for 12 to 15 minutes and they will begin to darken slightly on top. Test with a toothpick, which should come out clean from the centre, when they are fully baked. Allow to cool thoroughly.


To make the frosting, place all of the ingredients, except the extract, in a large bowl, over a saucepan of simmering water and with an electric mixer, beat for 5 minutes. The frosting will become thick and voluminous. Remove from the saucepan and add the vanilla extract. Beat for another couple of minutes.

When ready to decorate and with your prepared marshmallow fluffy frosting, pipe on top. Then dunk the top of each into desiccated coconut to cover fully.


Your cupcakes are ready to enjoy. The taste of these cocoa free cupcakes are difficult to describe, other than they are very ‘cakey’ tasting, in the best possible way. They are moist and very vanilla which is never a bad thing. The soft snowball top is a perfect compliment.


My colleagues made their way through these pretty sharpish and I think anyone you bake these for will too. Enjoy…


Thursday 20 December 2012

Wednesday 19 December 2012

Birthday Bars


In my family, December is not just about Christmas. My nephew Ross has a birthday and this year he turns 11.

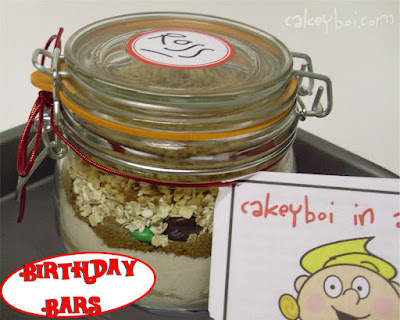
When I was wondering what to get the boy who has everything, I remembered seeing a lot of these cookies in a jar gifts – you know where the ingredients are layered up in a jar, ready for the recipient to chuck in a bowl, mix with wet ingredients and pop in the oven.

Ross loves to bake and I thought this would be ideal as part of his gift. So I bought a jar, little baking pan and looked at various recipes to get ideas on what to make.


I remembered an ingredient that I had used years ago, which is very versatile. Bisquick made by Betty Crocker is like an all in one mix that you just add a few ingredients to. I decided to use this, some sugar, hazelnuts, oats and M&M’s.

I layered 50 grams of Bisquick, 50 grams of light brown sugar, 50 more grams of Bisquick, 50 grams of dark brown sugar, a small pack of chocolate M&M’s, 50 grams of chopped hazelnuts and topped with 50 grams of porridge oats. After each addition into the jar, I pressed down with the end of a small glass to compress the ingredients, making the layers look sharp. I then gussied it up with some ribbon, and wrap – and of course the instructions!

Ingredients:
100 grams Bisquick
50 grams light brown sugar
50 grams dark brown sugar
50 grams of chopped hazelnuts
50 grams of porridge oats
1 small pack of chocolate M&M’s
50 grams of melted unsalted butter
1 large egg
1 teaspoon vanilla extract

Method:
Preheat oven to 180oC. Grease and flour a 4”x4” baking tin.
In a bowl place all of the dry ingredients, and incorporate the butter, egg and vanilla thoroughly. The mixture should come away from the sides of the bowl when fully mixed. 


Place this into the baking pan and press down, so it is even. Place into the oven for 20 to 25 minutes, until it has turned golden brown.
Remove from the oven and allow to cool before easing from the pan. It should come out fairly easily. Chop into small bars and they are ready to eat. Delicious and easy.


Happy Birthday Ross!

Monday 17 December 2012

Eggnog (Flavour) Rice Krispie Wreaths


christmas rice krispie treats


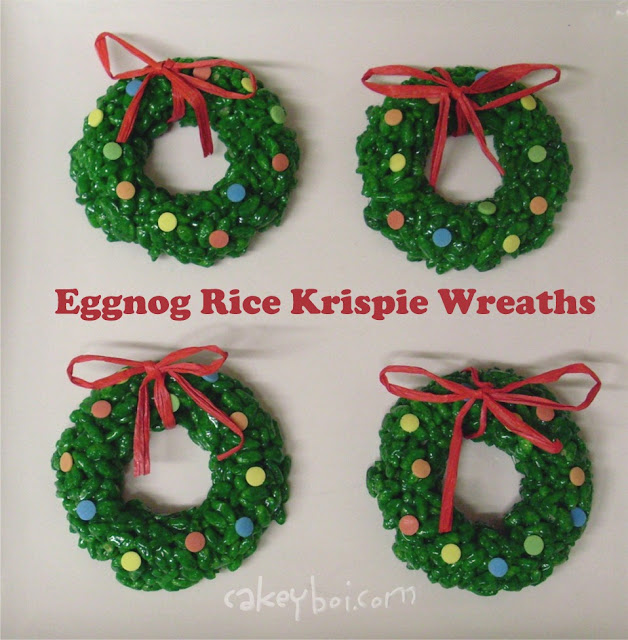
I couldn’t let the season pass without a festive version of Rice Krispie Treats or RKT’s as I like to call them.

Don’t worry no eggs were nogged in the making of these and the closest they come to actual alcohol is rum flavouring. As said previously, I do like the flavour of eggnog and I thought it would be fun to try out this flavour.

And what makes them even more festive is the fact I have made them into little wreaths with the help of my doughnut pan, I purchased a while back. You could make these by hand if you don’t have a doughnut pan, just grease your hands a little and carefully mould the krispies into sausage shapes, then curve into circles. I added some edible coloured dots to look like lights and tied a bow with some red raffia I had hanging around. If you wanted to make them 100% edible, you could use strawberry laces instead.

Makes 4 wreaths

Ingredients:
100 grams mini marshmallows
15 grams unsalted butter
1 teaspoon rum flavouring
½ teaspoon ground nutmeg
½ teaspoon ground cinnamon
Green food colouring
65 grams rice krispies
Edible coloured dots


Method:
In a large saucepan, on low heat, melt the butter and add the marshmallows, stirring until they have melted and combined with the butter. Add the rum flavouring, nutmeg and cinnamon and stir through. Add enough green food colouring, depending on what you use such as liquid or paste, until you get a shade you find right.


Add the rice krispies and stir through, until everything is combined. All the krispies should be covered with the green colour. Now mound into 4 of the greased doughnut cavities if you are using a doughnut pan, pressing down firmly. If you are using your hands, grease them lightly with vegetable oil to prevent sticking and when the mixture has cooled slightly make four sausages of equal length. Twist them into circles and press the ends together where they meet. Allow to cool on greased foil, or in the pan for at least two hours.


Carefully remove from the pan or foil and press some coloured dots into the green krispes to look like fairy lights. Next, tie some ribbon, raffia, strawberry laces – whatever you choose and your treats are ready, to hang up, or gobble down! Enjoy!!


Saturday 15 December 2012

Christmas Cartoon Strip

It's been a while in coming, but Cakeyboi stars in another woeful comic strip - and this one introduces his friend Marsha (Mallow)....


Thursday 13 December 2012

Norma’s Mini Christmas Pud Truffles


As you may know, I had a few friends round recently for a festive evening. They were work colleagues past and present. I am lucky that the people I work with are more than just colleagues, but also good friends. We wanted to get together to have a drink, blether, nosh up and to swap our Secret Santa pressies.

At work, we usually have a Christmas buffet each year and Norma, who I have worked with for many a moon, always makes her little Christmas Puds. They aren’t actually Christmas Puds, but delicious little truffles of condensed milk, cocoa and crushed biscuit, topped with icing sugar and decorated with little holly and ivy. They are so good; I wanted Norma to share them with you.

Norma was off the same week as I, and she agreed to come down earlier than everyone (to help me set up) and also make her little puds especially for Cakeyboi.

Yield: Approximately 40 mini puds

Ingredients:
24 Digestive Biscuits
4 tablespoons cocoa powder
113 grams butter
400 grams tin of sweetened condensed milk
250 grams icing sugar
water
Red and Green Food Colouring Pens


Method:
Crush the digestive biscuits into a large bowl. Add the cocoa powder, mix through and set aside. In a saucepan, melt the margarine and add the condensed milk stirring until it simmers gently. 


Pour this into the biscuit crumbs and stir through, until everything is mixed fully. Pop this into the fridge and allow to chill for about an hour. The mixture will start to set.


After they are chilled, spoon some mix (about a tablespoons worth) into your hands and roll into balls, placing them into petit four cases.


Pop them back into the fridge and allow to chill again, for at least half an hour.


Just before you remove them from the fridge make up the icing for the tops, with water and icing sugar. Get this to a thickish consistency. With a spoon make little icing circles on top of the puds and once all are done, pop back into the fridge for another half hour, to chill again and to let the icing harden. After the half hour, remove from the fridge and on each pud, draw holly berries and some ivy.


Your puds are ready to enjoy! They are lovely and chocolaty, with the decadence of the rich condensed milk ( a personal favourite) and the texture from the crushed biscuits.  Thanks Norma, from Cakeyboi and his visitors.

Wednesday 12 December 2012

Monday 10 December 2012

Eggnog Spice Cookies


I love Eggnog. It’s not a very common drink where I live. In fact when I have made eggnog based drinks or desserts in the past, folk usually ask me – what is eggnog?!

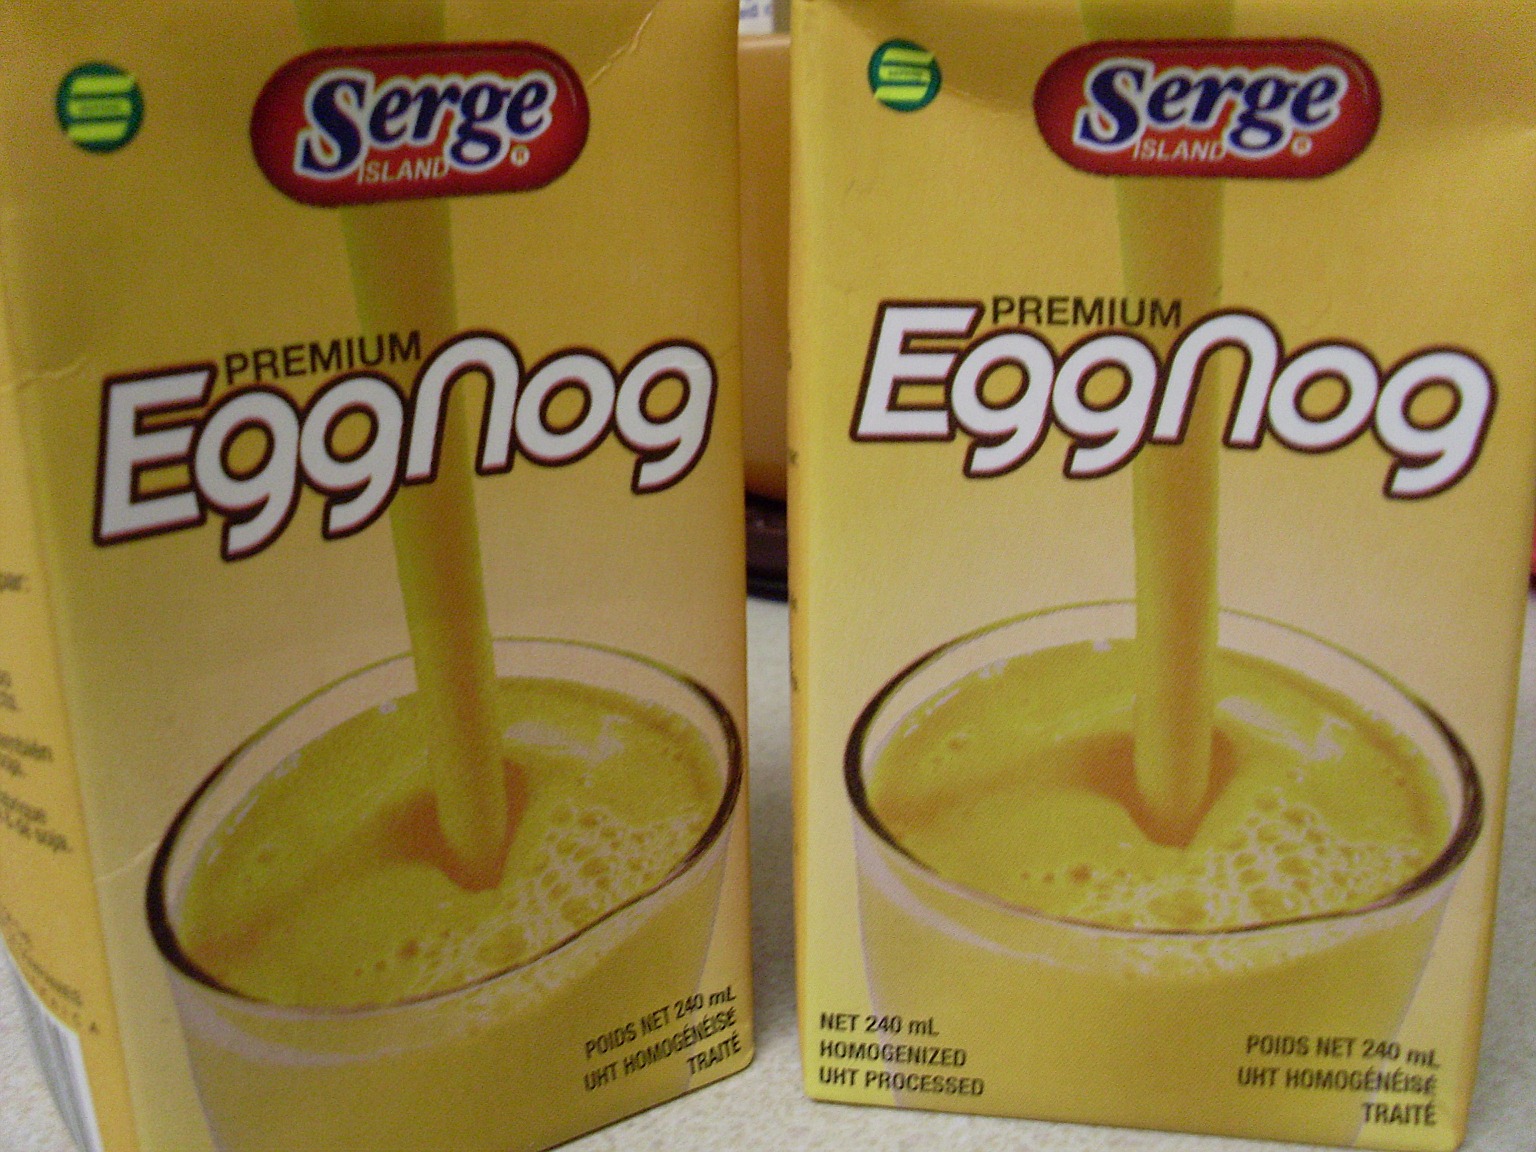
Well, for the uninitiated, it’s a dairy based drink that’s made with milk or cream, sugar and eggs. Flavoured with some alcohol, rum is the most common, and it’s finished off with some nutmeg spice. It’s popular in North America, especially at Christmas time. Luckily this year I managed to track down some Eggnog juice boxes (complete with little straw) in the African section of Tesco?!


Last year I made these particular cookies for gifts and they were very popular. So I thought I would share them with you. They are super-easy  to make, if you can get hold off the eggnog of course!

Eggnog Spice Cookies
(Adapted from SouthernFood.About.Com)

Yield: 40 cookies

Ingredients:
250 grams plain flour
1 teaspoon baking powder
½ teaspoon ground cinnamon
½ teaspoon ground nutmeg
280 grams granulated sugar
170 grams unsalted butter, softened
120 ml prepared eggnog
1 ½ teaspoon vanilla extract
2 large egg yolks
Red and Green sprinkles

Method:
Preheat the oven to 150oC. Line a cookie sheet (or three) wth greaseproof paper.

Sift together the flour, baking powder, cinnamon and nutmeg in a large bowl. Set aside. In another bowl, beat together the sugar and butter until pale and creamy. Add the eggnog, egg yolks and vanilla, beating well. It might look a bit curdled at this stage, but keep beating and it will get smoother. Next add in the flour mix and mix to combine until no streaks of flour are seen.


I used a 1 1/2 “ cookie scoop and placed balls of the cookie dough onto the prepared sheets, slightly spaced apart. With wet fingers I pressed on each one slightly to flatten a little. I then added the sprinkles, patting them into the dough slightly. I popped them into the oven for 20 minutes until lightly golden brown. I let them cool fully before removing them from the paper.


They are quite cakey, soft type cookies with an unmistakable creamy, almost boozy taste. And of course the cinnamon and nutmeg shine through. If you didn’t want to add sprinkles, you could use royal icing, or just a small sprinkle of more nutmeg. These are sure to be Christmas favourites! Enjoy…


I'm entering these cookies into this month's biscuit barrel challenge - the theme is Festive and Party. I think host Laura from I'd Much Rather Bake Than... would agree these are a good fit for the festive season!