Monday 23 October 2017

Coffee and Orange Halloween Cake

Coffee and Orange Halloween Cake

I cracked out my Redmond RMC-M4502E Multicooker again at the weekend. This is the one-stop cooking pot which does all manner of things in the kitchen such as baking, cooking, frying, sterilising, warming, proving dough, making soup, making cheese, you name it, it does it.


This time I decided to make a cake for Halloween. It’s a basic sponge recipe, flavoured with coffee and orange. A strange combination I know, but it really works well, And with some additions of food colouring made for a perfect spooky looking treat.

I made the sponge batter, then divided this into 2. One half of the batter I added coffee to, with a bit of coffee extract and in the other half, some orange flavouring along with a large dollop of marmalade.


Now, this is when I added some colourings to the batter, but this is purely optional. The coffee batter will stay a pale brown, but I added black gel colouring. This didn’t go jet black, just a deep grey. I also added orange gel colouring to the orange flavoured batter. Add as much or as little as you are comfortable with.

In the bowl of the Multicooker, which I didn’t need to grease as the bowl is a super non-stick surface which items just glide out of, I added dollops of the batter in a random pattern and then with the end of a wooden spoon, I swirled the batters together to look sort of marbled.

Coffee and Orange Halloween Cake

I put the bowl into the Multicooker and set it to the bake function for one hour. I checked half way through to see how it was getting on it needed a bit longer. I clicked down the lid again and baked for the remaining 30 minutes.

Coffee and Orange Halloween Cake

The cake slid out onto the cooling rack after I had let it 
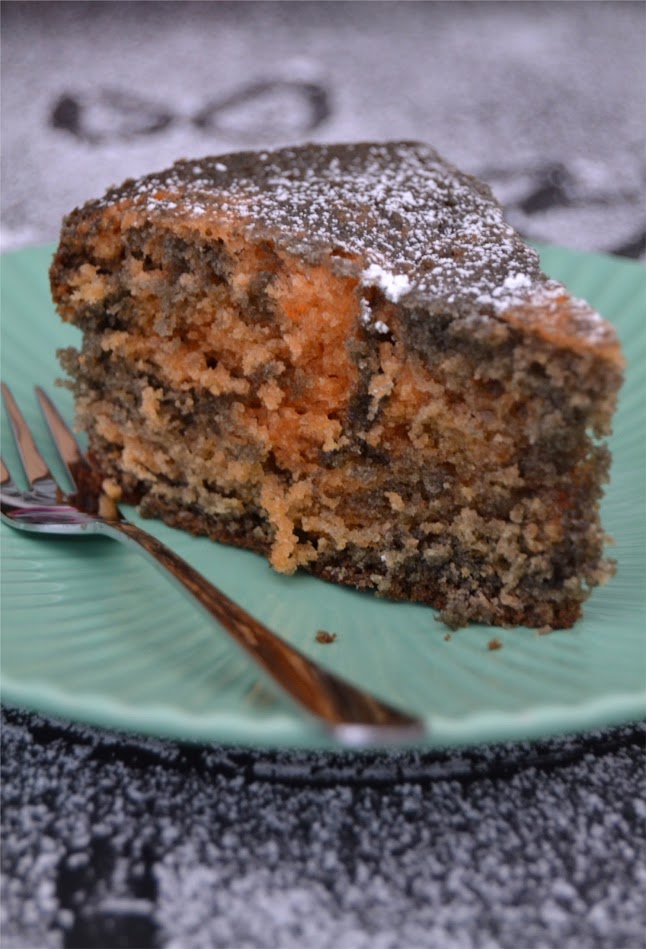
cool in the bowl for 5 minutes. I let it cool fully and I loved the swirled top of the cake. With the Multicooker, the top of the cake doesn’t brown too much, although it is cooked perfectly. This means the colours really stand out. In fact the grey batter got darker making it look even spookier.

Coffee and Orange Halloween Cake


When cut into, the colours of the sponge really stand out. Now, this may sound gross, but it looks almost like mouldy cheese, which could be a great idea for a Halloween buffet.

The cake itself is moist and the flavours really complement each other well. It doesn’t need any additional garnishing like cream or frosting, but I did sprinkle a touch of icing sugar over the top.

Coffee and Orange Halloween Cake


This would work well in the oven too, 180C for 25 minutes or so, but in the RMC-M4502E Multicooker it cooks perfectly on the worktop.

Redmond have a model on special offer at the moment. Check out the RMC-280E, available in 3 colours, only £59 for a limited time!


Here’s how I made the cake:


print recipe

Coffee and Orange Halloween Cake
Sponge cake flavoured with Coffee and Orange
Ingredients
  • 225 grams granulated sugar
  • 225 grams softened butter
  • 4 large eggs
  • 225 grams self-raising flour
  • 2 teaspoons baking powder
  • 1 sachet strong instant coffee granules
  • 2 tablespoons boiling water
  • 1 teaspoon coffee extract
  • 1 heaped dessertspoon marmalade
  • 1 teaspoon orange extract
  • black and orange food colouring
Instructions
Make the coffee with the boiling water and set aside to cool a little.In a bowl, beat together the butter and sugar until light and fluffy.Add the eggs, one at a time and incorporate into the batter after each addition.Add the flour and baking powder, stir this into the batter fully.Divide the batter into two and in one half add the coffee, and coffee extract, stirring this through. Add the black food colouring if using.Dollop large dessertspoonful’s of the mix randomly into the non-stick bowl of the multicooker and with the end of a wooden spoon, swirl these about.Set the multicooker to bake for one hour. Check half way through to make sure things are going okay inside and let cook for the remaining time.Let cool in the bowl for 5 minutes, removed from the multicooker and then transfer to cooling rack to cool fully.Sprinkle some icing sugar over the top if desired.Perfect with a spooky beverage!
Details
Prep time: Cook time: Total time: Yield: 12 servings


Disclosure Statement: I received the multicooker free to review. I have been paid to develop this recipe using the multicooker. 

Thursday 12 October 2017

(Gruesome Green) Pandan Blondies

blondies flavoured with pandan the popular south asian flavouring

I made these green Pandan Blondies after picking up some pandan flavouring in my local Chinese supermarket.
image source
Pandan is a plant grown in South Asia and the leaves are used in a variety of culinary ways. One of which is in pandan flavouring. It is commonly sold in small bottles with green food colouring mixed in with it.

blondies flavoured with pandan the popular south asian flavouring

The flavour of pandan is like a buttery vanilla, if you can imagine that, with wafts of mild coconut in there too. It really is a gorgeous smell and I thought using the flavouring in blondies would be a great way to showcase the taste.

As I was making them, I suddenly realised what with Halloween coming up, the green hue of these would make them a perfect home baked treat for Trick or Treaters.

blondies flavoured with pandan the popular south asian flavouring

I made a basic blondie batter and stirred in a tablespoon of the pandan flavouring. The green grew stronger and stronger as I mixed it in to the batter. Almost like the baking equivalent of the Hulk I suppose.

I also added chips to these for added flavour. I don’t specify which sort of chips, as any would work really well in these. I had some peanut butter chips and white and milk swirled chocolate chips, so chucked these in. But you could use butterscotch, plain chocolate, even some chopped nuts would be a great addition.

blondies flavoured with pandan the popular south asian flavouring


They baked for about 25 minutes. Obviously the outside of the baked blondies (I should really call them greenies, which sounds not quite so appetising) take a brownish tinge from being baked, but when cut into squares, the dark emerald tones are revealed.

blondies flavoured with pandan the popular south asian flavouring


I dusted some icing sugar over the top of these beauties, but for added spooky flair, you could add a cobweb design in chocolate for example or whatever you fancy really.

You can purchase pandan in Asian supermarkets or online.


Here’s how I made them:


print recipe

(Gruesome Green) Pandan Blondies
Blondies flavoured with pandan
Ingredients
  • 115 grams melted unsalted butter
  • 2 tablespoons vegetable oil
  • 225 grams dark brown sugar
  • 1 large egg
  • 1 tablespoon pandan flavouring
  • 1/2 teaspoon baking powder
  • 1/4 teaspoon bicarbonate of soda
  • Pinch of salt
  • 100 grams baking chips or chopped nuts
  • To garnish icing sugar
Instructions
Preheat the oven to 180C (160C fan) and line a 9”x9” baking tin with greaseproof paper.In a large bowl stir together the melted butter, vegetable oil and dark brown sugar until smooth.Add the egg and pandan and beat this in until fully combined.Sift over the baking powder, bicarb, salt and flour and stir this into the mixture until incorporated.Stir in the chips (or nuts) until evenly distributed and then transfer the batter to the prepared tin.Smooth over with a palette knife and pop in the oven for 25 minutes or until a toothpick comes out clean from the centre.Allow to cool for 5 minutes before transferring to a cooling rack.Cut into 16 squares and dust some icing sugar over the top.These taste great when warm but keep for about a week, when cooled, in an airtight container.
Details
Prep time: Cook time: Total time: Yield: 16 blondies

blondies flavoured with pandan the popular south asian flavouring

Monday 2 October 2017

Snickerdoodles with Maple Pecan Filling

Snickerdoodles with Maple Pecan Filling

I love the name of snickerdoodles, very quirky and nonsensical for such a lovely cookie. I hadn’t made them before, which I know is quite strange given my love of all things cinnamon.

To the uninitiated a snickerdoodle is a cookie flavoured with cinnamon, then rolled in cinnamon sugar before baking. They are classically a soft chewy cookie, which is just how I like them. They contain cream of tartar as a leavener which gives it a slight acidic tang, balanced well with the cinnamon sugar. Classically that have a cracked top, but mines didn't come out of the oven like that sadly. They still tasted smashing though.

Being me, I decided to amp them up a little and turn them into sandwich cookies with a filling made from maple and pecans, quite seasonal! (thanks to Val from last years GBBO for that one).

Snickerdoodles with Maple Pecan Filling

The cookies were a (snicker)doddle to whip up in the mixer, roll into balls, dunk into cinna-sugar all before placing them on the baking sheet, spaced well apart as they do spread. They went slightly darker on the edges, so I knew they were baked perfectly at that point. You could stop at this point if you just wanted snickerdoodles.

Snickerdoodles with Maple Pecan Filling


I let them cool however and in the meantime, chopped up some pecans, placed them in a high speed blender with butter, maple syrup and light brown sugar. This made for a spreadable paste which I could slather on one cookie before placing another on top.

Snickerdoodles with Maple Pecan Filling


These are so warming and comforting with their cinnamon goodness plus the sweetness of the maple and slight nuttiness from the pecans just make these so good to eat with a cuppa. Here's the recipe...


print recipe

Snickerdoodles with Maple Pecan Filling
Soft and chewy snickerdoodles sandwiched with a scrummy maple pecan filling.
Ingredients
  • 225 grams unsalted butter, softened
  • 150 grams granulated sugar
  • 100 grams light brown sugar
  • 2 medium eggs
  • 1 tablespoon vanilla extract (or paste)
  • 1 teaspoon bicarbonate of soda
  • 1 teaspoon cream of tartar
  • 1 heaped teaspoon cinnamon
  • 300 grams plain flour
  • Coating
  • 50 grams granulated sugar
  • 1 tablespoon cinnamon
  • Filling
  • 75 grams pecans, roughly chopped
  • 40 grams light brown sugar
  • 1-2 tablespoons maple syrup
  • 15 grams softened unsalted butter
Instructions
Preheat the oven to 180C (160C fan) and line two baking sheets with greaseproof paper.In the bowl of a food mixer, cream together the butter and sugars until pale and fluffy, 2 to 3 minutes depending in whether you use an electric mixer or by hand.Add the eggs and vanilla and beat through until combined.Add the bicarb, tartar, salt and cinnamon and stir throughAdd the flour and beat until combined and no dry bits of flour can be seen.In a bowl mix together the sugar and cinnamon for the coating.Take tablespoon sized amounts of the cookie dough and with your hands roll into a ball before tossing in the cinnamon sugar.Place the ball on the baking sheet and repeat with the rest of the cookie dough making sure to space the balls at least an inch apart as they do spread.Bake in the oven for 5 minutes, rotate the pans and bake for another 5 minutes.Remove from the oven and allow to cool on a cooling rack.Make the filling by placing the chopped pecans in a high speed blender with the softened butter, maple syrup and sugar. Blitz until a smooth(ish) paste is formed, add more syrup if needed to make it smoother.Spread a small amount on the underside of half the cooled cookies. Sandwich together with the other cookies.These cookies will store well in an air-tight container for up to a week, but I promise they won’t last that long. Enjoy!
Details
Prep time: Cook time: Total time: Yield: 16 Sandwich Cookies approx.

Snickerdoodles with Maple Pecan Filling