Monday, 6 July 2015

Spice 'n' Cheesy Scottish Oatcakes

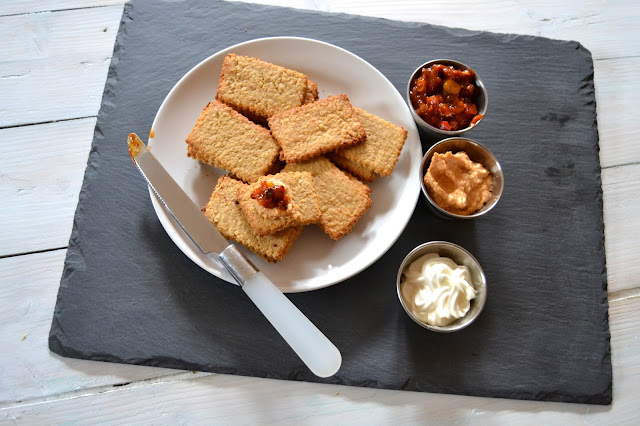
spicy cheese oatcakes

If you aren't from the UK, or maybe even Scotland then you may be unfamiliar with oatcakes. I had some lovely ones in a restaurant in Kincardine, called The Unicorn (highly recommended) recently and I wanted to give making them a bash.

Oatcakes or Bannocks as they are also called, hail from Scotland since the time of the Roman invasion. They are a hard cracker type affair, made from the oats which were plentiful back then in Scotland, cooked on a girdle – Scottish for a griddle (not the undergarment).

They have evolved over the years and you can add flour to them, along with some fat. They are neither sweet nor savoury and you can top them with anything really. You get English and Welsh versions which are very different, so don’t be confused.

spicy cheese oatcakes

You also get other additions to the basic oatcake recipe, including cheese, which I have used here. I have made them spicy with the addition of a Mexican cheese which contains chillies. I have also added a bit of hot chilli powder, so these oatcakes really do have a pleasing kick to them.

For my oatcakes, I didn’t make them on my girdle as a) I don’t have one and b) an oven does the job just as well and you can do them all in one go! Also circle shaped one are traditional, or large circles cut into quarters, or farls, but I have made oblongs as you can see. 

The oats shouldn’t be too big. If the ones you have are not a medium grain, pop them in the blender and give them a couple of pulses which will make them a better size for oatcakes.

spicy cheese oatcakes

If you don’t like spice, then you can omit the chilli powder and go with a plain cheddar. When serving these up, I like to have some condiments for dipping them into. I have some houmous, salsa and sour cream. A simple spread of butter would be nice too!

Here's how I made them...

Spice 'n' Cheesy Scottish Oatcakes


Thumbnail Url Traditional Scottish Oatcakes
with spicy cheese and chilli powder
(adapted from mumsnet cheese oatcake recipe)
Cuisine: Scottish Category: Snack Yields: 32 approx.
Prep Time: Cook Time: Total Time:


Ingredients
  • 225 grams porridge oats
  • 1 tablespoon plain flour
  • 1 teaspoon chilli powder
  • 100 grams Mexican cheese, grated
  • 1 tablespoon cooking oil (any, I used olive)
  • 100 ml water
 
Instructions
  1. Preheat the oven to 200C. Line a couple of baking trays with greaseproof paper.
  2. If your oats are needing pulsed, do that now.
  3. In a large bowl mix the oats, flour and chilli powder. Add the grated cheese and stir through.
  4. Drizzle the oil over and lastly the water and mix until a dough is formed.
  5. Roll the dough out, to about an eighth of an inch thick. Cut into any shape you choose.
  6. Transfer the oatcakes to the baking trays and bake in the oven for around 12 minutes or until they are golden on the edges.
  7. Remove from the oven and allow to cool fully.
  8. Serve your oatcakes with more cheese or any condiment you choose.

Saturday, 4 July 2015

Saturday Swally with Stella


Are we all enjoying Wimbledon this year? It is a British institution enjoyed by everyone and for some, the weather this year has been exceptionally good. Who wouldn’t love to watch a game with a glass of chilled lager in their hand?

And there is no better beer to enjoy for Wimble watching than Stella Artois who are sponsors of the tennis tournament.

To celebrate this I was recently sent some Stella Artois to review, along with a fantastic tennis bag, emblazoned with the Stella logo, a limited edition engraved Wimbledon/Stella Artois chalice and a set of limited edition tennis balls.


Stella Artois, for those of you who haven't tried it yet, is an extremely popular lager enjoyed in over 80 countries worldwide. It is a pale lager from Belgium, with a light malt taste which is a bit sweet and a bit bitter. When chilled, it is a very refreshing tipple coming in at 5.2% alcohol by volume (abv) content.


Now, I am going to be cheering on my fellow Scotsman Andy Murray who is playing a blinder this year, whilst sipping on my Stella Artois from my lovely chalice. Then after, I may be inspired to pack my kit in my new bag, dust off my tennis racket and have a few volleys with my new balls!


The chalices can be purchased over at the Stella Artois website.


 Please drink responsibly.


Disclosure Statement:  I was sent Stella Artois lager, the bag, tennis balls and chalice in exchange for a review of the lager. Any opinions expressed are entirely my own.

Thursday, 2 July 2015

Treat Petite July 2015


Thanks to all of you who were feeling fruity last month and entered Treat Petite. You can see the full round up over at The Baking Explorer.

‘Summer time is here again’, so goes the song. But it’s not referring to my part of the world unforrtunately! Only joking.

It is warm up here, but no pavement splitting sunshine or temperatures like at Heathrow!  Still, I can dream...

Summertime conjures up so many memories and images for me that I thought it would be a great theme for this month’s Treat Petite. I know Kat did Summer last year, but you all gave us such good entries, why not repeat the process?!


 I’m calling it ‘Summertime Special’ after a variety show we used to get on TV, in the summer unsurprisingly. Ah, summer weather always seemed so much better years ago. Anyhoo –the theme is quite open really. Anything that conjurs up summer to you.

This may the seaside, candy floss and 99’s. Maybe a BBQ savoury treat petite or holiday inspired bakes. You name it, if it means summer to you and is a petite treat, we shall accept it!

Here’s the rules…

  • Add your petite treat to the Linky at the bottom of this post by the 25th of the month, midnight at the latest.
  • Post your bake onto your blog and link back to Cakeyboi and The Baking Explorer, stating who is hosting this month.
  • Follow Cakeyboi and The Baking Explorer blogs on Google + (see sidebar links), if you haven’t already.
  • If you tweet use  #treatpetite and mention @MrCakeyboi and @BakingExplorer – we will retweet Add the new challenge logo to the post and ‘Treat Petite’ as a label to the post
  • Use any recipe as long as the source is noted
  • If you like, add your photo to the ‘Treat Petite’ Pinterest board (request access from me – Cakeyboi)
  • Feel free to enter old posts as long as you update the post and meet all the requirements above!
Happy summer and remember - above all else - have fun!


Monday, 29 June 2015

Mini Victoria Sandwiches

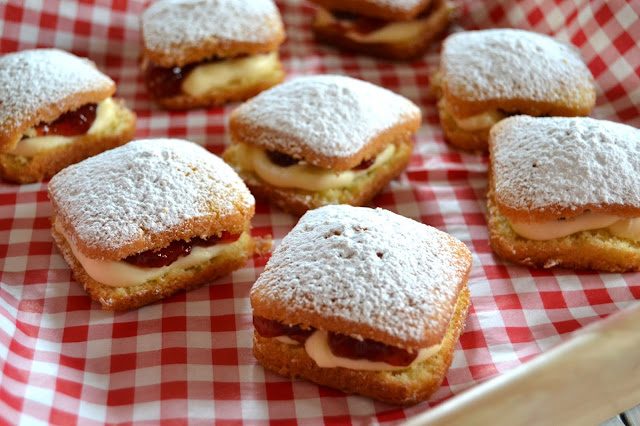
mini victoria sandwiches

These are so cute – and not radically different, I know. Who doesn't love a Victoria Sandwich cake?

But now you can make them into little sandwiches – perfect for packing into a lunch box, taking on a picnic or having as nibbles at a party. Plus these are good for little hands too.

mini victoria sandwiches

I don't know what made me think of baking the cake like this, but I was quite impressed.

it may have been the individual brownie pan I have, which is like a cupcake pan, but the holes are square. You can get these quite easily nowadays – and definitely online, if you can’t get hold of them. They are good for so much more than brownies.


Baking the mini Victoria sponges in them, then splitting them in half and filling them with jam and buttercream couldn’t be simpler. These look so quintessentially British.

To make the sponge, I took a tip from Dame Mary Berry and used a baking spread, starting with 'St' and ending with 'Ork', instead of butter. It gives a good old-fashioned taste to the bake, like I used to have when I was a kid. Margarine and other non-butter spreads were used a lot in baking years ago. No one ever used vanilla extract in their Vicky sponge as far as I can remember!

mini victoria sandwiches

For the jam, you could make your own, but being short on time as ever, I used a shop bought one – which was sugar free to boot! Plus a simple mix of butter and icing sugar for a buttercream, instead of a traditional whipped cream filling means these can last a bit longer and don't have to be fridged if they are sitting out for any length of time.

Here’s how I made them…

Mini Victoria Sandwiches


Thumbnail Url Individual Victoria Sponges
in little sandwich shapes
Cuisine: Dessert Category: Cake Yields: 12 cakes
Prep Time: Cook Time: Total Time:


Ingredients
  • 100 grams baking spread
  • 100 grams caster sugar
  • 2 medium eggs
  • 100 grams self-raising flour
  • 100 grams unsalted butter, softened
  • 150 grams icing sugar
  • ½ teaspoon vanilla extract
  • 100 grams strawberry jam
 
Instructions
  1. Preheat the oven to 180C. Grease and flour a 12 square hole baking tin.
  2. In a bowl, add the spread, caster sugar, eggs and flour. Beat until a smooth cake batter consistency is achieved.
  3. Divide the batter equally between the squares. Bake in the oven for 12 minutes, or until golden brown and a toothpick comes out clean from the centre.
  4. Allow to cool for 5 minutes before removing from the tin. Allow to cool completely.
  5. Make the buttercream by beating the butter and icing sugar together until smooth and add the vanilla, mixing in.
  6. Split the cooled cake in half horizontally and spread, or pipe, on the buttercream and jam.
  7. Sandwich together and dust with some extra icing sugar.


I'm entering these mini victoria sandwiches into this month's Treat Petite, hosted by Kat, The Baking Explorer. The theme is Picnic Treats and these would be the perfect sweet treat to enjoy during a picnic.


Saturday, 27 June 2015

That's What I Call New #7


Hello! I haven’t posted for a while on a Saturday, time seems to keep getting away from me.

But I am back and I am dying to tell you about some new things I have been sent to try over the past wee while…

Savoury first and the people at  Chicago Town pizza invited me to try their new flavours of Deep Dish Pizza. These pizzas are so deep, filled with scrumptious fillings, they are almost like a pie – probably where the term pizza pie comes from.

They have new flavours to try in the Deep Dish range which are the New Yorker filled with mozzarella, ham, pepperoni and red onion.
There is the Sloppy Joe, oozing with Chicago Town’s signature tomato sauce, spicy beef, red onions, green peppers and mozzarella.
Then there is the Chicken Club, with chicken breast, bacon, ham and mozzarella. Finally the Pulled Pork. I tried their pulled pork pizza a couple of months back and loved the Smokey BBQ sauce paired with the pork and fried onions. The Deep Dish pizza was no exception.

Retailing at around £2.19 for 2, at most of the big supermarkets, all have been a hit in the Cakeyboi household!

Next up, a savoury and a sweet sampling from Thomas J Fudge. This company sell a large array of sweet and savoury snacks on their website and in some stores, and have very elegant packaging.


To sample, I was sent their Piquant Cheese and Peppercorn Crackers. I can tell you these were SPICY! The peppercorn was definitely not holding back in packing a punch. These will appeal to anyone who loves a bit of heat in their crackers. The cheese flavour was there, but hiding behind the nip of the peppercorns! A very very good cracker, perfect for eating on it’s own or spreading with a topping of your choice. These retail at £2.25 per pack.


Thomas J Fudge also sent me a pack of their Marvellous Milk Chocolate Flapjacks. Well, me and my sweet tooth were in heaven with these thick slabs of syrupy, oaty flapjacks dunked in a generous coating of milk chocolate. These retail at £3.25 for a pack of 8.


Check out their website for the full-range.

 Lastly today, Auntie Anne got in touch with me. Not my Auntie Anne, I don’t have one. But rather the pretzel purveyors. Don’t worry if you haven’t heard of them yet. I tried them in JFK Airport a couple of years back. They sell huge big delicious chewy pretzels in tons of flavours. You can choose from jalapeno, cheese and bacon, almond crunch and raisin to name but a few.


 And when they got in touch with me, I was surprised to hear they now had UK outlets, even one in Scotland. Auntie Anne said that she even sells a home baking kit so you can try making them at home yourself. She popped one in the post for me and I whipped up a batch. They were very easy to make – although my twisting technique could use some honing!


 The box comes with yeast, pretzel mix, baking soda and salt and cinnamon sugar. You can choose to make all salt, all cinnamon sugar or a mix, up to you.

Pop to the website to see where your nearest Auntie Anne’s Outlet is. The home baking kits can be purchased at outlets.


That’s all for now folks.

Disclosure Statement: I have received these items free to review. I have not been paid to endorse them. Any opinions expressed are my own.

Wednesday, 24 June 2015

Strawberry Jammy Blondies

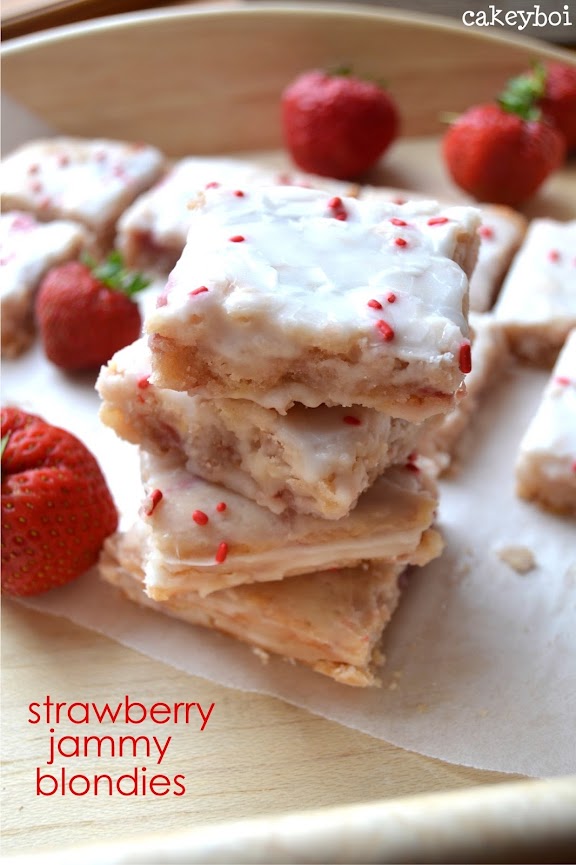
Blondies infused with strawberries and white chocolate chips

Wimbledon will soon be upon us, a bit later this year than usual, and I don’t know about you, but I always think of strawberries and cream when I think of the tennis tournament. Strawbs and cream are plentiful there after all.

Blondies infused with strawberries and white chocolate chips

I have made a few things over the past couple of years to tie in with that – Strawberry and Cream Cupcakes and Strawberry and CreamTruffles.


This year, after making raspberry blondies earlier, I decided to make a strawberry variation. These are a very simple bake and just require some strawberries mushed up before being added to your batter. For the 'cream' part, I went for some white chocolate chips – well they do taste creamy!


To finish off these blondies, I added a simple icing glaze on top and sprinkled on some red sprinkles (entirely optional). These taste very cakey and fruity with a real strawberry jam taste going on.

I love them and they do contain a good amount of fruit, so can’t be that bad surely (just ignore the butter and sugar…)!

Blondies infused with strawberries and white chocolate chips

Here’s how I made them…


Strawberry Jammy Blondies


Thumbnail Url Strawberry Infused Blondie
Bars with White Choc Chips
Cuisine: Dessert Category: Bars Yields: 16 bars
Prep Time: Cook Time: Total Time:


Ingredients
  • 200 grams fresh strawberries, hulled
  • 100 grams unsalted butter, melted
  • 220 grams granulated sugar
  • 150 grams plain flour
  • 1 teaspoon vanilla extract
  • 1 medium egg
  • 100 grams white chocolate chips
  • 50 grams icing sugar
  • 1-2 teaspoon water
 
Instructions
  1. Preheat the oven to 180C.
  2. Line a 9”x9” tin with greaseproof paper.
  3. Mush the strawberries in a bowl until juices are released and there are no large parts left.
  4. Melt the butter in a large jug in the microwave, for 30 seconds, or so. Pour into a bowl and add the granulated sugar.
  5. Stir to combine then add the egg and vanilla.
  6. Add the mushed strawberries and stir through.
  7. Sift in the flour and fold in.
  8. Fold in the white chocolate chips.
  9. Pour into the prepared tin and bake for 18 minutes or until lightly golden on top.
  10. Allow to cool in the pan.
  11. Make the glaze by mixing the icing sugar and some water together until you get a thickish consistency.
  12. Pour over the cooled blondies and allow to set.


Monday, 22 June 2015

Pink No-Bake Fridge Cake

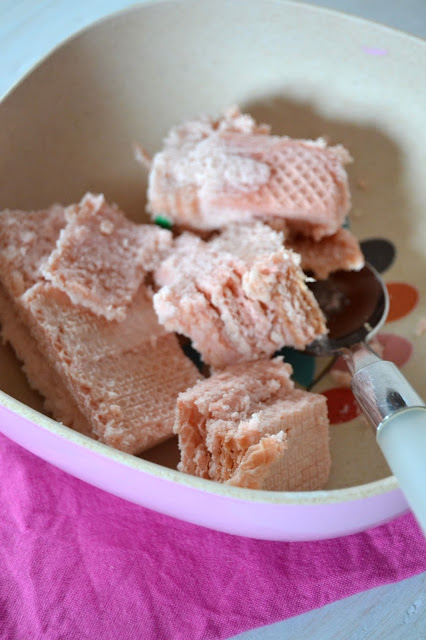
pink wafer and strawberry pudding no-bake cake

Back to normal regular blogging! I have been busy with work the past couple of weeks, so my posting has been a bit sporadic, but I hope to be a bit more regular for the next wee while. Strange, but I always feel guilty when I don’t post, as I like to do this regularly. Still, no harm done!!

pink wafer and strawberry pudding no-bake cake

I was stumped to know what to call this recipe. I had the idea for making it after seeing all those ‘icebox cakes’ on American websites. For Icebox read fridge (not freezer as I thought). These are made by sandwiching together cookies and cream for example, then chilling it.

American’s use wafer cookies, which are not wafer biscuits like we know in the UK. These, correct me if I’m wrong, are more soft and spongy than crisp like ours.


Anyhoo, I thought I would try something with actual pink wafers. Hands up who remembers these? ‘Pink Panther’ ones I used to enjoy as a child, I think you used to sometimes get stickers in the pack. I bought some recently for this recipe and noticed that there weren’t quite as lurid pink as I remembered. Probably down to artificial colours back in the day which had us all bouncing off the walls (Kia-ora anyone?).

Instead of cream, I used a pack of sugar-free store own-brand fridge pudding mix (i.e. Angel Delight, but not the real stuff). I went for strawberry flavour to keep with the pink theme and set about making my ‘pink no-bake fridge cake’ (the best I could come up with).

I whipped up my pudding mix in a food mixer to aerate it a little more than normal, then transferred it to a piping bag. This would make it easier to ‘build’ the cake. You could just use a spoon and knife if you don’t have a piping bag.

I made the cake in a loaf tin, lined with clingfilm, and depending on the size of your loaf tin the amount of pink wafers and pudding mix will vary. My loaf tin was 20x10cm and I used just over 200 grams of the wafers and a pack of the pudding.


When all layered up, I gathered up the overhang of the clingfilm and wrapped the contents tightly. I popped it into the fridge and weighed it down with something heavy. This ensured all the ingredeints would be nice and tightly squished together. I left mine for 24 hours, but you could leave it just overnight, or even a good few hours. But the longer, the more it all comes together.

pink wafer and strawberry pudding no-bake cake

To unmould, I pulled back the clingfilm and turned it out onto my serving board. It looked all smooth and pink, and would have been fine au natural. However, I decided to sprinkle on some sprinkles. This made it look perfect for a child’s birthday party. Little girls especially would love this cake.

Sliced strawberries on top would also be a nice, healthier, alternative.

pink wafer and strawberry pudding no-bake cake

An easy recipe, which tastes unsurprisingly like strawberry pudding and pink wafer biscuits, but looks impressive, I’m sure you will agree!


Pink No-Bake Fridge Cake


Thumbnail Url Strawberry pudding and wafer
biscuits layered into a cake
Cuisine: Dessert Category: Cake Yields: 1 loaf cake
Prep Time: Chill Time: Total Time:
 

Ingredients (for 20x10cm loaf tin)
  • 200 grams + Pink Wafer biscuits
  • 1 pack of Strawberry flavoured pudding mix
  • 300 ml milk (or as per packet)
  • Sprinkles (optional)
 
Instructions
  1. Line a loaf tin with clingfilm and leave overhang over each edge.
  2. Whip up the pudding mix as instructed but beat with an electric mixer to get as much volume into it as possible.
  3. Transfer the pudding mix to a piping bag, if you have one.
  4. Pipe a layer of pudding into the bottom of the tin and then cover with a single layer of pink wafers.
  5. On top of that layer, pipe more pudding, add more wafers and repeat until you get to the top of the tin with a final layer of pudding.
  6. Wrap the top with the overhang of clingfilm and place into the fridge with a heavy object on top, for pressure.
  7. Leave for a minimum of 7 hours.
  8. When chilled, turn out onto your serving plate and cover with sprinkles if using.
  9. Slice with a sharp knife and serve up to your guests!