Saturday, 17 May 2014

BBC Good Food Bakes and Cakes Show - 25% Discount


This is the place to come for discounted tickets to the BBC Good Food’s new Bakes and Cakes show which is taking place at the Business Design Centre in Islington, London between 25-27 October this year (2014).


The show, sponsored by Lexus, brings you wall to wall baking, cake making, bread making, demonstrations, free master classes and the chance to buy hundreds of products to help you knock up beautiful creations in the kitchen!


You may know that I was chosen to be part of the BBC Good Food Show’s blogger community last year. I was lucky enough to attend the show in Glasgow in October and interview James Martin. I also got the chance to meet James Morton from GBBO, watch the brilliant demonstrations in the master theatre, all of which you can read about here.

The shows are a great day out and you are warned to take plenty of cash with you, as there is lots you will want to buy. Even more so at this one, as it is ALL bake and cake!


The new Bakes and Cakes show concentrates on that favourite pastime, of us all, and is the place to meet bakers, confectioners, cake decorators, develop new skills and shop ‘til you drop! There will be live 30 minute demos from celebrity bakers in the Bakes and Cakes Theatre, which is included in a full-day adult ticket. Sit back and watch Mary Berry, Mich Turner, John Whaite and Paul Hollywood amongst others whip up a storm in the kitchen.


I am very pleased to announce that visitors to Cakeyboi are eligible for a whopping 25% discount off the ticket price, just by quoting EBPAR1 when purchasing the ticket via the link HERE.


So, if you would like to attend this brilliant new show from the people at BBC Good Food, then why not grab yourself a discount before you go? And who knows, I may even see you there myself!

Disclosure Statement: I am not being paid to promote the BBC Good Food Bakes and Cakes Show. I will be receiving a press pass to the event. Any opinions expressed are my own.


Thursday, 15 May 2014

Red Velvet and Coconut White Cake for Eurovision


If you have followed Cakeyboi from the start, you may know of my love of Eurovision. The song contest which is broadcast every year across Europe (and other continents I believe).

It pits European nations against other European nations and may the best song win (well, it doesn’t always work like that). The voting is political, hysterical and overall makes for a perfect Saturday evening in front of the telly.

My friend Ewan always throws a Eurovision shindig, which I always bake a cake for. And I always incorporate the host nation’s flag into the cake somehow.


A couple of years ago it was the Azerbaijan flag, last year I made a blue(ish) velvet cake for Sweden. This year’s host was Denmark and I wanted to do something other than just make a flag on top. S o I decided to make the flag on the inside of the cake (as you can see from above).

As the colours were red and white, I went for red velvet cake (without cocoa) and white cake. I added clear coconut extract to the white cake as I didn’t want vanilla to alter the colour.


I made the cakes the night before and let them sit out overnight to ‘firm’ up a little for cutting. The next day, with my best geometry skills, I measured and cut until I got what I thought was the right pieces for putting together the flag.


I then whipped up some of my cream cheese whipped cream frosting and set about putting the jigsaw together. The flag took shape and I felt alright with the result, but not 100% happy as lines seemed a bit off.
Still, I persevered and decorate the top of the cake with sliced strawberries for garnish.


This was a behemoth of a cake and was tricky to drive with up to the glens of Scotland where Ewan lives (beautiful views). Disneyboi kept a good eye on it as I drove and it got there in one piece.


Lots of food and drink were consumed during the show and just after Conchita Wurst sang her winners song, we decided to slice the cake. Somehow it had melded together perfectly and I was pleased with how I turned out after all. And everyone loved how it tasted!

If you would like to make a similar cake follow the link for my red velvet cupcakes and double the quantities, but bake the batter in a 9”x13” baking pan at 180C for 25 minutes approx. Likewise for the white cake, follow the recipe for my strawberry orange sprinkles poke cake – don’t add the sprinkles and substitute the strawberry flavouring for coconut.

Last but not least, grab the recipe for my cream cheese and double cream frosting.
And I shall leave the jigsaw part up to you.


Austria will be host next year, but I plan to change things up a tad as it will be the 60th Anniversary of the song contest (and the flag would be quite similar to this years) – any suggestions will be gratefully welcomed!

Monday, 12 May 2014

Cookie Dough Tarty Pops

Homemade cookie dough pop tarts

These Cookie Dough Tarty Pops popped into my mind as I love Pop Tarts I have loved them since I was younger, but don’t have them nearly as often as I used to. In fact I only pick up the occasional box on one of our frequent trips to London. London has loads of shops scattered about which carry the American ones.

The American ones come in so many different flavours, compared to their uninspiring UK cousins. The last ones I picked up were Maple Brown Sugar ones, which came in oatmeal variety! I also had some chocolate and peanut butter ones. And I’m rather partial to the frosted grape ones!

Anyway, I digress! I decided to make my own using simple ingredients, in cookie dough variety (you guessed it, another favourite of mine).

I made half a batch of my cookie dough truffle recipe for the filling and just used some shop bought short crust pastry for the exterior part. I know this isn’t exactly like the outside of Pop Tarts, as they are almost cookie like in their consistency. One day I do plan to devise something more akin to the real ones, but for now I went for ease!

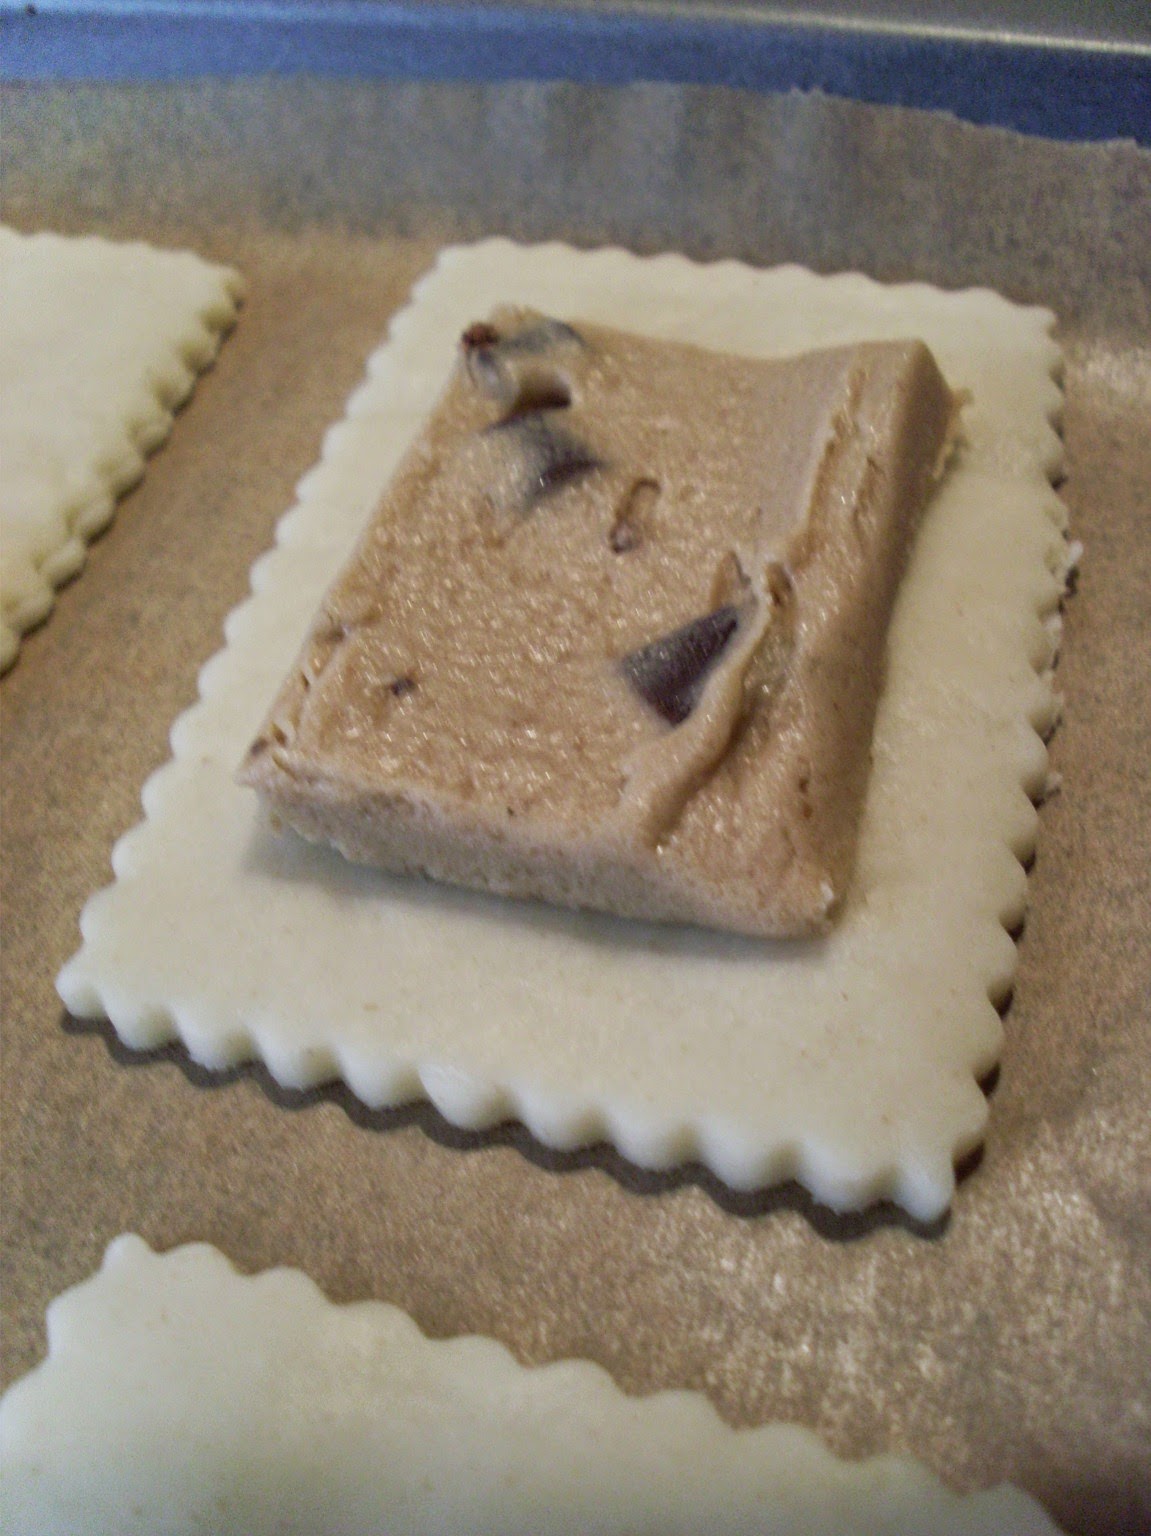
The cookie dough was frozen then added to the pastry pocket before baking, to ensure that it stayed nice and doughy, not baked!

And when they had cooled, I decorated with royal icing in contrasting colours. Here’s the recipe:

Ingredients:
One package of ready rolled short crust pastry
Some milk for pastry

Cookie Dough Ingredients:
55grams of unsalted butter - very soft
125grams plain flour
200grams of light brown sugar
½ tsp Vanilla extract
½  can (200g) condensed milk
50grams of dark chocolate chips

Icing Ingredients:
425 grams icing sugar, sifted
3 tablespoons meringue powder
1 teaspoon vanilla extract
1 tablespoon milk
food colouring paste

Method:
Prepare the cookie dough, by creaming the butter and sugar together. Add the vanilla, flour and condensed milk and stir together until combined. Lastly, stir through the chocolate chips.


Take a baking sheet lined with greaseproof paper and spread the cookie dough mix out flat on this, so it is about ½ cm thick. Place another sheet of greaseproof paper over the top and place into the freezer for a couple of hours minimum (I left mine overnight).

When you are ready to make your tarty pops, pre-heat the oven to 180C. Unwrap the dough and cut out an even number of rectangles – the size is down to you but mines were about 3”x4”. Lay on a baking sheet lined with greaseproof paper.


Now remove the frozen cookie dough and cut into rectangles smaller than the pastry. You want to leave a gap around the filling, so the pastry can stick together.


Place the cut cookie dough in the centre of a pastry rectangle, wet the edges of the pastry and place another pastry rectangle on top. Crimp the edges of the pastry together with a fork and prick holes over the top sheet of pastry to prevent it from rising. Lastly brush some milk over the pockets.


Place the baking sheet in the oven for 8 to 10 minutes, or until the pastry is golden brown. Remove from the oven and allow to cool fully before icing.


To make the icing, place the icing sugar, meringue powder, milk and vanilla in a bowl and beat on high for 5 minutes. It will have gone very thick in this time. Split the icing into different quantities if you are going for different colours. Add as much colouring as you like.

Spread or pipe the icing on top and let it set fully.


And there you have delicious, crispy, cookie dough filled ‘what I call’ Tarty Pops! They look great and last for a few days in an airtight container, if you can resist them that long. Enjoy…


And as these are favourites of mine, I am entering these into the Laura’s Biscuit Barrel over at I’d Much Rather Bake Than… The theme this month is, conveniently, Favourites!


Saturday, 10 May 2014

Food Mixer Giveaway!


Ok guys, this is the big one! Giveaway number three – courtesy of Tesco Direct - is brought to you after a few words…

Cakeyboi is now two. And without you, the people who take the time to visit my humble baking adventures, I wouldn’t be able to bring you giveaways such as this.

The past two years have been a blast – I’ve met famous chefs, worked with big brand names, I’ve been on BBC radio, been featured in local press and had a couple of my recipes featured in magazines! I love thinking of new baking ideas, sharing them with you all and look forward to doing so into year three…

Now, I have banged on in the past 2 years about how great having a stand mixer in the kitchen is – you need one if you are to make homemade marshmallows,  you can let things beat in the background whilst you get on with other kitchen tasks, and let it do jobs you’d rather not, such as knead bread!


So I am very excited to bring you, from the Tesco DirectSmall Kitchen Appliances website, the chance to win a Morphy Richards Red Kitchen Machine.


This mixer features a powerful 800w motor with 6 speeds and a pulse setting. The bowl has a very generous 5-litre capacity and is stainless steel.


And of course it comes in stylish red, complete with a dough hook, beater and whisk attachments AND a splash guard to prevent nasty messes all over your kitchen.

The mixer is worth £87.50.

Have a look at the full spec at the Tesco Direct website. But to be in with a chance of winning this dream machine, entry is via the Rafflecopter thingamajig below. The giveaway is open until midnight on 31st May and a winner will be selected at random, soon after. Sorry, but only UK residents can apply.

For this giveaway, the minimum requirement is to tell me what Cakeyboi recipe you like the look of the most – so have a browse through the recipes on the site and add your comment using Rafflecopter below. (AND try to be original and not pinch the last entrants answer, or as SOME folk have done - say something that isn't actually one of my recipes! Cakeyboi won't be happy!)

Good luck to everyone and thank you for taking the time to visit!

a Rafflecopter giveaway

Disclosure Statement: I have not been paid to run this giveaway. Any opinions expressed are my own. All photos are courtesy of Amazon.

Tuesday, 6 May 2014

Iron Brew and Tablet Cupcakes and a Baking Bundle Giveaway


I promised you 3 giveaways this month and this is number two!

But before I get to that, I wanted to show you what I made with the great items on offer. And it is very much inspired by my Scottish roots – Scottish Tablet Stuffed and Iron Brew Frosted Cupcakes!


We are using an OXO Good Grips Batter Bowl to whip up some vanilla cupcakes. The bowl has high sides, so no splatter. It has permanent red markings (up to 2 litres) and a soft grip handle. And it has a wide spout to pour those more fluid batters. This retails at £13.00.


I used the recipe from my Trifle cupcakes and divided this between 12 cupcake cases. Now let the cupcakes cool before you move onto using the OXO Good Grips Cupcake Corer. This handy tool lets you remove the centre of cupcakes to fill with anything you choose. With an easy movement you core the cupcake and it ejects the centre for you to top the cupcake off with (or just snack on!). It’s has soft and non-slip grip, so perfect for kids or if you are making a large amount. This retails at £6.


I whipped up a batch of my Scottish Tablet (I overcooked it a tad in haste!!) and carefully spooned this into the cored cupcakes before it set. I let the remaining tablet set up in a separate pan, so I could snack on this later.

I let the tablet set fully in the cakes before I whipped up a batch of Iron Brew flavoured buttercream. I purchased the Iron Brew flavouring online and added 1 teaspoon to 500 grams of icing sugar, 200 grams of butter and one tablespoon of milk, all whipped up with some orange food colouring.


To spread the buttercream onto the cupcakes I used the OXOGood Grips Bent Icing Knife. I like to call this an off-set spatula myself as the stainless steel blade is raised from the handle which is perfect to keep it away from all the frosting going on. It has a soft non-slip handle and is very easy to use. This retails at £6.50.


To finish I decorated the frosting with some little blue chocolate balls. And that was my Iron Brew and Tablet Cupcakes. Give them a try!

But on to the giveaway...


I’m sure you’ll agree all of the OXO Good Grips items are very useful for baking. And as well as receiving these myself, I am able to offer one of you a chance to win your own batter bowl, cupcake corer and bent icing knife, worth a total of £25.50. All you need to do is enter via the Rafflecopter thingamajig below before midnight on 20 May. UK residents only sorry. Good luck everyone!

Disclosure Statement: I am not being paid to run this giveaway. I received items free to review and any opinions expressed are entirely my own.

Monday, 5 May 2014

Brownie Krisp

brittle pieces of crispy brownie

I am re-posting this after taking my original post down. I recently received a letter from a law firm in the US asking me to remove all reference to my original title for this recipe as it was copyrighted – whoops! So here goes again….

I recently came across two words in a cooking magazine I had never seen together before – brownie and brittle. I was intrigued.

I looked online and discovered Brownie Brittle came about after a woman, who baked brownies for a living, loved the crisp edges. She wanted to get a whole batch of crisp brownie edges and came up with a recipe.

It sounded delicious, all that chocolate brownie goodness with a satisfying crunch. I set about looking for a recipe and found a few online.

My first attempt was a recipe which just used boxed brownies. I made up the batch, spread it out in the recommended size pan and – wah wah! Just brownies which were a bit less deep than normal.

I took these into the office for my co-workers to share, as they still tasted good. But it wasn’t what I was after. I was describing them to folk saying they were like brownies only with sort of a biscotti crunch to them. Then it hit me – why not do as biscotti says – it’s the Italian for twice baked. Twice baking biscotti gives it that hard crunchy edge. So perhaps it would make my brownies krisp?

That Saturday, I whipped up a batch of ingredients which I had tweaked from a few other websites. Baked it once, broke it into shards and baked it again. The result? Lovely crisp, crunchy brownies. Result! Here’s how I made them;

Ingredients:
125 ml vegetable oil
2 tablespoons of unsweetened cocoa powder
115 grams granulated sugar
½ teaspoon vanilla extract
1 medium egg
35 grams plain flour
25 – 50 grams plain chocolate chips

Method:
Preheat your oven to 190oC. Line a large cookie sheet with greaseproof paper and set aside.


In a bowl, mix together the oil, cocoa, sugar, vanilla and egg with a whisk until smooth. Add the flour and stir through until just combined.


Spoon the mixture out onto the prepared cookie sheet, to about a ¼ inch thick. The mixture is sticky so may need some encouragement with an off-set spatula. Persevere. Lastly sprinkle on the choc chips, evenly over the brownie mix. Place into the oven for 10 minutes. Remove and place on a cooling rack. Allow to cool completely.


When cool, after about an hour, remove the greaseproof paper from the brownie krisp. It should start to break up at this point. Line the cookie sheet with another piece of greaseproof paper and place the broken bits of brownie krisp onto it. Place back into the oven for 8 minutes and remove immediately. Place back on the cooling rack and allow to cool completely again.

There you have brownie krisp – looks like thin brownie, tastes like brownie, with none of the gooey texture. Instead a crisp, dare I say, brittle texture. I used plain chocolate chips, but you could change things up with toffee bits, peanut butter chips, mint chips, nuts, it’s up to you!


It’s very satisfying with a cup of coffee. If you make, I hope you enjoy!

Sunday, 4 May 2014

Strawberry Orange Sprinkles Poke Cake

Strawberry flavour white cake with orange jelly and sprinkles

Nothing quite says celebration to me more so than sprinkles. I love sprinkles, I pick them up wherever I can. TK Maxx does great ones, B&M also is another great place. And I used two different types, from these very shops for this celebration cake – in honour of birthday month here on Cakeyboi. 

It’s a white cake flavoured with strawberry, holes poked into it then filled with orange jelly. Once set it is frosted with a fluffy white frosting made from cream cheese, sugar, vanilla and double cream.
And sprinkles are in everything!


I only discovered poke cake the other week when having a look at different recipes online. Some recipes went for strawberry jelly, which you could see more clearly  in the cake. The orange doesn’t show up too well sadly. But you can taste it. In fact, my tasters all said that the cake was very trifle like, with the cream, sponge and fruit flavours going on. Oh and they said it was the moistest cake they had ever tried!

Here’s how I made it:

Yield: One 9”x13” sheet cake

Cake ingredients:
400 grams plain flour
1 tablespoon baking powder
½ teaspoon salt
225 grams, unsalted softened butter
450 grams granulated sugar
1 tablespoon strawberry flavour extract
7 large egg whites
250 ml milk (any kind)
2-3 tablespoons sprinkles
1 pack of orange jelly (makes one pint)
Adapted from Woodland Bakery Blog

Frosting ingredients:
110 grams full-fat cream cheese
60 grams granulated sugar
1 teaspoon vanilla extract
250 ml double cream

Cake method:
Line and grease a 9”x13” baking pan. Pre-heat the oven to 180C.

In a bowl, sift together the flour, salt and baking powder. In another bowl mix together the egg whites, milk and strawberry flavouring.

In the bowl of a mixer, beat the butter and sugar together until light and fluffy. The mix should look pale in colour. Add one third of the flour mix and gently mix through. Add half of the wet mix and mix this until incorporated. Repeat with another third of the flour, the remaining wet mix and the last of the flour. Lastly add the sprinkles and mix through evenly.


Transfer the cake batter to the prepared pan and bake in the oven for 25 to 30 minutes, or until a toothpick comes out clean from the centre.

Allow the cake to cool for about half an hour, then begin to poke holes all over the cake. Make up the jelly as instructed then pour this into the holes of the cake slowly until it has all been absorbed.


Pop the cake into the fridge for a minimum of 3 hours, or better still overnight.

When set, carefully remove the cake from the pan and remove the paper. Wash out the pan and dry, then carefully place the cake back in.

To make the frosting, in the bowl of a mixer, beat the cream cheese, sugar and vanilla together until soft. Add the double cream and beat until the mixture is thickened and is spreadable.


Spread the frosting on top of the cake evenly and scatter even more sprinkles on top.


Pop back into the fridge for an hour for the frosting to set. Then the cake is ready to devour. Slice into squares and watch everyone take a slice of sprinkle heaven! Enjoy…