Saturday 31 October 2020

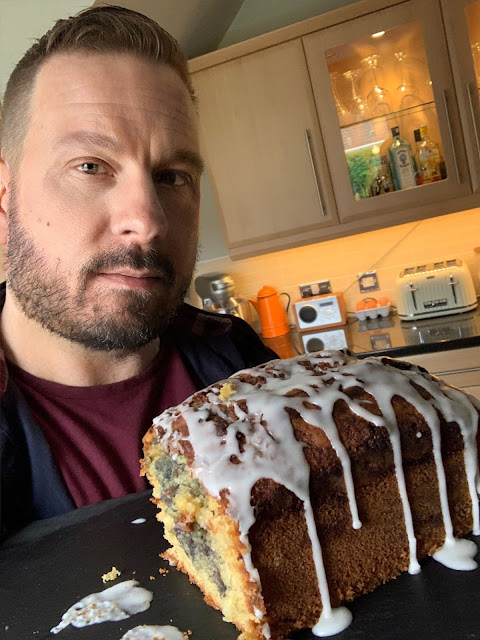
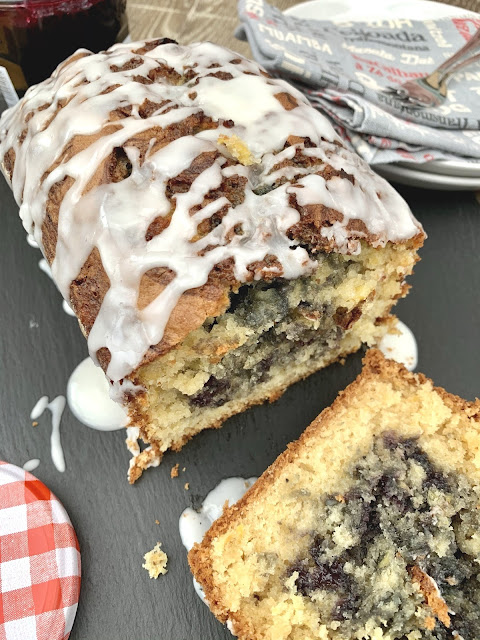
Creamed Sweetcorn and Blueberry Loaf Cake with Zingy Lime Icing​

Moist loaf cake baked with creamed sweetcorn and dollops of blueberry conserve topped with lime icing


This delicious, moist and flavourful cake is packed with sweetness from the creamed corn, to the addition of tart blueberry conserve to the hit of lip smacking lime icing. 

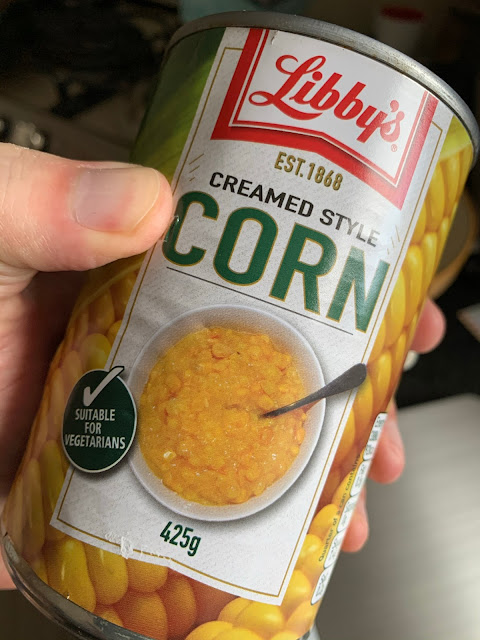
Creamed Sweetcorn

I know what you are thinking – creamed sweetcorn in a cake? But if you think about it cornbread is good and that is really just a cake made from corn! Trust me it works. I had a can of creamed sweetcorn in the cupboard and it had been there for a while. I wondered what could I come up with using this, apart from soup or succotash - whatever that is. Then I thought that a bit like the addition of pumpkin in my pumpkin and pecan loaf cake recipe, the vegetable would add a depth of flavour and a tempting moistness. There is nothing worse than a dry cake is there?! 

Creamed Sweetcorn and Blueberry Loaf Cake with Zingy Lime Icing​

So I decided to use that, some blueberry conserve which was hidden away at the back of the fridge, and limes – a big bag of which we keep for using in gin. One wouldn’t go amiss! I made the batter, stirring up the ingredients by hand in a bowl, the good old fashioned way. I transferred it to the prepared loaf tin and added dollops of blueberry conserve to the batter, mixing it through with a knife to give it a nice swirl effect. 

Creamed Sweetcorn and Blueberry Loaf Cake with Zingy Lime Icing​

I popped it in the pre-heated oven and when it was ready I let the cake cool in its tin for a few minutes before turning it out onto a wire cooling rack. Then with some icing sugar and the juice of one whole lime, I made a simple icing which could be drizzled over the top of the cake. I let is set and fully cool whilst we went to the cinema and then we came back and had dinner, followed by a slice of the cake, with a dollop of thick cream on the side. I didn’t tell Disneyboi what the secret ingredient was as he would likely have baulked at the thought – so after he had enjoyed his wedge, I told him and he was surprised. 

Creamed Sweetcorn and Blueberry Loaf Cake with Zingy Lime Icing​

He’s not a huge fan of sweetcorn, but does love cornbread. So the cake's flavour doesn’t taste like a can of Green Giant don’t worry. But lies somewhere between cornbread and a blueberry muffin. That doesn’t sound too bad does it?! Here’s how I made it… 

Creamed Sweetcorn and Blueberry Loaf Cake with Zingy Lime Icing​


print recipe
Creamed Sweetcorn and Blueberry Loaf Cake
Moist Cake made with creamed sweetcorn and blueberry conserve swirls
Ingredients
  • 200 grams granulated sugar
  • 100 grams vegetable oil
  • 3 medium eggs
  • 200 grams of creamed sweetcorn
  • 1 teaspoon vanilla extract
  • 250 grams self raising flour
  • 1/2 teaspoon bicarbonate of soda
  • 6-8 heaped tablespoons blueberry conserve
  • Juice of one lime
  • Icing Sugar
Instructions
1. Preheat oven to 180C (160 fan) and grease and flour a two pound loaf tin. 
2. In a bowl, add the sugar and oil, mixing together until smooth and the sugar is absorbed. 
3. Add the eggs, sweetcorn and vanilla and stir to incorporate. 
4. Add the flour and bicarb and stir this through until a smooth batter is achieved. 
5. Transfer to the loaf tin and dollop the blueberry conserve onto the top of the batter. 
6. With a knife or end of a spoon swirl the conserve through the batter. 
7. Pop in the oven for 45 to 60 minutes or until a skewer comes out clean from the centre of the cake. 
8. Allow to cool for 5 minutes before removing from the loaf tin and placing on a wire rack. 
9. Make the icing by mixing the lime juice with enough icing sugar to achieve a drizzling consistency 10. Drizzle the icing over the cake and allow to set slightly before slicing. 
11. Best served warm with a bit of cream on the side

Details
Prep time: Cook time: Total time: Yield: 1 loaf cake

Creamed Sweetcorn and Blueberry Loaf Cake with Zingy Lime Icing​

Creamed sweetcorn can be found in most large supermarkets in the tinned veg aisle.

Sunday 12 April 2020

Zombie Cake Banana Bread

A tempting banana loaf infused with the taste of porter – specifically BrewDog Zombie Cake – which gives it an amazing depth of flavour.

Zombie Cake Banana Bread - infused with a chocolatey porter

Well, since everyone has been in lockdown, it seems we have all taken to using up our foosty (great Scottish word there) bananas in the best way we know how – turning them into banana bread. There is something warm and comforting about banana bread and that is why we are possibly turning to this old favourite, in these difficult times.

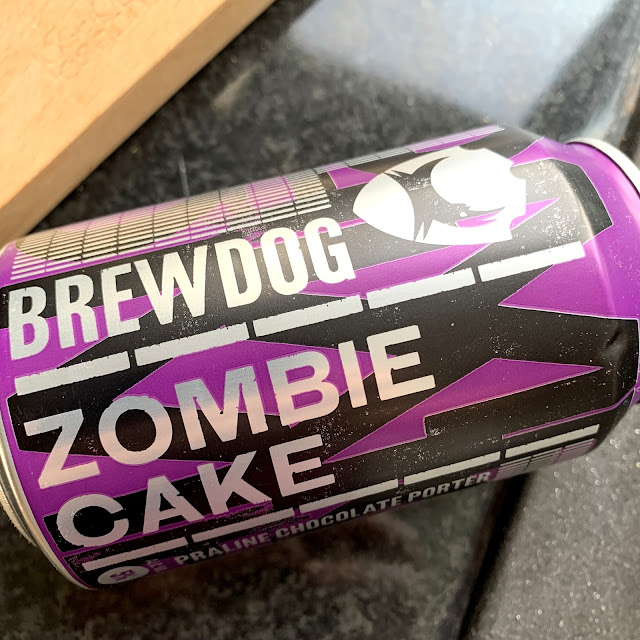
To add flavour to mine, I decided to add my favourite porter to the mix, as I knew the flavours in Zombie Cake from BrewDog, would work extremely well with the ‘nana sweetness of the cake batter. Zombie Cake is described as a praline porter, with notes of toffee and chocolate, followed by vanilla, coffee and nuts. So you can see exactly why I thought this would be a perfect combination.

BrewDog Zombie Cake Porter

Aside from drinking the porter, this is a great way to get my BrewDog fix which I am missing greatly since the pub has been shut!

Zombie Cake Banana Bread - infused with a chocolatey porter

I made my usual banana loaf recipe, changing the amounts slightly to compensate for the added liquid. I used very ripe bananas which were way past their best for eating, ideal for the recipe. I mashed them up with a fork and then set about making the batter.

Zombie Cake Banana Bread - infused with a chocolatey porter

To top the cake, I had pre-cut slices of banana which when baked, looked lovely on top of the finished loaf. Doing this is entirely optional, but remember to do this before you mash the bananas.

When eating the cake, I could taste all those notes from the Zombie Cake porter, which did give it an amazing depth of flavour which you couldn’t quite put your finger on. It kept the banana bread moist and I stored it in an airtight container for a week, having a wee slice each night with a cuppa.

Zombie Cake Banana Bread - infused with a chocolatey porter


print recipe
Zombie Cake Banana Bread
Moist Banana Bread infused with a chocolate porter
Ingredients
  • 60ml vegetable oil
  • 100 grams dark brown sugar
  • 50 grams granulated sugar
  • 1 large egg
  • 1 teaspoon vanilla extract
  • 3 Over ripe Bananas Mashed
  • 200 grams plain flour
  • 1/2 teaspoon salt
  • 1 teaspoon bicarbonate of soda
  • 1/4 teaspoon cinnamon
  • 125ml BrewDog Zombie Cake Porter
Instructions
Preheat the oven to 180C (160C fan) and grease and flour a regular sized loaf tin.In a bowl, sift together the flour, salt, bicarb and cinnamon. Set aside.In another bowl, beat together the veg oil, sugars, egg and vanilla until thoroughly combined.Add the mashed banana and stir this through.Add the dry ingredients and mix these together until just combined and dry bits can be seen.Lastly add the porter and stir this through before pouring the batter into the loaf pan.Top with the banana slices if doing so, the place in the oven and cook for 55 minutes, or until a toothpick comes out clean from the centre of the cake.Once baked, leave to cool before removing from the pan.Allow to cool completely before slicing. The banana bread keeps well for a week in an airtight container.
Details
Prep time: Cook time: Total time: Yield: 1 loaf cake

Disclaimer: I have not been paid for this post. However, I do hold shares in BrewDog.

Sunday 29 March 2020

White Chocolate Chunk Blondies

gooey caramel blondies studded with chunks of white chocolate

I always wondered what it would take to get me blogging and now I know – a global pandemic!

Hello everyone, in case you have missed me, and I hope you that you are all staying safe and well in these crazy, scary times we are now living in.

I have had some time on my hands, like most of you out there. I will be at work some of the time, as I am a key worker, but will be at home for periods too. So I have cleaned the house, tidied the garden, caught up with the seasons I haven’t seen of Chicago Fire, but what else could I do?

With Disneyboi fiddling away on the PC upstairs, as he can work from home, I thought why not a spot of baking? It’s been a while, but there is something extremely calming and comforting about baking as I’m sure, if you have stumbled upon this post, you agree with too.

So I popped to the supermarket with a list of ingredients (along with other essentials!) and queued to get into the shop, staying 2 metres away from my fellow shoppers. With barely a square of Andrex, or bag of penne to be found, thankfully I could see the white chocolate staring at me from the shelves.

gooey caramel blondies studded with chunks of white chocolate


I had a hankering for White Chocolate Chunk Blondies, which is nothing too outrageous, but just what I fancied. For white chocolate it has to be Milky Bar, the best white chocolate around. As I child I was often called the Milky Bar kid, as I had a shock of whitey blonde hair and a pair of penny rounder, John Lennon style, spectacles with the wee loops which went around my ears to keep them on. I think I might have been quite cute!

source
I digress however. I wanted to make a gooey bar of caramelised sugar studded with delicious white chocolate. So my go to recipe for blondies was adapted to include a mixture of milky bar chunks and lots of milky bar giant buttons.

This is so easy to mix up with just a few ingredients that you may already have lurking in your kitchen cupboards. It takes no time at all to bake in the oven and is scrummy to eat when still warm from the oven.

gooey caramel blondies studded with chunks of white chocolate

Baked in a brownie pan, or any square tin you have, I lined mine with greaseproof paper which I keep in place with some binder clips - all sterilised and cleaned of course. For the chunks I chopped each chunk of large bar of Milky Bar into two and mixed these through, along with giant Milky Bar button. Any white chocolate you like would suffice of course.

The recipe uses vegetable oil. Using oil instead of butter ensures that the bars stay gooey and moist even once cooled. Any flavourless oil would work here, but I always have veg oil on hand.

I baked them in my oven which has a mind of it's own and they are a bit darker on top than I would have liked. But it doesn't affect the taste at all, it's purely aesthetic. If you'd like paler coloured blondies, you can always tent your pan with a bit of foil to stop it catching.

gooey caramel blondies studded with chunks of white chocolate


The dark brown sugar in the recipe gives the bars a golden caramel taste and with the ultra-sweet white chocolate they are ideal for those of you, like me, with an extremely sweet tooth.

Once made, I cut them into squares and sat down to enjoy them with a cuppa and an episode of Tiger King – desperate times!!

If you make these, I hope you enjoy and please stay safe everyone.


print recipe

White  Chocolate Chunk Blondies
Soft caramelly bars of deliciousness studded with tons of white chocolate chunks and buttons
Ingredients
  • 125ml vegetable oil
  • 230 grams dark brown sugar
  • 1 large egg
  • 1 teaspoon vanilla extract
  • 1/2 teaspoon baking powder
  • 1/4 teaspoon bicarbonate of soda
  • 1/4 teaspoon salt
  • 125 grams plain flour
  • 100 grams white chocolate chunks
  • 100 grams giant white chocolate buttons
Instructions
Line an 8"x8" brownie pan with greaseproof paper and preheat the oven to 180C (150C fan). In a medium bowl, whisk together the flour, baking powder, bicarb and salt. Set aside.In another bowl, stir together the sugar and vegetable oil until it resembles wet sand. Add the egg and vanilla and stir to combine.Add the dry ingredients and mix until combined. Add the white chocolate and stir these through also.Pour the batter into the brownie panWith a spatula or knife, spread the mixture into the corers of the pan. Place in the oven and bake for 15 minutes.Allow the blondies to cool slightly before removing gently from the pan. Then with a knife cut into 16 equal squares. Your blondies can be eaten slightly warm and stored in an airtight container up to a week.
Details
Prep time: Cook time: Total time: Yield: 16 bars


Friday 1 December 2017

White Chocolate and Cranberry Blondie Brittle

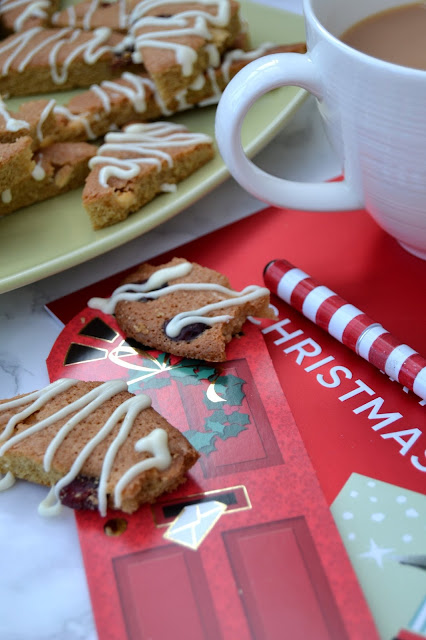
blondies with white chocolate chips and dried cranberries baked into crisp shards

This white chocolate and cranberry blondie brittle is a doddle to make and equally as easy to scoff.

Let me tell you a story…A few years back, I saw an advert in the back of a magazine for a product called brownie brittle. It was brownies in a crisp, biscuit (cookie) like format. I thought this sounded delicious and set about trying to come up with a recipe of my own for this.

Well I did and it proved a popular recipe here on the blog. Making a simple brownie batter, spreading it thin onto a baking sheet and baking it, not once, but twice, like you do biscotti. This meant the results were extra crisp!


But a few months later, I got an email from an American law firm, threatening me with legal action if I did not remove my recipe, or change its name. The company who invented (their version) of brownie brittle were suing me for copyright. I had no idea that the name was protected in that way and duly changed the name to a less glamorous ‘brownie krisp’, the recipe for which can be found in the cookie section.

Anyhoo, the hits for that post went down and legal action was averted!! It was quite flattering that a company felt threatened by my wee blog.

But, I got to thinking that a blondie (the chocolate free version of brownies) version may actually be quite tasty also. I checked blondie brittle and the name is not copyrighted – there are quite a few recipes online for different variations.

blondies with white chocolate chips and dried cranberries baked into crisp shards


But my variety is perfect for Christmas especially with its white choc cranberry flavours. It’s a really similar process, make a blondie batter, spread it thin over a baking sheet (or two) and bake until set Allow it to cool, then break the slab into shards. Arrange the shards back on a cooled baking tray, bake again and let it cool again. (I added a drizzle of white chocolate on top but this is entirely optional.)

There you have crispy, crunchy and satisfying white chocolate and cranberry blondie brittle. This could make a lovely gift to hand out for the festive season, or to take to a Christmas bash. Or like me, to scoff on when writing Christmas cards.

blondies with white chocolate chips and dried cranberries baked into crisp shards


However you have it – enjoy! Here’s the recipe…


print recipe

White Chocolate and Cranberry Blondie Brittle
Blondies baked into crisp satisfying shards and dotted with white chocolate chips and cranberries
Ingredients
  • 2 medium eggs
  • 60 ml vegetable oil
  • 1/2 teaspoon vanilla extract
  • 100 grams plain flour
  • pinch of table salt
  • 140 grams light brown sugar
  • 50 grams white chocolate chips
  • 50 grams dried cranberries
Instructions
Line two baking sheets with greaseproof paper and preheat the oven to 150C. In a large bowl, mix together the eggs, vegetable oil and vanilla extract.In another bowl, sift the flour and salt. Add this to the wet ingredients and stir to combine.Add the brown sugar and stir this through until combined. Add the chocolate chips and cranberries and stir these through also.Pour half the batter on one of the baking sheets and the other half on the other baking sheets, making sure the mix-ins are equally distributed.with a spatula or knife, spread the batter so it is as thin as it can be. Place both the baking trays in the oven and bake for 20 minutes or until the mix is golden around the edges.Remove from the oven reduce the temperature to 120C. Allow the blondies to cool completely. Then with a knife cut the slabs of blondie into shards. Place back onto the baking sheets in a single layer and bake for a further 15 minutes.Remove from the oven and allow to cool completely again. Your blondie brittle is ready to enjoy.
Details
Prep time: Cook time: Total time: Yield: Lots


blondies with white chocolate chips and dried cranberries baked into crisp shards

Friday 3 November 2017

Spicy Apple Chutney

spicy apple chutney

We still had a shed load of apples in the garage (that should be garage load really), left from the trees in the garden. We’d already sickened ourselves of crumbles and pies, so I decided to make something savoury with them instead. And I thought that a chutney would be perfect.

spicy apple chutney


It’s thick consistency and sweet, savoury and warming taste is ideal for this time of year. It would make great gifts to hand out at Christmas (sorry for using the C word so soon) and also great for Christmas dinners and shindigs that you may have coming up.

spicy apple chutney


I used a basic apple chutney recipe but decided to tweak it to suit my taste. It’s called spicy and not spiced because I added chilli flakes to the mix and it really packs a hot punch. If you like it on the milder side though, add less chilli flakes or omit them altogether.

spicy apple chutney


The house becomes ‘aromatic’ shall we say when the chutney is cooking and does linger for a while. It's very vinegarry, but it’s so worth it. Once fully cooled, I transferred it to sterilised jars and popped them in the fridge until we are ready to use them. Gorgeous with some cheese and crackers, I never realised chutney was so easy.

spicy apple chutney


Here’s the recipe.


print recipe

Spicy Apple Chutney
A great way to use leftover apples. This sweet and savoury chutney packs a spicy punch.
Ingredients
  • 1 1/2 Kilos Apples (any variety)
  • 750 grams light brown sugar
  • 500 grams raisins
  • 4 tablespoons mixed peel
  • 2 large white onions
  • 2 teaspoons mustard seeds
  • 2 teaspoons ground ginger
  • 2 teaspoons chilli flakes
  • 1 teaspoon table salt
  • 1/2 teaspoon ground cinnamon
  • 700 ml malt vinegar
Instructions
Peel, core and chop the apples into cubes and place into a large pan with a thick base.Add the sugar, raisins and mixed peel.Chop the onions and add these too.Add all the remaining ingredients and stir to combine.Place the pan over medium heat and cover. Bring to the boil.Once boiling, turn the heat down so the mix bubbles away, uncovered for around an hour.Stir frequently and when the mix is dark in colour, thick and syrupy the chutney is ready.Allow to cool fully, the chutney will thicken on standing.Place into sterilised jars, seal and fridge until ready to use.
Details
Prep time: Cook time: Total time: Yield: A few jars worth.

spicy apple chutney


Monday 23 October 2017

Coffee and Orange Halloween Cake

Coffee and Orange Halloween Cake

I cracked out my Redmond RMC-M4502E Multicooker again at the weekend. This is the one-stop cooking pot which does all manner of things in the kitchen such as baking, cooking, frying, sterilising, warming, proving dough, making soup, making cheese, you name it, it does it.


This time I decided to make a cake for Halloween. It’s a basic sponge recipe, flavoured with coffee and orange. A strange combination I know, but it really works well, And with some additions of food colouring made for a perfect spooky looking treat.

I made the sponge batter, then divided this into 2. One half of the batter I added coffee to, with a bit of coffee extract and in the other half, some orange flavouring along with a large dollop of marmalade.


Now, this is when I added some colourings to the batter, but this is purely optional. The coffee batter will stay a pale brown, but I added black gel colouring. This didn’t go jet black, just a deep grey. I also added orange gel colouring to the orange flavoured batter. Add as much or as little as you are comfortable with.

In the bowl of the Multicooker, which I didn’t need to grease as the bowl is a super non-stick surface which items just glide out of, I added dollops of the batter in a random pattern and then with the end of a wooden spoon, I swirled the batters together to look sort of marbled.

Coffee and Orange Halloween Cake

I put the bowl into the Multicooker and set it to the bake function for one hour. I checked half way through to see how it was getting on it needed a bit longer. I clicked down the lid again and baked for the remaining 30 minutes.

Coffee and Orange Halloween Cake

The cake slid out onto the cooling rack after I had let it cool in the bowl for 5 minutes. I let it cool fully and I loved the swirled top of the cake. With the Multicooker, the top of the cake doesn’t brown too much, although it is cooked perfectly. This means the colours really stand out. In fact the grey batter got darker making it look even spookier.

Coffee and Orange Halloween Cake


When cut into, the colours of the sponge really stand out. Now, this may sound gross, but it looks almost like mouldy cheese, which could be a great idea for a Halloween buffet.

The cake itself is moist and the flavours really complement each other well. It doesn’t need any additional garnishing like cream or frosting, but I did sprinkle a touch of icing sugar over the top.

Coffee and Orange Halloween Cake


This would work well in the oven too, 180C for 25 minutes or so, but in the RMC-M4502E Multicooker it cooks perfectly on the worktop.

Redmond have a model on special offer at the moment. Check out the RMC-280E, available in 3 colours, only £59 for a limited time!


Here’s how I made the cake:


print recipe

Coffee and Orange Halloween Cake
Sponge cake flavoured with Coffee and Orange
Ingredients
  • 225 grams granulated sugar
  • 225 grams softened butter
  • 4 large eggs
  • 225 grams self-raising flour
  • 2 teaspoons baking powder
  • 1 sachet strong instant coffee granules
  • 2 tablespoons boiling water
  • 1 teaspoon coffee extract
  • 1 heaped dessertspoon marmalade
  • 1 teaspoon orange extract
  • black and orange food colouring
Instructions
Make the coffee with the boiling water and set aside to cool a little.In a bowl, beat together the butter and sugar until light and fluffy.Add the eggs, one at a time and incorporate into the batter after each addition.Add the flour and baking powder, stir this into the batter fully.Divide the batter into two and in one half add the coffee, and coffee extract, stirring this through. Add the black food colouring if using.Dollop large dessertspoonful’s of the mix randomly into the non-stick bowl of the multicooker and with the end of a wooden spoon, swirl these about.Set the multicooker to bake for one hour. Check half way through to make sure things are going okay inside and let cook for the remaining time.Let cool in the bowl for 5 minutes, removed from the multicooker and then transfer to cooling rack to cool fully.Sprinkle some icing sugar over the top if desired.Perfect with a spooky beverage!
Details
Prep time: Cook time: Total time: Yield: 12 servings


Disclosure Statement: I received the multicooker free to review. I have been paid to develop this recipe using the multicooker. 

Thursday 12 October 2017

(Gruesome Green) Pandan Blondies

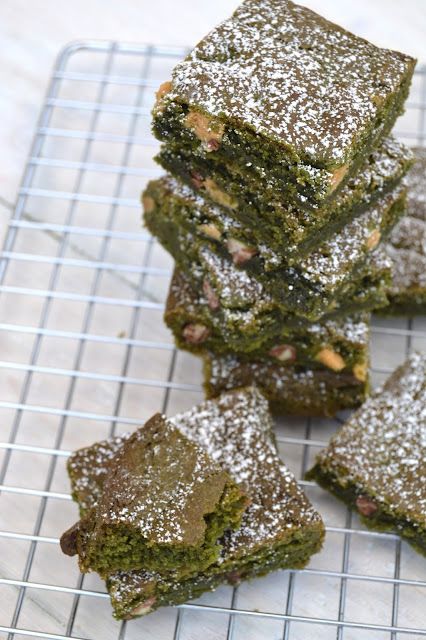
blondies flavoured with pandan the popular south asian flavouring

I made these green Pandan Blondies after picking up some pandan flavouring in my local Chinese supermarket.
image source
Pandan is a plant grown in South Asia and the leaves are used in a variety of culinary ways. One of which is in pandan flavouring. It is commonly sold in small bottles with green food colouring mixed in with it.

blondies flavoured with pandan the popular south asian flavouring

The flavour of pandan is like a buttery vanilla, if you can imagine that, with wafts of mild coconut in there too. It really is a gorgeous smell and I thought using the flavouring in blondies would be a great way to showcase the taste.

As I was making them, I suddenly realised what with Halloween coming up, the green hue of these would make them a perfect home baked treat for Trick or Treaters.

blondies flavoured with pandan the popular south asian flavouring

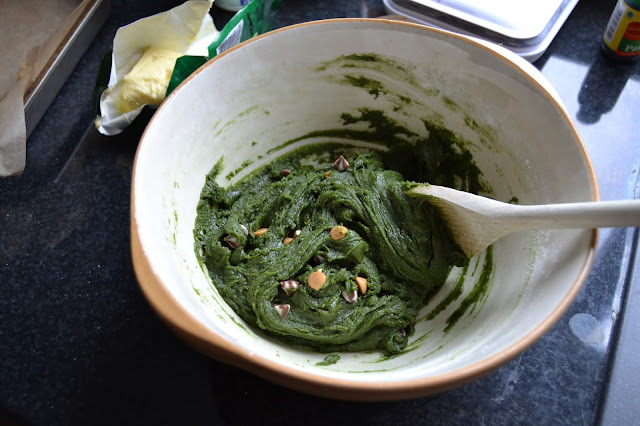
I made a basic blondie batter and stirred in a tablespoon of the pandan flavouring. The green grew stronger and stronger as I mixed it in to the batter. Almost like the baking equivalent of the Hulk I suppose.

I also added chips to these for added flavour. I don’t specify which sort of chips, as any would work really well in these. I had some peanut butter chips and white and milk swirled chocolate chips, so chucked these in. But you could use butterscotch, plain chocolate, even some chopped nuts would be a great addition.

blondies flavoured with pandan the popular south asian flavouring


They baked for about 25 minutes. Obviously the outside of the baked blondies (I should really call them greenies, which sounds not quite so appetising) take a brownish tinge from being baked, but when cut into squares, the dark emerald tones are revealed.

blondies flavoured with pandan the popular south asian flavouring


I dusted some icing sugar over the top of these beauties, but for added spooky flair, you could add a cobweb design in chocolate for example or whatever you fancy really.

You can purchase pandan in Asian supermarkets or online.


Here’s how I made them:


print recipe

(Gruesome Green) Pandan Blondies
Blondies flavoured with pandan
Ingredients
  • 115 grams melted unsalted butter
  • 2 tablespoons vegetable oil
  • 225 grams dark brown sugar
  • 1 large egg
  • 1 tablespoon pandan flavouring
  • 1/2 teaspoon baking powder
  • 1/4 teaspoon bicarbonate of soda
  • Pinch of salt
  • 100 grams baking chips or chopped nuts
  • To garnish icing sugar
Instructions
Preheat the oven to 180C (160C fan) and line a 9”x9” baking tin with greaseproof paper.In a large bowl stir together the melted butter, vegetable oil and dark brown sugar until smooth.Add the egg and pandan and beat this in until fully combined.Sift over the baking powder, bicarb, salt and flour and stir this into the mixture until incorporated.Stir in the chips (or nuts) until evenly distributed and then transfer the batter to the prepared tin.Smooth over with a palette knife and pop in the oven for 25 minutes or until a toothpick comes out clean from the centre.Allow to cool for 5 minutes before transferring to a cooling rack.Cut into 16 squares and dust some icing sugar over the top.These taste great when warm but keep for about a week, when cooled, in an airtight container.
Details
Prep time: Cook time: Total time: Yield: 16 blondies

blondies flavoured with pandan the popular south asian flavouring