Monday, 4 April 2016

No Bake Dirty Coke Cheesecake

no-bake cheesecake flavoured with cola, coconut and lime

A couple of years ago, when surfing online,  I saw a recipe on the fabulous blog Sugar Hero 
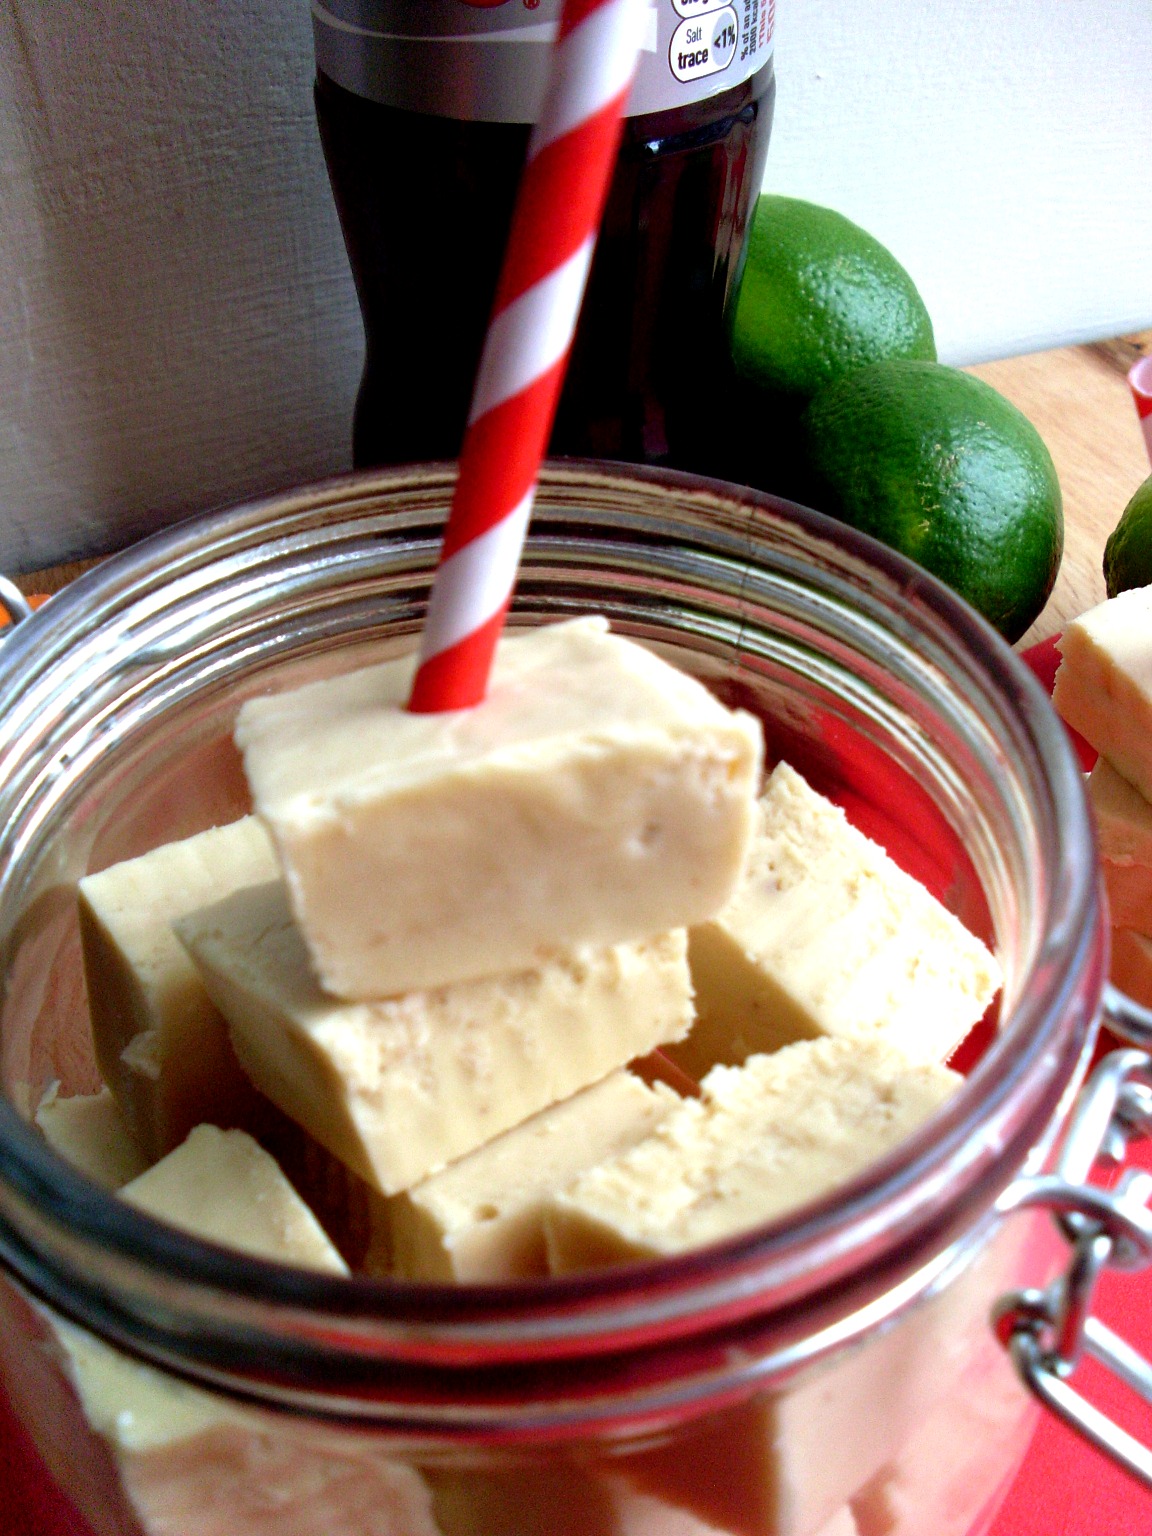
– for Dirty Coke Fudge.

The name of the recipe intrigued me and I read on. I discovered that a dirty coke was cola flavoured with coconut syrup and lime juice.

Elizabeth at Sugar Hero explained that the drink can be made with other fizzy drinks such as Dr Pepper and Pepsi. She loved the flavour combination so much she turned it into a fudge.

Intrigued, I decided to make the fudge too and it was a revelation. Coconut, lime and cola go so well together, I was a convert!


Recently we had Disneyboi’s family over for a few drinks and we put on a buffet, the usual nibbles, that I had made for my family visiting recently. Sarnies, crisps, sausage rolls and so on. For the dessert though, instead of the Chocolate and Peanut Butter cake I made my lot (it’s been a big hit – check it out) – I decided to make a cheesecake, but what flavour would I make?

no-bake cheesecake flavoured with cola, coconut and lime

You guessed it, I decided to crack out the cola flavouring, coconut extract and some lime juice and made a Dirty Coke Cheesecake. How would the flavours translate combined with cream cheese and a biscuit crust? Well, as it turned out.

This is a no-bake cheesecake, so does incorporate gelatine – apologies to vegetarians. I’m not sure if vege-gel would work here, but if anyone tries it out, please let me know.


When I made the dirty coke fudge, I found cola flavouring on the shelves in Sainsbury’s. I think this may have been discontinued since then. This time instead, I bought some flavouring oil online. This is a brand called LorAnn, which I’ve used before. It is super-concentrated and only needs a few drops to incorporate the flavour, as they are three to four times as intense as regular flavourings and extracts.
I had some normal coconut flavouring in the cupboard as well, so with the purchase of a few other ingredients, I was good to go.

The proportions in a dirty coke are to taste really, so play about and see what you like. But I can assure you, however you like the flavours, any combination will be a big hit in this chilled cheesecake.

no-bake cheesecake flavoured with cola, coconut and lime

I used lime zest in the cheesecake filling only, not lime juice, but I added lime marmalade to the top of the cake, when it had set in the fridge, to give it a good hit of lime. I also grated some extra zest on top too. Lime curd would work well here too, instead of marmalade if you can’t find it (or even a wee bit of lime jelly).

Here's how I made it...


print recipe

Dirty Coke Cheesecake
No-bake cheesecake flavoured with cola, coconut and lime.
Ingredients
  • 250 grams digestive biscuits
  • 113 grams melted unsalted butter
  • 55 grams granulated sugar
  • 300 ml double cream
  • 250 grams full-fat cream cheese
  • 125 grams caster sugar
  • 2 1/2 teaspoons coconut extract
  • 3-4 drops Lorann cola flavouring
  • 1 1/2 lime zest
  • 1 sachet sachet of gelatine (approx. 4 teaspoons)
  • 250 grams lime marmalade (or curd)
Instructions
Crush the digestive biscuits in a food processor until they resemble fine crumbs (or attack them with a rolling pin) and mix in the 55 grams of sugar.Line a 9” springform pan with a sheet of greaseproof paper, then melt the butter.Pour the melted butter into the digestive/sugar mix and stir to combine.Transfer to the springform pan and press down firmly with your hands or an off-set spatula to an even layer, coming about one inch up the sides. Place in the fridge to chill.In a bowl, place the sachet of gelatine with 2-3 tablespoons of water. Let it sit for 10 minutes to absorb. Then heat the gelatine over a pan of simmering water until it turns liquid.In the bowl of a food mixer fitted with the whisk attachment, place the cream, cream cheese, coconut extract, cola flavouring, zest of one lime and the caster sugar. Beat until stiff peaks form.Add the slightly cooled gelatine and continue to whisk for a further 2 to 3 minutes then transfer the filling to the chilled cheesecake base. Smooth over with a spatula and place in the fridge again to chill for at least 2 hours or overnight.For the lime marmalade topping, gently heat it in a saucepan, until it turns more liquid and spreadable. Pour this on top of the chilled cheesecake and gently spread out. Add the remaining lime zest on top.Return to the fridge to firm up, at least another two hours.To unmould your cheesecake, open the springform pan and slide off the base onto a serving plate, ready to slice with a sharp knife.Enjoy!
Details
Prep time: Cook time: Total time: Yield: 1 9" cheesecake


no-bake cheesecake flavoured with cola, coconut and lime

Friday, 1 April 2016

Treat Petite April 2016


I’m back hosting Treat Petite, my first turn since December would you believe. Many thanks go to my pal Lisa from United Cakedom for hosting February in my place, whilst I moved home.

(Loads of thanks to my regular co-host Kat, The Baking Explorer, for her patience!)

With no obvious celebration this month to theme Treat Petite on (Easter was soooo early this year), I have taken inspiration from one of my posts in March.

Did any of you catch my Fry’s Chocolate Cream Stuffed Brownies? A favourite old bar of mine, I decided to use them in my baking after rediscovering them recently in a pound shop.


And with that idea in mind, this month’s Treat Petite theme is ‘favourite sweets, chocolates and biscuits). For this month, we’d love to see you incorporate a sweetie, a chocolate bar or a favourite biccie of your choice into a bake.

Perhaps you want to top cupcakes with Smarties? Bedeck some bark with gummy bears or make Oreo cookies into truffles. There really are no limits to this month’s theme aside from big cakes, whole loaves, puddings etc. You know the Treat Petite rules!

But if not, here is a wee reminder…

1. Add your petite treat to the Linky Tool at the bottom of the current month's post by the 25th of the month, midnight at the latest

2. Post your bake onto your blog and link back to Cakeyboi and The Baking Explorer, stating who is hosting this month

3. Follow Cakeyboi and The Baking Explorer blogs on Google+ (see sidebar links), if you haven't already.

4. If you tweet use #treatpetite and mention @MrCakeyboi and @BakingExplorer - we will retweet

5. Add the challenge logo to the post and 'Treat Petite' as a label to the post

6. Use any recipe as long as the source is noted

7. If you like, add your photo to the 'Treat Petite' Pinterest board (request access from me, Cakeyboi)

8. Feel free to enter old posts as long as you update the post and meet all the requirements above!


Above all else – have fun!

Wednesday, 30 March 2016

Fudgy Chocolate Cake with Creamy Peanut Butter Frosting

Fudgy Chocolate Cake with Creamy Peanut Butter Frosting

Did you have a nice Easter weekend? My family were coming to visit on Easter Sunday as my aunt, uncle and cousin hadn’t seen our house since we’d moved.

So they came up from Arbroath, with my mum, to pay us a visit. I say us, but we had been out the night before and Disneyboi was feeling a little tender so slept off his ‘headache’ in the spare room.

I made a small buffet for us, the usual nibbles, some sarnies, crisps, sausage rolls, pasta salads that sort of thing.

But, as goes without saying now, I made a cake. And as I knew my relatives liked chocolate and peanut butter together, I decided to make a fudgy chocolate cake with a creamy peanut butter frosting.

I adapted a couple of recipes together and came up with this triple layered cake which was very simple to make. It had cocoa powder to give the chocolatey flavour and a dash of added golden syrup for a little je ne sais quoi!

Fudgy Chocolate Cake with Creamy Peanut Butter Frosting

I’m beginning to master my fierce furnace of a Smeg oven and it baked in no time at all. I let it cool completely then set about making the creamy, buttery peanut butter frosting. This recipe makes ample frosting to the layers and the sides.

Fudgy Chocolate Cake with Creamy Peanut Butter Frosting

To finish the cake off, I wanted chocolatey drips. I’ve seen them on a lot of cakes recently and set about trying to replicate it myself. The answer seemed to be making something akin to ‘Ice Magic’. We used to have this stuff growing up. It’s a chocolate sauce which you pour on ice cream and it sets as soon as it touches the cold.

image source
This dripping sauce part of the recipe works well for a 'chilled in the fridge' cake. It set perfectly just as it was dripping down the sides of the peanut butter frosting. I made a random pattern on top, but if you are doing this, there is plenty in the recipe to cover the entire top of the cake too.

My family loved the moist chocolate cake and deliciously gooey peanut butter frosting – oh they loved our house too!

I had some cake leftover which I kept in the fridge and it seemed to get better the next day. The cake got more dense and moist and the frosting firmed up even more.

All chocolate and peanut butter nutters out there – you are going to love this cake!!

Here’s how I made it…


print recipe

Fudgy Chocolate Cake with Creamy Peanut Butter Frosting
A moist and dense chocolate cake with a sweet and creamy PB frosting to compliment it.
Ingredients
  • 260 grams self-raising flour
  • 3 tablespoons unsweetened cocoa powder
  • 1 ½ teaspoons bicarbonate of soda
  • ½ teaspoon salt
  • 225 grams granulated sugar
  • 3 large eggs
  • 225 ml vegetable oil
  • 285 ml semi-skimmed milk (or milk of your choice)
  • 3 tablespoons golden syrup
  • 225 grams unsalted butter softened
  • 250 grams smooth peanut butter
  • 450 grams icing sugar
  • ½ teaspoon vanilla extract
  • 100 grams dark chocolate chips
  • 2 tablespoons coconut oil
Instructions
Preheat the oven to 180C (160C) and line and grease three 8” cake tins.In a bowl sift together the flour, bicarb, salt and cocoa powder. Stir in the granulated sugar and make a well in the centre.In a jug, beat together the eggs, veg oil, 225 ml of the milk and golden syrup.Pour this into the dry ingredients and mix well with a spoon or spatula until smooth and all the ingredients have combined.Divide the cake batter equally between the three cake tins and place into the oven for 20 to 25 minutes.The cakes will be baked when a toothpick comes out clean from the centre.Allow to cool for 10 minutes in the tins, before turning out on to cooling racks and letting them cool completely.To make the frosting, beat the peanut butter and softened butter together until smooth in a food mixer or with a hand held mixer.Add 50 grams of the icing sugar, the remaining milk and vanilla and beat to combine. Add the rest of the icing sugar gradually until the frosting is smooth and slightly thicker.Spread the frosting on each layer of the cake and place on top of one another.Coat the top and sides with a thin layer of the frosting and refrigerate for at least half an hour, to let the frosting firm up.Remove from the fridge and coat the top and side of the cake more liberally. To achieve a clean finish, heat your palette knife up (either over a gas burner or with some hot water) before smoothing over the frosting.Place into the fridge for at least an hour to cool completely.To make the chocolate topping, melt the chocolate chips and coconut oil together in a bowl over a simmering pan of water.Let it cool slightly before spooning over the cake or placing it in a piping bag and piping it over the top of the cake. Go close to the edges so the chocolate drips. It should chill and go solid before getting to the bottom of the cake.Chill until ready to serve.Enjoy!
Details
Prep time: Cook time: Total time: Yield: 8 servings

Fudgy Chocolate Cake with Creamy Peanut Butter Frosting

Wednesday, 23 March 2016

Lemon Cookies with Drippy Blueberry Icing

lemon cookies with drippy blueberry icing

It’s very spring like out there and this is what inspired me to make these citrus infused cookies. Bursting with lemon flavour from lemon extract and lemon zest, they taste incredibly fresh.

I then thought of making a scrummy blueberry filling for the cookies and making them into sandwich cookies. Blueberries and lemons go incredibly well together and I knew the flavours would pop.

I made my lemon cookies from a recipe adapted from realhousemoms.com. The bits of lemon zest give the cookies a real zingy bite. They’re lovely and crackly on top, crisp on the outside and slightly chewy in the middle as I prefer my cookies.

I then set about making my blueberry icing. This did not go so well and it was a very loose concoction. It was made from fresh blueberries and cream cheese, with a bit of butter and LOTS of icing sugar.

lemon cookies with drippy blueberry icing
It tasted of sweet, fresh blueberries and spread on the cooled cookies well. But it seemed to have a mind of its own. The icing just wanted to leak out. This made for an extremely flavourful cookie, but a very messy one also.

I tried freezing the icing, which did firm it up and piped on the cookie well. It held its shape a bit better. Perfect as a kind of ice cream sandwich, but it didn’t hold its shape for long and the blueberry mix went south once more.

lemon cookie recipe

Still, if you don’t mind a bit of mess then this is the one for you. Or forgo the icing and just enjoy a tantalisingly zingy cookie, perfect at this time of year, or anytime really.


Here’s how I made them…


print recipe

Lemon Cookies with Drippy Blueberry Icing
Zingy lemon cookies with a blueberry cream cheese filling that oozes a bit!
Ingredients
  • 225 grams unsalted butter, softened
  • 400 grams granulated sugar
  • 1 large egg
  • 1 teaspoon vanilla extract
  • 2 teaspoons lemon extract
  • Zest of 1 and a half lemons
  • 1 teaspoon bicarbonate of soda
  • half teaspoon baking powder
  • half teaspoon salt
  • 300 grams plain flour
  • 100 grams full-fat cream cheese
  • 25 grams unsalted butter, softened
  • 75 grams fresh blueberries, mashed with a fork
  • 250 grams icing sugar
Instructions
Preheat the oven to 180C (160C fan) and line two cookie sheets with greaseproof paper.In the bowl of a stand-mixer beat together the 225 grams of butter and granulated sugar until light and fluffy.Add the egg and beat until combined. Add the vanilla and lemon extract and zest and mix until combined.Sift together the bicarb, baking powder, salt and flour and add to the wet mix. Stir by hand until no dry streaks are seen.Drop 1 tablespoon amounts on to the cookies sheets, slightly apart as they do spread a little.This batch makes around 48 cookies, so I baked two sheets twice, getting 12 on each sheet. Bake for 10 to 12 minutes.Allow the cookies to cool completely.To make the icing, beat together the cream cheese and butter until smooth.Add the mashed blueberries and stir through until combined.Add the icing sugar until the mix is thick. Add more as necessary.Chill the filling for at least one hour.Spread a little onto the underside of one cookies and place another one on top, pressing together gently.Enjoy!
Details
Prep time: Cook time: Total time: Yield: 24 sandwich cookies

lemon cookies with drippy blueberry icing

I'm entering these cookies into this week's Bake of the Week, hosted by Sarah at Maison Cupcake and this week Helen at Casa Costello.


Monday, 21 March 2016

Easy Snowball Bunnies and Other Easter Treats

snowball mallows made to look like easter bunnies

This is a really quick and easy recipe for an Easter treat (more a craft really) which kids will love to make and eat.

It’s so simple, all you need are a few shop bought ingredients and you are good to go. Snowballs are made to look like little bunny rabbits with the addition of some foam bananas and a pink jellybean or Skittle. I actually got something called Vimto Skidaddles(?) or similar, which were exactly like a Vimto flavoured skittle.

You can plunge the banana into the top of the snowball, or like I did, cut a little bit off the end and insert half a toothpick into the ‘nana. Leave a bit of toothpick sticking out and use that to attach it to the snowball.

snowball mallows made to look like easter bunnies

For the nose, I used the end of a teaspoon to make a little whole for the pink sweet to go in.
That’s it really. You could attach eyes, but I like the ‘abstract’ look.

Remember, if using toothpicks, take them out before giving to children to eat.

I'm entering these Snowball Bunnies into this month' Treat Petite, hosted by Kat, The Baking Explorer. The theme this month is Easter and Spring.


Here are some of my past Easter treat ideas for you.


Happy Easter when it arrives.

Thursday, 17 March 2016

Fry's Chocolate Cream Stuffed Fudgy Brownies


Hands up who remembers Fry’s Chocolate Cream? To be honest, I had completely forgotten all about the chocolate bar until I saw them recently in a shop – 3 for a pound. Bargain I thought!

For those who have never had one before, Fry’s Chocolate Cream is a bar of sweet white fondant surrounded by dark, dark chocolate. It tastes a lot better than you would imagine. They are very delicious and have a very distinctive taste.


 I remember them, and different variations, when I was growing up. There were peppermint fondant ones, which I think you can still get. You also used to get orange ones and many years ago, which I vaguely remember, was a five centre bar. Research shows (thanks Wikipedia) that the five flavours were orange, strawberry, raspberry, lime and pineapple.

Seeing these in the shop, I immediately bought a pack and then thought that they would be very tasty baked into some fudgy gooey brownies. The dense chocolate of the brownie and the sweet sugary fondant together would be a taste sensation.

I adapted a recipe, used by Thomas Joseph on the Martha Stewart Youtube channel, who explains the difference between fudgy brownies and cakey brownies. It's down to the fat content mostly and a few other tweaks.


 Personally, I think if you get a cakey brownie, it’s just a flat piece of chocolate cake really. Whereas a brownie is moist and dense, fudgy and almost tastes under baked. This recipe makes the brownies that way. You could incorporate any mix-in you like, but I used 4 bars of Fry’s Chocolate Cream chopped into segments, which I dotted through the batter.


I had visions of great photographs with the cut brownies revealing the white fondant inside. Sadly, the white fondant must have melted into the brownie batter as it was nowhere to be seen. But all my tasters, Disneyboi and colleagues at work all said you could definitely taste the Fry’s bar. So this was a big, big hit with everyone and you will love it too!


print recipe

Fry's Chocolate Cream Stuffed Fudgy Brownies
Gooey fudgy brownies loaded with Fry's Chocolate Cream Bars
Ingredients
  • 113 grams unsalted butter, chopped into cubes
  • 170 grams plain chocolate
  • 340 grams granulated sugar
  • 3 large eggs
  • 25 grams unsweetened cocoa powder
  • Half a teaspoon salt
  • 70 grams plain flour
  • 4 Fry's Chocolate Cream Bars
Instructions
Preheat the oven to 180C (160C fan) and line a 9”x9” square baking pan with greaseproof paper.In a bowl over a pan of simmering water, melt the butter and chocolate.Remove from the heat and beat in the sugar.Add the eggs one at a time, stirring in between each addition.Sift the flour, cocoa powder and salt into to the wet mix. Stir until everything is fully combined.Spread half the brownie batter in the baking pan and dot with the Fry’s Chocolate cream pieces. Add the rest of the brownie batter and smooth over with a knife.Make in the oven for 35 to 40 minutes. The top will begin to crack and a toothpick inserted in the middle will have some brownie batter on it.Remove from the oven and allow to cool in the pan for an hour. Remove carefully from the pan and let it cool fully.Carefully remove the greaseproof paper and cut into squares.Enjoy!
Details
Prep time: Cook time: Total time: Yield: 24 pieces


I'm entering these brownies, into this month's We Should Cocoa hosted by Choclette at Tin and Thyme and this month Linzi at  Lancashire Food. The theme this month is butter.


Disclosure Statement: I have not been paid by Fry's Chocolate Cream people for this post. I simply saw them in the shop and bought them!

Monday, 14 March 2016

Super Bloody Blue Smoothie

baby plum tomato and blueberry smoothie

Since we moved house, it’s been a case of seeing where certain kitchen equipment fits. We’ve moved from a smallish flat to a house with a lot more space. It’s been good to have the room to store all my baking equipment away. In fact we have a floor to ceiling cupboard in our utility room which is now literally crammed with all my baking items, christened the ‘Baking Cupboard’.

We also have a cupboard in the kitchen, which the previous owner of the house referred to as the ‘gloryhole’ when we came to view it. We kind of like that name and it has stuck...

Some of my other kitchen equipment has ended up resident in the gloryhole such as the food mixer, food processor and Optimum 9400 from Froothie, which you may remember me using in the past.
I decided to get it out of the gloryhole, to give it a whirl in it’s new kitchen. And I wanted to make a smoothie for my breakfast on Saturday morning.

Sometimes with smoothies, I find you are dictated by what fruit and veg you have leftover from the week. This weekend I found some baby plum tomatoes and blueberries in the freezer. I also had some bananas and soya milk in the fridge and it was as easy as that!


I popped the frozen tomatoes in the Optimum 9400, along with the frozen blueberries, banana and 500 ml of soya milk (which I had in the fridge, any milk would be fine)  and gave it a whirl.

baby plum tomato and blueberry smoothie

The resultant drink tasted of freshness. No wonder with superfoods tomatoes and blueberries in there. It was naturally sweet from the sweetness of the tomatoes and banana, so there was no need for any added sweetener.

As for the name I’ve given it? Bloody as in Bloody Mary (minus the vodka of course) with the blue of the berries.

baby plum tomato and blueberry smoothie

This was a great drink to wake up to and set me up for the morning. It was filling and tasty and gave me loads of energy for the day ahead.

I used frozen fruit which the Optimum 9400 blitzes through effortlessly. But unfrozen works just as well.

Here’s how I made it;


print recipe

Super Bloody Blue Smoothie
Baby plum tomatoes and blueberry smoothie
Ingredients
  • 225 grams baby plum tomatoes
  • 150 grams blueberries
  • 1 medium banana
  • 500 ml soya milk (or alternative)
Instructions
Place all the ingredients in a blender and blitz until smooth.Pour into glasses and enjoy.
Details
Prep time: Cook time: Total time: Yield: 2 large glasses

baby plum tomato and blueberry smoothie

Disclosure Statement: This post contains affiliate links. I received the Optimum 9400 free to use in recipes. I have not been paid for this post.