Monday, 6 April 2015

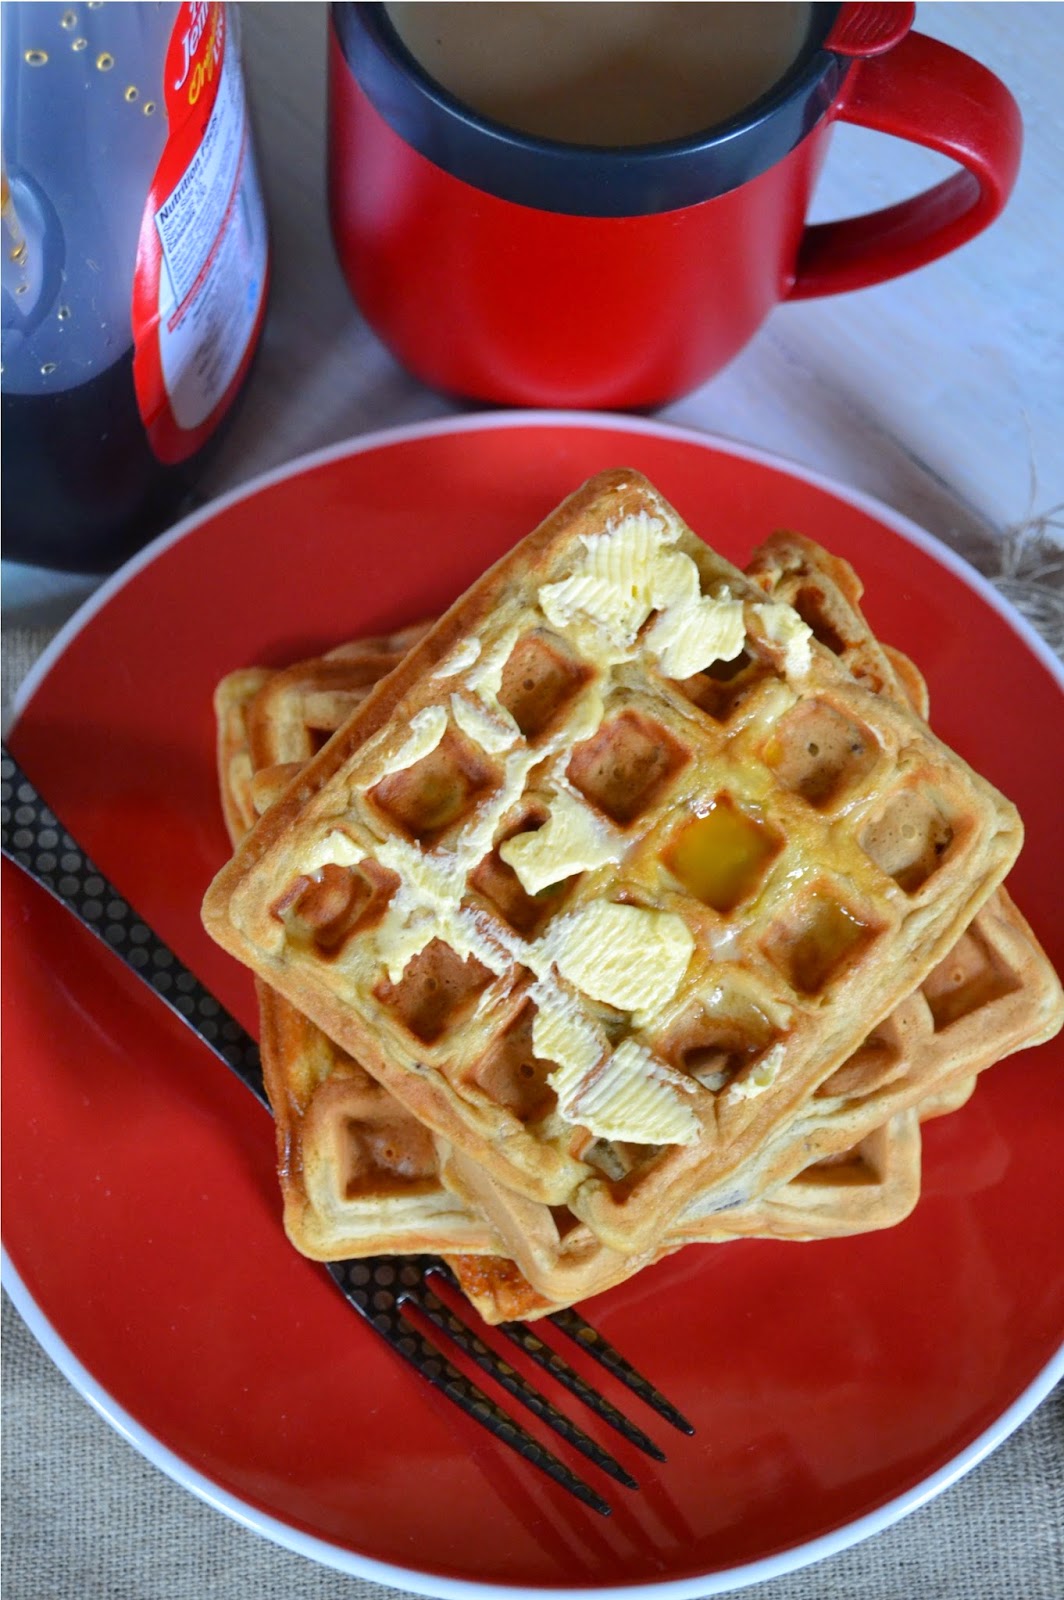
Banana Maple Nut Waffles

banana maple nut waffles

I bought a new waffle iron recently and was dying to try it.

Who has time to make waffles for breakfast through the week? Not I, so I waited until the weekend and whipped up a delicious concoction of maple, banana and pecan waffles. And the bonus with this recipe is I used no fat! The only fat was from the milk I used and that was a nominal amount really!

banana maple nut waffles

Back to waffles and I have always loved them. A breakfast treat I remember trying first when I visited America in the 1970’s. I remember seeing a commercial for them on TV and my Aunt went to the supermarket and bought them for me. I smothered them in maple syrup and that is where my love of waffles began.

They aren’t a huge thing here in the UK are they? Savoury potato waffles are more commonplace here. But I do see new places popping up now and again selling sweet varieties, dusted with icing sugar as a snack. Me, I love them for breakfast as I said.

My new waffle iron makes oblong shaped waffles, whereas my last one made a flowery circle which could be cut into heart shapes – cute – but I wanted waffles with corners!

I whipped up the ingredients using a very ripe banana, which sort of mushed on it’s own. My wee tip for this is to freeze the banana and then take it out the night before, leaving it in a bowl, in it’s skin. In the morning the banana skin will be black, but open it up and you find sweet, mushed banana ready to bake with. (This also a good tip for making banana bread.)

banana maple nut waffles

I also used a good quality maple syrup and chopped pecans. You could substitute golden syrup if you like and any type of nut you fancy, but I loved the flavour combination of banana, maple and pecan.

This was so easy and the only drawback was making them, it took so long with my weenie new iron. But then I tried toasting the ones that had cooled whilst I made the rest – and you know what? The toasted ones were even better!! They had a lovely crispy outside and were still fluffy and light in the middle. I actually preferred them like this. In future I will be making my waffles way in advance, ready to toast!

banana maple nut waffles


The only topping these beauties called for really was a schmear of butter on top, which melted into the holes of the waffles – gorgeous!! (But I did have some more syrup just for good measure!!) Here’s how I made them…


Banana Maple Nut Waffles


Thumbnail Url Breakfast waffles made with banana, maple and pecans
Cuisine: waffles Category: breakfast Yields: 10 waffles approx.
Prep Time: Cook Time: Total Time:


Ingredients
  • 2 large eggs
  • 1 tablespoon granulated sugar
  • Pinch of salt
  • 200 grams plain flour
  • 4 teaspoon baking powder
  • 250 ml milk (I used almond)
  • 1 large frozen banana, defrosted and skinned
  • 4 tablespoons maple syrup
  • 40 grams chopped pecans
 
Instructions
  1. Preheat your waffle iron.
  2. In a bowl whisk together the eggs and sugar until pale and frothy. Add the salt, flour and baking powder and mix through. Don’t worry if there are lumps – this is okay.
  3. Add the milk and stir this through then add the banana, syrup and lastly nuts until just combined.
  4. Spoon waffle batter into your iron (amount will depend on the size of your iron) and cook for about 5 minutes until the waffles are golden brown.
  5. Transfer to a cooling rack and enjoy straight away. If you let them cool, pop them into the toaster to warm them up and get crispy on the outside (my favourite way).
  6. Enjoy them with some butter!


I am entering the recipe into this month's Alphabakes - the letter is B (for banana in this case!). Waffles are kinda baked, so I hope this is allowed! Hosts are, this month, Caroline at Caroline Makes... and Ros The More Than Occasional Baker.


Saturday, 4 April 2015

That's What I Call New #4


It’s been a while but I am back with ‘That’s What I Call New’ number 4.  A round-up of some goodies I have been sent over the past wee while to give a try. Being a blogger certainly has it’s benefits!

courtesy of Planet Organic
 First off we have Buffalo Worms! Yep, worms. A company called Grub have launched a range of edible insects – very Bushtucker trial! Available via Grub’s website or Planet Organic, you can choose from a selection of mealworms, crickets, grasshoppers and buffalo worms. I was sent the latter to try and I can tell you they aren’t half bad! Crunchy and quite savoury tasting the worms would certainly make a good talking point as nibbles at your next dinner party. Be brave!!

Packed with protein, I intend to experiment with them in my baking. You know my liking for the quirky, so stay tuned! Retails at £5.69 for a 50 gram bag of buffalo worms.

courtesy of Joseph Joseph
Next up Joseph Joseph sent me a few new products to try. Firstly their Slice and Sharpen Wooden Chopping Board with Integrated knife sharpnener. This chopping board is great – firstly I prefer wooden chopping boards – they are much kinder to knives and if treated correctly can last a long time. The knife sharpener which is located in the handle is perfectly placed – allowing you to give your knives a quick sharpen just before you start chopping. The boards come in small and large sizes. Available from the website, starting at £20.

Joseph Joseph also sent me three of their multi-peel tools (available from £8 for 4) to try out – all with different functions.

courtesy of Joseph Joseph
 First off was the yellow coloured serrated peeler with a built in zesting tool. The peeler is a good sharp peeler perfect for softer skinned fruits and veg. The attached zesting tool is great for getting wee curls of citrus peel for garnish!

courtesy of Joseph Joseph
 Second was the green coloured straight peeler with integrated scraping tool. This items is perfect for potatoes and the like and has a potato eye remover too. The scraping tool on the side I find is great for getting skin off ginger, which can be a fiddly job.

courtesy of Joseph Joseph
 Lastly we have the julienne peeler, ideal for carrots and firmer veg that you want to cut into julienne strips – it really saves time. The channel knife is good for cutting out strips of peel and skin for garnishing too.

Courtesy of Beets Blu
Next I was sent the Beets BLU Heart Monitor and Pager Tag to try. You might be wondering why I chose to try out a heart monitor. I do try and stay fit and run when I can – although I haven’t been able to as often I would like lately. The heart rate monitor allows you to check your performance whilst exercising. If you have a smartphone, then you download from a choice of apps and pair it with the monitor. Before your workout you clip it around your chest, and the app does all the work.

 For me, I have to say, I don’t take my phone out running with me, or to  the gym, so I found it frustrating having to have my phone with me. But if you take yours normally, this would be no hassle. You do need to wet the sensors on the monitor before attaching to get a better connection, so it does take a minute or two to put on.

On the plus side, you can see on the app your performance and how much work you are doing so, a great tool to keep you motivated and set new goals for yourself. This retails at Amazon for £29.95.

courtesy of Beets Blu
Beets BLU also sent me a pager tag. A very handy device, about the size of two postage stamps, which you can track remotely from your phone. You can use this to keep an eye on the whereabouts of keys, your wallet or purse (it is thin enough to slip in there) or even on your dog’s collar for example. If your tagged object falls outwith a radius of about 5 metres then an app on your phone alerts you. Very handy for the forgetful among us. This retails at Amazon for £18.95.


 Lastly the people at Simoney, who are the UK leaders in manufacturing and supplying personalised name badges, promotional badges and a whole raft of promotional products, asked if I would like a Cakeyboi name badge for myself, when attending conferences. I sent off my logo and I received in the mail the badge above. It will come in handy for the future I have no doubt! Made from metal it is digitally printed so the quality is very high. It should certainly last me a good while. Check the website for costs.

Thanks to everyone who sent me their products to try!

Disclosure Statement: I received all of the items above free to review and was not committed to writing a positive review for any of them. Any opinions expressed are entirely my own.

Thursday, 2 April 2015

Fried Egg Meringue Cookies

meringues that look just like a fried egg

This recipe isn’t really a recipe – it’s just meringue!

But it is just so cute yet so simple and perfect for Easter.

Now, first of all, to those in the UK, you are probably wondering where the cookie part comes in? Well, in America, the recipe books I have anyway, cookies are not just the beige coloured, chocolate chipped circles that we know. They class allsorts as cookies from said meringues to palmiers, brandy snaps even lemon bars.

Hence, I have called these meringue cookies, but just call them meringues if you wish. The best part, I think is the design – they look identical to a fried egg! Just by piping them into a squidgy splat shape and colouring some extra meringue yellow and piping on a yolk, these are great fun.

meringues that look just like a fried egg


They are delicate, as they are piped quite thin. You can if you wish, dip the bottoms into some melted chocolate for extra flavour, but I liked them just as they are.

If you can whisk egg whites, then you can make these.


My oven must be a bit skewwhiff as my top tray of meringues browned ever so slightly, whereas the bottom row stayed perfectly white.


meringues that look just like a fried egg

The secret is to keep your oven as low as possible. I’ve even heard of people keeping the door ajar by jamming it open with a wooden spoon. I didn’t try that myself – perhaps I should’ve? Hey-ho – they are still edible and so cute for Easter!

Here's how I made them...(I've just realised as I'm typing they also look a bit like daisies!!)


Fried Egg Meringue Cookies


Thumbnail Url Meringues that look just like a fried egg!
Cuisine: Dessert Category: Cookies Yields: 18 cookies
Prep Time: Cook Time: Total Time:
 
Ingredients
  • 4 large egg whites, room temperature
  • ¼ teaspoon, salt
  • 260 grams, granulated sugar
  • 1 teaspoon, cornflour
  • 1 teaspoon, white vinegar
  • 1 teaspoon, vanilla extract
  • Yellow food colouring
 
Instructions
  1. Pre-heat the oven to 100C.
  2. Line two large baking sheets with greaseproof paper. With a pencil, draw fried egg splat shaped on the sheet, slightly apart. I got 9 shapes on each of my sheets of paper. Flip the paper over and set the trays aside.
  3. In the bowl of a food mixer with the whisk attachment, beat the egg white and salt, until white and peaks form. Keep whisking as you add the sugar, tablespoon at a time. Lastly add the cornflour, vinegar and vanilla.
  4. Take a couple of large dessert spoonfuls of the meringue mix and place into a smaller bowl. Add yellow food colouring and mix until you get an egg yolk type colour.
  5. Transfer the white meringue mix to a piping bag and pipe into the shapes you had drawn on the baking paper (ensuring you have turned the paper over!). Smooth each ‘egg white’ with an off-set spatula.
  6. Place the yellow meringue mix into a piping bag and pipe a yolk sized circle in the centre of each white. Smooth any raised tip with a wet finger.
  7. Place both baking trays in the oven for 1 hour to 1 hour 20 minutes. Swap and rotate each tray halfway through baking.
  8. Remove when the cookies are firm to the touch and are no longer wet.
  9. Allow to cool slightly before carefully peeling from the paper.
  10. (Dip the bases into melted chocolate at this stage, if you so wish.)
  11. There you have fried egg meringue cookies.


Happy Easter everyone!

Monday, 30 March 2015

Double Chocolate Easter Eggy Puppy Chow

malt cereal coated in milk chocolate and icing sugar and tossed with Easter treats

Double Chocolate Puppy Chow, despite the name is NOT suitable for dogs. Also called muddy buddies, monkey munch or other cute names, it is essentially cereal covered with chocolate, icing sugar and other tasty treats.

In the past I have made regular puppy chow, with chocolate and peanut butter, white chocolate puppy chow with cranberries for a festive treat and also Biscoff puppy chow with banana chips.

malt cereal coated in milk chocolate and icing sugar and tossed with Easter treats

 This is double chocolate Easter eggy puppy chow, as it uses both a bar of milk chocolate and a milk chocolate spread. It tastes just like a choccy egg opened on Easter Sunday morning.

For my money, and I have not been paid to say this, the best milk chocolate is Cadbury’s here in the UK – that is until Kraft, or Heinz, or whoever owns it now changes the recipe! They started with crème eggs and lets hope they don’t cheapen our beloved Dairy Milk!


The cereal is mixed with this delicious Cadbury infused lusciousness then tossed with icing sugar. Then when it has all set, I have mixed in some Easter type sweet treats – fried egg jellies, carrot shaped jelly sweets, little chocolate micro-eggs and some Easter-coloured sprinkles.

This combo is served up in a bowl for folk to snack from, or served in little baggies and handed out to kids as a treat.

malt cereal coated in milk chocolate and icing sugar and tossed with Easter treats

This is a killer snack as it’s so addictive and chocolatey – make sure the Easter bunny doesn’t pinch any!!

Double Chocolate Easter Eggy Puppy Chow


Thumbnail Url Crunchy cereal smothered in milk chocolate with added Easter treats
Cuisine: snack Category: dessert Yields: Lots!
Prep Time: Chill Time: Total Time:
 
Ingredients
  • 300 grams malted wheat cereal, such as Shreddies
  • 55 grams unsalted butter, cubed
  • 190 grams milk chocolate, broken into pieces
  • 125 grams milk chocolate spread
  • 2 teaspoons flavourless oil, such as corn oil
  • 190 grams icing sugar
  • Oodles of Easter-inspired treats
 
Instructions
  1. Line a baking tray with greaseproof paper and set aside. Place the cereal in a large plastic tub, with a sealable lid.
  2. In a large bowl, over a pan of simmering water, add the butter, chocolate and chocolate spread. Stir until melted and add the oil, stirring this through.
  3. Pour the chocolate mix over the cereal and stir until every bit of cereal is smothered in chocolate. Add the icing sugar on top. Place the lid on top of the tub then shake it vigorously for a good couple of minutes.
  4. Empty the contents on to the baking sheet and spread out. Pop in the fridge to chill, about one hour.
  5. Place the contents back into the tub and add your treats, such as mini eggs, jelly sweets, whatever takes your fancy.
  6. Pop the lid on and shake to distribute the treats through the mix.
  7. Serve the mix in small bowls or in little baggies. Enjoy!  


malt cereal coated in milk chocolate and icing sugar and tossed with Easter treats

Thursday, 26 March 2015

Treat Petite March 2015 Round Up


March has whizzed by and it’s time for our Treat Petite round-up for March. As Mother’s Day falls in March in the UK, we were celebrating all things ‘Mum’, with all links to ‘mum’ tenuous and specific welcomed!


To start things off Dom over at Belleau Kitchen, gave us his Honey, Oat and Cranberry Cookies. These were inspired by his mum’s love of honey and they look like they would go perfect with a cuppa.


Next we had Helen at Family Friends Food bringing us her super-fruity chocolate tiffin. These were made with Kipper in tow and would make a perfect treat for Mother’s Day or anytime.


My co-host Kat made Lindt Lindor Cupcakes with Salted Caramel Buttercream. The chocolates on top certainly grab your attention! Kat made these for her mum, whose favourite chocs are – you’ve guessed it – Lindt Lindors!


Sadhna at Herbs, Spices and Traditions made Tandoori Naan stuffed with potatoes and onion. These were inspired by her mother-in-law who made her naans on a Sunday.


Helen at Case Costello made these bright and cheery Sunshine Cookies full of orange and lemons zest. These were gussied up with ribbons and Helen said would make a perfect Mother’s Day gift.


Caroline at Caroline Makes… made homemade marshmallows for the first time at a class in Putney. Caroline didn’t say if she was giving these to her mum, but said they would make an ideal gift for Mother’s Day all parcelled up in a box.


These mini St. Clement’s cakes from Kate, the Gluten-Free Alchemist look like we Victoria sponges. But they are filled with lots of zingy citrus, honey and brown sugar – these really are a perfect cake for Mother’s Day as Kate says.


Emily at Cooking for Kishore made Irish Cream Glazed Vanilla Bean Baked Donuts. She used her mum’s homemade Irish Cream in these to tie in with the mum theme. They look loads of fun and perfect for St. Patrick’s Day too.


Laura at I’d Much Rather Bake Then… paired up mint and cookie dough to give us these Mint Chocolate Chip Cookie Dough Cupcakes. I had never thought of pairing those two together but I think it sounds like a match made in heaven. Laura thought of her mum whilst baking these as she is feeling a bit homesick from uni at the moment.


Next up, and Ros, The More Than Occasional Baker made us some lovely mini chocolate éclairs from an Eric Lanlard recipe. Ros calls her chocolate on top messy as there was no time to let is set. I say it looks even more inviting and decadent! Her mum lives abroad and she couldn’t share these with her, but she knows how much her mum would love them!


My entry was next and I made mango and pineapple galette for my mum. She came around for dinner and we bought her a Chinese takeaway. But I did make dessert using her favourite fruits in this crisp golden pastry shell.


Choclette at her new home ‘Tin and Thyme’ made Marmalade Runeberg Cakes which are made from breadcrumbs and ground almonds instead of flour. With the addition of her mum’s marmalade sauce, these look really tasty.


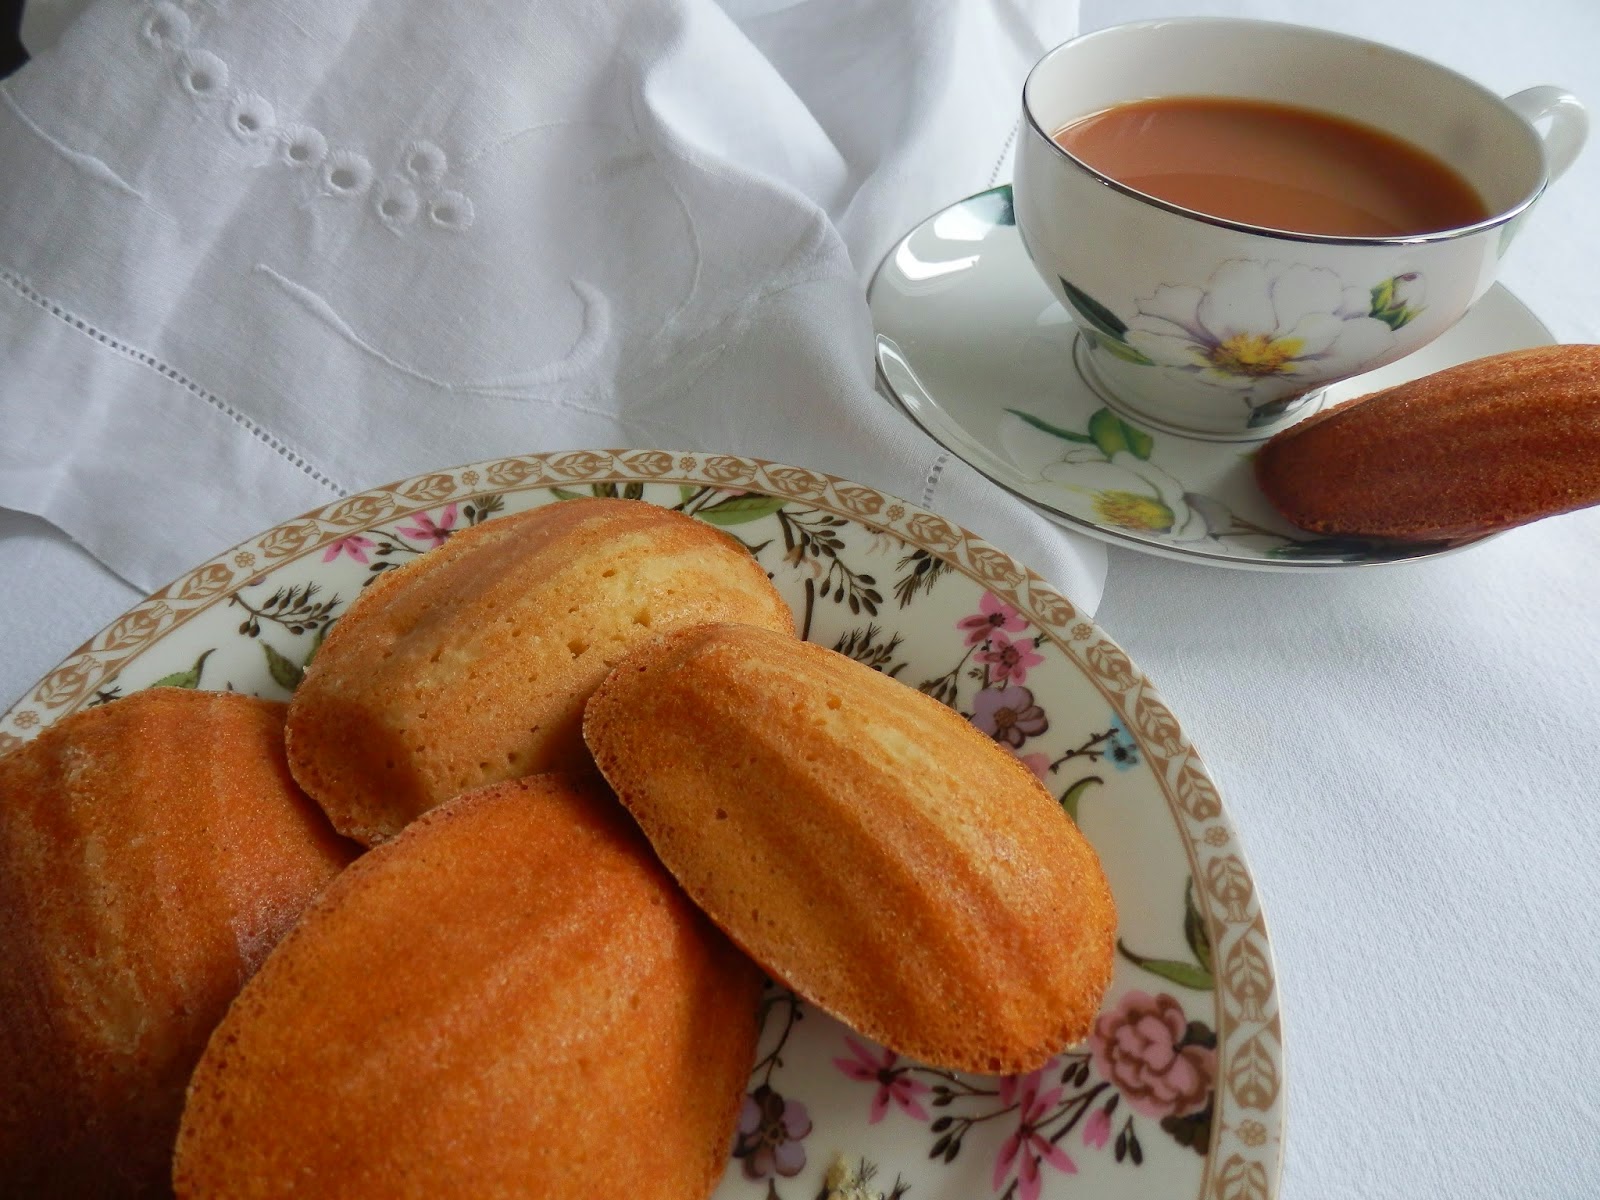
Katharine at Leeks and Limoni made citrus and honey madeleines. These were inspired by Proust’s novel ‘In Search of Lost Time’. It was the author’s mother who gave him the madeleines inspiring the book, a great tie-in to the theme of Mum.


Caroline at Caroline Makes… also made chunky peanut brittle, who made this for her mum. My mum would definitely love this!

Helen at Family Friends Food also made no-bake almond coconut fudgies. Nice and easy, without having to turn on the oven – Helen interpreted the theme as ‘things you would make for your mum’ and so, I’m guessing her mum would love these!

Thanks to all who entered and keep your eyes peeled for April’s theme over at The Baking Explorer.

Monday, 23 March 2015

'Italian Easter Bread' Cookies

'Italian Easter Bread' Cookies

Have you ever heard of Italian Easter Bread? I hadn’t until last year, when I happened upon it on Pinterest.

courtesy of recipes100
It is visually quite stunning – a plaited wreath of sweetened dough with dyed hard-boiled eggs placed in the wreath, plus some sprinkles.  Very Eastery, not just because of the colours, but of course the eggs – which have all sorts of religious connotations.

I’m not religious, as I’m sure I’ve mentioned before, but I still like the holiday and it's colours and tastes.

I thought I would try making it this year, but then I mentioned Italian Easter Bread to Disneyboi who baulked at the thought! He’s not a lover of real eggs at all. I say real eggs, as he does like chocolate ones, which set me to thinking.

'Italian Easter Bread' Cookies

How about a cookie made to look like Italian Easter Bread and instead of real dyed eggs, I could substitute mini chocolate eggs?

I made a plain cookie dough and chilled it overnight. The next day I twisted lengths of cookie dough together (I cannot plait to save myself, twisting was much easier) and added some micro eggs, before chilling the unbaked cookies for a few minutes (helps them to keep their shape) before baking them.


I tried both mini eggs and micro eggs and I have to say the micro eggs won. They did crack a little when baked, exposing their choccy innards, but I loved the look of them.

When cooled I made a simple glaze from icing sugar and water, brushed it over the cookies and sprinkled some multi-coloured sprinkles – very festive!

'Italian Easter Bread' Cookies

Disneyboi enjoyed these immensely and I think they would cheer up any Easter celebration table!

Italian Easter Bread Cookies


Thumbnail Url Cookies made to look like Italian Easter Bread
Cuisine: snack Category: cookies Yields: 20 cookies
Prep Time: Cook Time: Total Time:


Ingredients
  • 200 grams unsalted butter, softened
  • 200 grams granulated sugar
  • 1 medium egg
  • 1 teaspoon vanilla extract
  • 400 grams plain flour
  • ½ teaspoon salt
  • 1 bag of chocolate micro eggs
  • Icing sugar
  • Water
  • Multi-coloured sprinkles
 
Instructions
  1. In a mixer, beat together the butter and sugar until pale and fluffy. Add the egg and mix in followed by the vanilla extract. Add the flour and salt and mix until a dough forms.
  2. Split the dough in two and wrap each half in clingfilm. Refrigerate for a couple of hours at least or overnight.
  3. When ready to make your cookies, pre-heat the oven 180C. Line two cookie sheets with greaseproof paper.
  4. Split the dough into 40 grams balls and separate each ball in half. Roll each half into 20cm long snakes and place each snake side-by-side. Twist each end until you get a full twisted ‘log’. Wrap it into a circles and then take the micro eggs, dotting 5 or 6 around the folds of the dough.
  5. When all cookies are made, chill them for 15 minutes before baking in the oven for 10-12 minutes or until lightly browned.
  6. Allow to cool completely before making a glaze from some icing sugar and water, Brush over the cookies and sprinkle with sprinkles.
  7. Allow the glaze to dry before tucking into your Italian Easter Bread Cookies!


I am entering these into this month's Tea Time Treats hosted by (this month) Janie at The Hedgecombers and Karen at Lavender and Lovage. The theme is biscuits and cookies.


I am also entering these cookies into this week's Cook Blog Share hosted by Lucy at Supergolden Bakes