Monday, 7 July 2014

Rhubarb and Custard Cookie Bars

cookie bars topped with rhubarb jam and a custard flavoured icing

These Rhubarb and Custard Cookie Bars were born after a neighbour of my mum’s handed in some fresh rhubarb from their garden. I had it in my kitchen for a few days, and I was intending to make it into some tasty jam. Which I would then add into these tasty bars inspired by those old school rhubarb and custard sweeties.

courtesy of keepitsweet.co.uk
But alas, the rhubarb wasn’t that fresh and I had to dispose of it before I could use it. Thank goodness for ready-made supermarket rhubarb jam! The jam I used had ginger in it too, which was a nice addition, but not necessary for these bars, if you can get plain rhubarb.

cookie bars topped with rhubarb jam and a custard flavoured icing

 The base of these bars equals the cookie part, it’s a cookie dough baked into a flat 9”x9” pan. I spread jam over the base before I popped it into the oven. Then I made a thick custard flavoured icing – like I use in Nanaimo bars which I spread over the topped of the base when it had cooled.

cookie bars topped with rhubarb jam and a custard flavoured icing

The result was a tasty bar, crunchy on the bottom, tangy fruit in the middle and creamy sweetness on top. Here’s how I made them:

Yield: 25 squares approx.

Base Ingredients:
170 grams unsalted butter, softened
75 grams granulated sugar
175 grams plain flour
25 grams porridge oats
½ teaspoon salt
1 tablespoon water
200 grams of rhubarb jam

Topping:
80 grams unsalted butter, softened
3 tablespoons custard powder
1 teaspoon vanilla extract
375 grams icing sugar
3 tablespoons milk (I used almond milk)

Method:
Grease and line a 9”x9” pan with greaseproof paper. Preheat the oven to 180C.

In a bowl mix the butter and sugar for the base until light and creamy. Sift in the flour and mix through. Add the oats and mix these through also. Add some water if the mixture is quite dry, up to 1 tablespoon. Transfer to the pan and press evenly with your fingers so the cookie dough covers the base evenly. Spoon over the rhubarb and spread it evenly over the dough. 

Place into the oven for 15 minutes. The jam will bubble and the base will brown.
Remove from the oven and allow the base to cool completely.

Make the custard topping by mixing the butter with the custard powder, vanilla, icing sugar and milk, until smooth and spreadable.

Spread the topping evenly over the cooled base and place into the fridge to allow the topping to firm up, a couple of hours.
cookie bars topped with rhubarb jam and a custard flavoured icing

When firm, remove from the pan and cut into squares. Enjoy your rhubarb and custard cookie bars with a nice cuppa!

I am entering these into this month's Alphabakes, hosted alternately by Caroline at Caroline Makes and this month Ros at The More Than Occasional Baker. The letter is R and rhubarb begins with R!


Saturday, 5 July 2014

Fresh Orange Slushie

Fresh Orange Slushie


I have a new friend who I’d like you to meet. He arrived recently and I just can’t get enough of him. I should explain though…my new friend is called Optimum 9400 and is actually a blender from Froothie.


I have become addicted to green smoothies using my Optimum 9400, but that is for another post. For this one, I am bringing you a super easy Fresh Orange Slushie which demonstrates just one of the brilliant features of the machine – it crushes ice.

Just some of its other functions include:

Grinding nuts and grains
Kneading bread dough
Making preservative free nut butter
Making nut milk
It can make ice cream just from frozen fruit
It can also whip up steaming hot soup (due to it’s 48,000rpm speed)
Makes hummus, dips and salsas
Whizzes up whole fruit juice
Can blend Cocktails
Whips cream

You can see why I am excited about my new gadget and I will be bringing you lots of healthier recipes using it. This blender is so powerful it can even pulverise paving stones – check the video!


As the machine has a very powerful motor, it won’t burn out like other cheaper alternatives. Have a look at the specifications  of the Optimum 9400 compared to the Vitamix,another blender on the market.

The Optimum 9400, which is available at a special introductory cost of £329, also has a 10 year extended warranty so you can be rest assured you will be using it for years to come. The cost is really good value when you consider cheaper models won't do a fraction of the things a 9400 will and it is considerably less expensive than other high-end blenders which can retail up to £600. 

Oh, and washing it is a snap - just add some hot water to the jug (add a dash of washing up liquid if you've blended something oily) and turn on high for a few seconds. Rinse the jug and you are done!!

The fresh orange slushie I made was done in seconds flat. The Optimum 9400 crushed the ice effortlessly. It's all natural with just two or three ingredients and is perfect for a summer cool-me-down.

Ingredients:
2 large oranges, peeled
Ice
Agave Nectar (optional)

Method:
Cut each peeled orange in half and pop into a blender. Whizz for a few seconds until the orange is smooth liquid.


Full the jug 3/4 full of ice.

Blitz the ice until the contents of the jug resemble slush.

Fresh Orange Slushie


If you like things a bit sweeter you can drizzle some agave nectar over the top of the slushie when it is poured into glasses.

Fresh Orange Slushie


Add a spoon or a straw, cool down and enjoy!


I'm entering this recipe into the Cook, Blog, Share linky party hosted by Lucy at Supergolden Bakes

Disclosure Statement: I was sent the Optimum 9400 free to review. Any opinions expressed are my own.

Thursday, 3 July 2014

Apple Cheese Cookies

cheddar-cheese-apple-cookies


A wee while back I made a delicious apple pie, which had cheddar cheese added to the pastry. You may have seen it, you may not have. But the result was surprising.

Good surprising that is.

The cheddar in the crust gave the whole pie a creamy taste to it. You couldn’t pick that it was cheese in the pie at all, for those who might baulk at the thought.

So, I wondered how cheese and apple might go together in sweet cookies? I set about looking at some recipes and came up with my own. I didn’t want to add cinnamon, like there was in the pie, as I wanted the flavour of the apple to stand out.

cheddar-cheese-apple-cookies


I used a grated mature cheddar cheese and Granny Smith apples. I grated both by hand. Using the food processor to grate the apple would have left it way too moist for the recipe. In fact grating the apples by hand still leaves them a bit wet, so I placed them in some kitchen roll and squeezed out the excess moisture.

The addition of oats in the cookie dough ensures a chewy cookie, the kind I like best. Here’s how I made them;

Yield: 10 large cookies

Ingredients:
75 grams plain flour
½ teaspoon baking powder
½ teaspoon salt
110 grams grated strong cheddar cheese
120 grams porridge oats (not instant)
150 grams unsalted butter, softened
75 grams golden caster sugar
1 medium egg
2 Granny Smith apples, peeled, cored and grated
Adapted from Sargento.com

Method:
Preheat the oven to 180C and line two large baking sheets with greaseproof paper.

Grate the cheese and apples. Squeeze the excess moisture from the apple by placing it in some kitchen paper or a clean dish towel and wringing it.

In a bowl of a mixer, beat together the butter and sugar until creamy. Add the egg and beat this in. Next, sift in the flour, baking powder and salt and stir to combine.


Add the cheese and stir through, then do the same with the apple. Lastly stir through the oats.


Scoop balls of cookie dough onto the prepared baking sheets and press them down with the bottom of a wet glass. Bake the cookies in the oven for 12 to 15 minutes.


The cookies will smell like cheese on toast when you open the oven door, they will be golden brown with flecks of cheesy orange on the outside.

cheddar-cheese-apple-cookies


Allow the cookies to cool fully before enjoying, as they are soft and likely to fall apart when picked up when warm.


They are just as good as the pie was – the cheese just lends a creamy taste which works perfectly with the fruitiness of the apple.

Try these  and you won’t be disappointed! Enjoy…


Tuesday, 1 July 2014

Summer Trifle

Jelly, fruit, yoghurt, trifle, pudding


I don't know about you, but I used to think of trifles as a preserve of the winter months, especially Christmas when it is my family’s dessert of choice. So when I concocted this dessert in the summer, I wasn’t really sure, initially what I would call it.

I was making a jelly, yoghurt, cakey, fruit individual pudding and when I looked at it, I realised that it was essentially a trifle. A summer trifle.

Jelly, fruit, yoghurt, trifle, pudding


I layered up fruit and jelly in individual jars and when set used some fat free greek yoghurt mixed with vanilla and granulated sweetener for a middle layer. I thought this was a bit like the custard filling in a trifle. And lastly I crumbled some cookies and strawberries on top.

As you can probably tell, I was going for a red, white and blue theme as Independence Day is coming up. I had blue jelly in the cupboard, and made some red cookies from last year’s ID4 recipe. The colours are obviously up to you. This will depend on the jelly, the fruit and cookies you use.

The outcome was a very eye catching trifle pudding, which wasn't really too bad on the old waistline. I used a sugar free jelly (you could use my recipe here), sweetener and the yoghurt, was 0% fat. The only ‘sinful’ bit was the cookies on top. You could use sponge cake in place of the cookies if you prefer.

Tip: I use old salsa dip jars to make the puddings in. The jars are washed thoroughly of course. In fact I used them before in a recipe for a Cinnamon Crunch Pudding.

Here’s how I made the summer trifle, but the amounts are quite vague!

Yield: 5 ‘jars’ or so

Ingredients:
One pack of jelly, prepared
Blueberries
0% Fat Greek Yoghurt (500ml approx.)
Teaspoon vanilla extract
2 teaspoon granulated sweetener
1 dozen cookies, crumbled (or some sponge cake)
Strawberries, chopped

Method:
Scatter blueberries in the bottom of each jar and fill with jelly, just until the berries are covered. Refrigerate the jars until the jelly is set.


Mix the yoghurt with the vanilla and sweetener. Spoon the yoghurt on top of the set jelly in each jar. 


Lastly scatter crumbled cookie/cake and chopped strawberries on top.


It is a very simple recipe, but tasty and adaptable to whatever fruit, jelly, cake you have lying around.

Jelly, fruit, yoghurt, trifle, pudding


So, if you are in the mood for a bit of trifle in the summer months, why not? A trifle is for life, not just Christmas!

I am submitting this into this month's Treat Petite, hosted by Kat at The Baking Explorer. The theme is Summer. Need I say more?


Saturday, 28 June 2014

Treat Petite June 2014 Round Up

It’s time to see what deliciousness was baked up for this month’s Treat Petite challenge. The theme this month was Childhood Memories and this obviously got the memory banks rewinding to back in the day!


Firstly was Kerene from The Dream Baker. Danish Butter Cookies were a favourite childhood snack of hers and she reminisces about the tins of cookies which she had as a child. Kerene’s cookies are individually piped and look light and tasty.


Laura at I’d Much Rather Bake Than came up with these Smarties cookies. Who doesn’t remember Smarties as a child? Laura explains as a child she mixed up teaspoon with tablespoon and you can imagine the result. Thankfully, that mistake didn’t happen here!


Helen at Casa Costello made these Coffee Melting Moments. These are adapted from ones her mum used to make when she was wee. I love the addition of coffee here.


Elizabeth at Elizabeth’s Kitchen Diary made these nostalgic biscuits from her rural Canadian childhood. She says these are similar to ginger snaps. I love that crinkle on top! Delicious.


Choclette at the Chocolate Log Blog made these coconut chocolate bars for Father’s Day and for Treat Petite. The recipe is reminiscent of Bounty Bars she says, which she used to get as a treat when she was a child.


Helen at Family-Friends-Food made these speculaas spiced date cookies. Her mum had lost the original recipe, but it later turned up and Helen was transported back to her mum’s kitchen once more.


Kate the Gluten Free Alchemist made these rather delicious looking Battenberg Slices. Gluten free, with home-made marzipan, she was worried I wouldn’t allow these as they were slices of a big cake. But served up individually these are perfect.


Ros at the More Than Occasional Baker made these very retro cornflake chocolate chip bites. She found them in a book her mum passed down to her. Ros loved this theme and said she was excited to see everyone else’s creations too.


Caroline at Caroline Makes entered these Jap Cakes form her childhood. I’ve never heard of them, but they sound lovely, made with egg white, ground almonds and other ingredients. These sparked quite a conflab on Caroline’s website about the origins of the cake. Pop over and take a look!


Back to the Dream Baker Kerene, who also submitted her cinnamon baked doughnut holes. Doughnuts take Kerene right back to her childhood and this adaptation of an Ina Garten recipe certainly makes me drool!


Sisley at Sew White made these yummy looking Marshmallow Chocolate Bites. These are a childhood treat updated to appeal to grown-ups also – with an added stick made from a straw.


Kat, my baker in crime, from The Baking Explorer made these cola cupcakes. She made them with cola flavouring, an homage to her favourite sweets as a child – cola bottles. Decorated with cola bottles too they look scrummy.


Lastly my entry, which is very similar to Sisley’s. We called these Top Hats and were made at every childhood party I was ever at. Chocolate, marshmallows and smarties, these are very easy to whip up in a flash. Easy for kids to make too.


So that is the childhood round up for you. A huge thanks to everyone who took the time to enter their creations. Stay tuned to The Baking Explorer to find out July’s theme!


Thursday, 26 June 2014

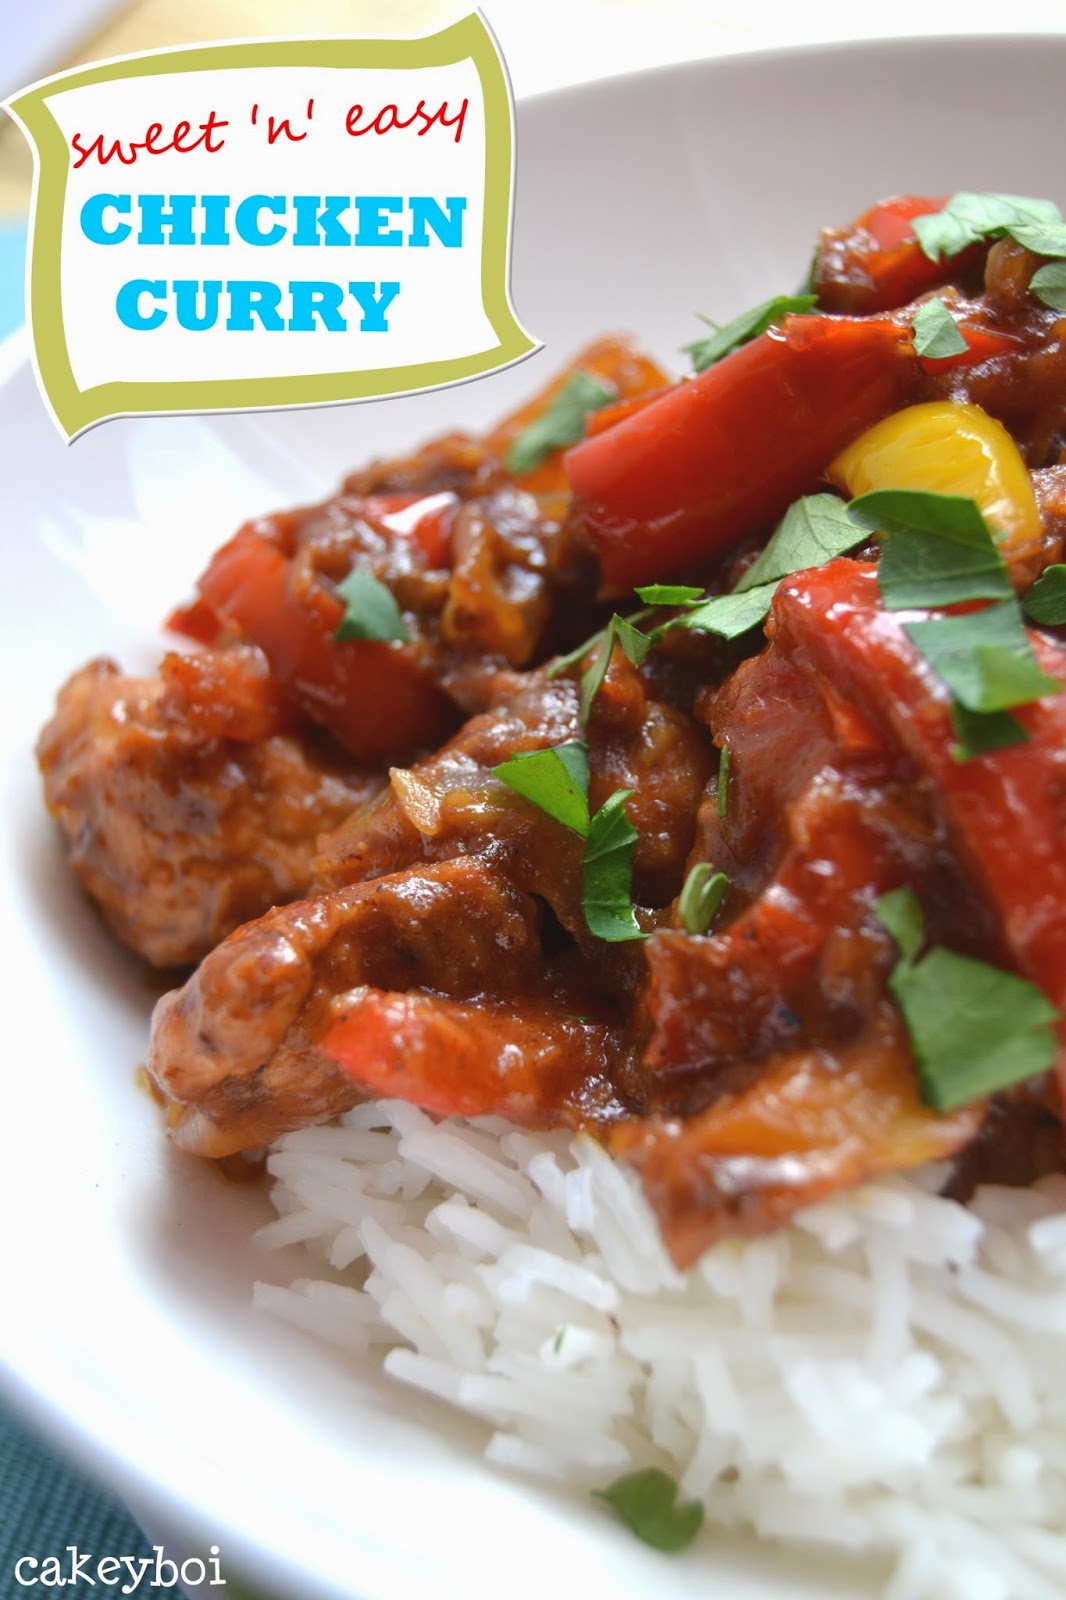
Sweet 'n' Easy Chicken Curry

I know, I know, I know! Before you say it – I know. This is Cakeyboi, you have come to the right blog. This is just a slight deviation from the normal sugary treat-fest I bring you!

chicken curry recipe


I make this chicken curry a lot and have passed the recipe on to many friends. And they keep saying I should write about it.

So, nothing ventured, nothing gained, this is a bona fide Cakeyboi non-baking savoury recipe. It is very loosely inspired by a curry recipe I saw on the Rachael Ray show once, when we used to get that programme in the UK. I just googled the original recipe now and to be fair, there is very little similarity. Mine is much easier and uses a lot less ingredients.

It is so easy to make, less than 30 minutes if you are in a rush. More if you want to let it simmer whilst you do other things. It is sweet, with mango chutney, peanut butter, coconut and mild curry powder going on.

I use chopped up chicken breasts and add an onion and a couple of bell peppers to the mix. To serve I make some rice and buy a store-bought naan bread to serve on the side. You can make it as saucy as you like, to use the naan for mopping up the sauce. Or you can make it a thick gooey curry. Totally up to you. Here is how I make it:

Ingredients:
2 tablespoons vegetable oil
2 large chicken breasts, cubed (approx. 400 grams)
1 large white onion
2 large bell peppers
90 grams smooth peanut butter
90 grams mango chutney
8 grams mild curry powder
15 grams desiccated coconut
Water from a recently boiled kettle
150 grams rice
Loosely adapted from Rachael Ray

Method:
Chop the onion in half and slice thinly. Slice the peppers into long thin strips.


Heat the oil in a large frying pan/skillet and fry the onions until translucent. Add the peppers and continue to fry and stir for a couple of minutes before adding the cubed chicken. Add a little more oil if the mix is dry.


When the chicken is lightly browned, add the peanut butter and stir through so it melts a little. Next, add the mango chutney and stir this through.

Add the curry powder and stir this in, then add water from the kettle covering the mix. It will sizzle and bubble. Add the coconut and stir this through. Continue to let the curry boil and the water reduce. The sauce will become thicker.


In the meantime, prepare the rice. Add more water to the curry if it’s is getting too dry.
Remember, you can make it as saucy or thick as you like.


When the rice is ready, so is the curry. Plate the rice and spoon the curry on top. (Garnish with a little parsley - if you want to!)
It really is that easy. It is nutty, sweet and is one of my own favourite recipes.

And a wee tip, a friend who makes it told me, is if you make it with chunky PB it adds a touch of crunch too!

There we go, my first (and last?!) foray into a proper savoury dish. Enjoy...


Monday, 23 June 2014

Homemade Fat Free Frozen Yoghurt


I purchased an ice-cream maker last year, thinking I would use it non-stop last summer – which was a relatively good one for Scotland. But, best laid plans and all that – I used it once to make (dare I say it) a rather delicious concoction inspired by a Coldstone Creamery ice-cream I had in New York last year – full of cherry pie filling, sprinkles and gummy bears – check it out!

But this year, I hope to use it a wee bit more and thought I had better get started whilst the weather is on my side. And I decided to try frozen yoghurt as I love the stuff.


And I used 0% fat Greek yoghurt, some vanilla bean paste and only a couple of tablespoons of sugar. Not too bad at all on the waistline. Which, of course, means you can go to town a little bit more on the toppings.

I went for a couple of toppings – sprinkles, chocolate chips and some Yuzu Citrus Seasoning I was recently sent to try.


The dressing has a wide variety of uses and can be used in sweet or savoury dishes. It’s flavour is quite ‘soor’ as wee Scots say – quite tart. It is like graprefruit with a little mandarin thrown in too. The dressing is like a syrup and goes well with the sweetness of the froyo!


Yield: Approx 500 grams Frozen Yoghurt

Ingredients:
500 grams 0% Fat Greek Yoghurt
1 Tablespoon Vanilla Bean Paste (or extract)
2 Tablespoons granulated sugar (or sugar substitute such as agave nectar or stevia)

Method:
Prepare your ice-maker as normal, ready for use.

In a bowl, mix the yoghurt, vanilla and sugar. Pour into the ice-cream maker for the time recommended in your usual manual.


Transfer the frozen yoghurt to a plastic container, cover and freeze for at least a couple of hours (the machine makes a soft mix only).


When ready to serve, sprinkle with your favourite toppings and enjoy.

Disclosure Statement: I received the Yuzu Citrus Seasoning free to sample. Any opinions expressed are my own.