Friday, 27 December 2013

Chocolate Pavlova Raspberry Whipped Cream Layers


I hope everyone had a great Christmas. I can’t believe the big day is over! Still, I have a few more days of R&R before returning to work. I need it to recover from the shock of making Christmas dinner this year. Only the second time I have done it, but I was a tad more organised than last and made lists of everything! Everything went well apart from my garlic infused sprouts, which I loved, but the others didn’t!

I wanted to share with you the dessert I made. We usually go for trifle, but we all fancied something a little different this year. I know that mum and Disneyboi love chocolate and raspberries together so that was where my inspiration began.


And the result was layers of chocolate flavoured and flecked chewy meringue, with layers of whipped cream and layers of raspberries! It was delicious and simple. That’s the key to Christmas day dessert I think - simple yet delicious. Time is precious on the day.

I made the pavlova discs a few days earlier and they kept well in an airtight container. So I all I needed to do was whip the cream and spoon on the rasps. I used frozen rasps (defrosted of course) as they tend to leak more juice, perfect for such a dessert.

I don’t have many pics of the pudding as it was assembled just as I was about to serve. And this couldn’t be layered in advance, the cream will eventually make the meringue soggy if it sits for too long, so it really is best eaten within a few hours of making.

Ingredients:
6 large egg whites, room temperature
¼ teaspoon cream of tartar
250 grams of caster sugar
1 teaspoon white vinegar
1 teaspoon vanilla extract
1 teaspoon cornflour
3 tablespoons unsweetened cocoa powder
50 grams dark chocolate chopped (70% cocoa solid min)
Adapted from Joy of Baking

600 ml double cream
700 grams frozen raspberries, thawed

Method:
Preheat the oven to 180C. Line two large cookie sheets with greaseproof paper and draw two circles on each sheet of paper, about 6” in diameter. Use a plate or upturned bowl as a template. Flip the paper over so your piped meringue doesn’t come into contact with the pencil.

In a mixer, beat the egg whites until frothy. Add the cream of tartar and once the mix holds soft peaks, continue beating adding the sugar one tablespoon at a time. Beat until the mix holds stiff peaks. At this stage, add the vanilla and vinegar and fold through with a spatula. Sift over the cornflour and cocoa powder and fold this through until the cocoa has incorporated fully. Fold in the chopped chocolate.


Either with a piping bag with a wide nozzle, or with a spoon fill the four circle templates with the chocolate meringue mix. If using a piping bag, spiral the chocolate until around the circle.

Place the cookie sheets into the oven for 1 and ¼ hours. When the time is up, turn off the heat and leave the baked meringue discs until they have cooled completely (I left mine overnight). Carefully peel the discs from the greaseproof paper and store in airtight containers until ready to assemble the pavlova layers.

To assemble, beat the cream until it is stiff, but spreadable. Place one meringue disc on your serving plate and spoon on one quarter of the cream and carefully spread out to the edges. Spoon a quarter of the rasps on top of this. Repeat this process, until you finish with a layer of cream and rasps. And it’s as simple as that.


The meringue tastes chocolaty, is crispy on the outside and chewy on the inside. The folded in dark chocolate holds it’s shape and is a nice added bite in the meringue. The tartness of the berries goes well with the sweetness and the cream is pure indulgence. If you make, enjoy, as we did!

Monday, 23 December 2013

Random Recipes #35 - Dare to Bare!


This is my last post before Christmas and rather than give you another recipe , I have decided to give you a ‘tour’ of my food cupboards instead.

Dom over at blog Belleau Kitchen has a monthly challenge called ‘Random Recipes’ where he asks people to bake a recipe chosen by some random method from a random cookbook. I have entered a couple of times in the past and would love to more regularly, but sadly the whole ‘random’ aspect freaks me out a little bit!


I love to know in advance what I am baking and have things planned in advance – did I ever tell you I am a control freak?! Anyhoo, I digress. This month, Dom has asked us all to open our cupboard doors to the world and show us their contents. He’s calling it ‘Dare to Bare’!

So, behold my rather messy food cupboard. I didn’t say I was a control freak about the insides of cupboards, as you can see.

The picture at the top is my main food cupboard – sweet to the left and savoury to the right. No idea why I separated like that, but I did. You can see some of my baking ingredients, as well as some US type produce I have picked up on my travels.


Since starting my blog, I have expanded things into my walk-in cupboard, which I have a tiered basket thing going on (above). The top level of which is dedicated to all things baking. I also food baggies, things for foodie photos etc. on levels underneath.


On another shelf I have a large box full of cake decorations, flavours and colourings (above) – another expansion after starting Cakeyboi.


And lastly back to the kitchen and the bottom level of another cupboard which houses my spices. This reeks when you open the door, there is so much crammed in there.

So, that is where the Cakeyboi magic happens! Bit messy, but it gets the job done.


It just leaves me to  say have a very Merry Christmas with all of your loved ones and I will be back with another post very soon.

Saturday, 21 December 2013

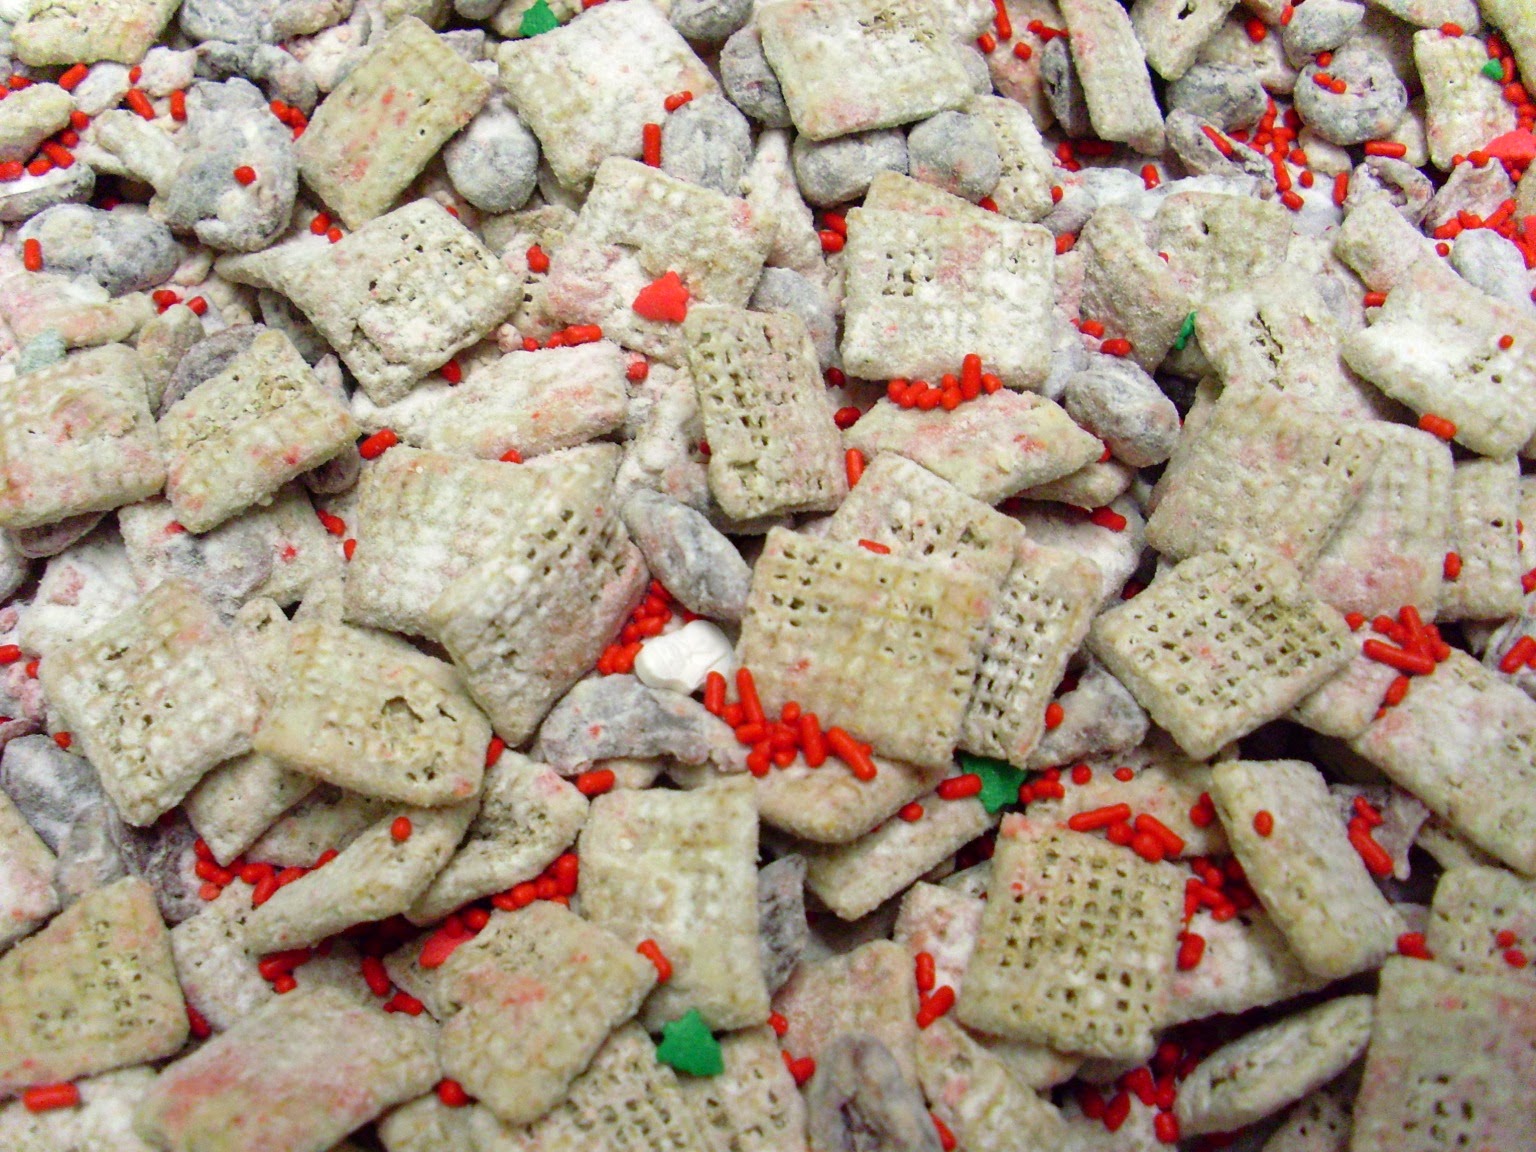
White Chocolate and Cranberry Puppy Chow


It’s getting close to the big day and you probably have so many things to do, other than make elaborate festive sweet treats.

So this recipe is a no-bake, quick and easy one. It is also highly addictive. I recently took some along to our Christmas buffet and folk couldn’t get enough of the stuff – I hadn’t laced it with anything – honest! It was just really that tasty.

I have made puppy chow before and if you remember, IT IS NOT FOR DOGS! It has chocolate, which is not good for our canine friends. But it's called puppy chow, I suppose because of the way it looks. It can also be called muddy buddies or monkey munch too. 

I decided to make a ‘Christmassy’ version for the office ‘do’ as I was short on time and knew this really took no time at all. The flavour combo of cranberries and white chocolate seems quite festive to me and so, this is basically malted wheat cereal, white chocolate and dried cranberries. I added some yuletide sprinkles too, but that is of course, entirely optional. Here’s how I made it…

Ingredients:
300 grams malted wheat cereal (such as mini Shreddies)
200 grams white chocolate, melted
150 grams dried cranberries
100 grams icing sugar
Christmas Sprinkles (optional)

Method:
Melt the white chocolate either in the microwave, or by my preferred method, a bain marie (in a bowl over a pot of simmering water).

Once melted add the cereal to the bowl and stir so the cereal is coated with all of the chocolate. Add the berries and stir these through too.


Transfer the cereal, berry, choc mix to a large plastic container which has it’s own lid. Add the icing sugar (and two to three tablespoons of sprinkles, if you wish) to the top of the mix and place the lid on top, tightly. Now shake the box vigourously – like you are trying to tone up those bingo wings. Let it sit for a minute then remove the lid.


On a baking sheet, lined with greaseproof paper, pour out the contents of the box and place into the fridge for about 30 minutes or until the chocolate has set.


And there you have white chocolate and cranberry puppy chow.  It's crunchy, chocolaty and chewy. I put mine in little treat bowls for people and they kept topping up, until it was gone.


Perfect as a fast and easy Christmas snack everyone will love – enjoy!

Thursday, 19 December 2013

Oreo Crust Eggnog Marshmallow Pie


I love eggnog – it’s creamy and delicious and very festive. I usually don’t like rum, but added to eggnog, with all the sweetness and spices going on, it just works – well!

Last year I made some eggnog cookies. And I wanted to make something using eggnog again this year. Well, kind of. There is no eggnog in this, just the flavours and no booze, just rum extract.

I thought adding the flavours to my marshmallow fluffy frosting would work. And having this in a pie crust would be a nice contrast between crunch and mallow-softness. I decided to use oreos for the crust as I thought chocolate and eggnog would be lovely together.

You need 15 oreo cookies for this, just scrape out the white filling first (nice to snack on!). Here’s how I made the pie;

Crust:
15 oreo cookies (30 half’s) minus the filling
60 grams melted, unsalted butter

Marshmallow Fluffy Frosting:
190 grams granulated sugar
2 egg whites
3 tablespoons water
Pinch of salt
¼ teaspoon cream of tartar

Eggnog Flavouring;
1 teaspoon vanilla extract
1 teaspoon rum flavour extract
1 teaspoon Nutmeg
½ teaspoon Cinnamom

More nutmeg for garnish

Crust Method:
Pre-heat the oven to 180C.
Crush the oreos in a food processor and add in the melted butter. Transfer to a 9” pie plate and smooth out up the sides, to an even layer. Bake in the oven for 10 to 15 minutes, just until you can smell the chocolate. Remove and allow to cool completely.


Marshmallow Method:
Place the sugar, egg whites, water, salt and tartar in a large bowl. Place this on top of a pan of simmering water (making sure the water doesn’t touch the bottom of the bowl). With an electric mixer on high speed, beat the ingredients over the heat for 5 minutes. The mixture will turn white and thick. Remove from the heat and add flavourings. Beat for another two minutes off the heat. And the frosting is ready.


Spread the fluff into the baked pie shell to an even level. Finish by garnishing with freshly grated nutmeg. There you have Oreo Crust Eggnog Marshmallow Pie ready to slice into.


This tastes every bit like eggnog and is sure to get you into the festive spirit – even without the use of real spirits! Enjoy!


I'm entering this pie into mine and Baking Explorer's challenge Treat Petite. This month's theme is Happy Holidays!


I'm also entering this bake into Cooking with Herbs hosted by Karen at Lavender and Lovage. This month's theme is spices and with the nutmeg and cinnamon is uber spicy!

Tuesday, 17 December 2013

Chocolate (and Pine) Xmas Tree Cupcakes


I have wanted to make these for a while now. Ever since I saw the brightly coloured chocolate drops in the shops a few months back, I knew they would be perfect as christmas lights in these tree cupcakes.

The cupcakes themselves are inspired by a chocolate which I ate at the BBC Good Food Show a couple of months back. The chocolate was flavoured with Scot’s Pine and I thought it was delicious and I thought making chocolate and pine flavour cupcakes would be inventive (pine trees after all), delicious and a doddle.

But there was a snag, nowhere could I get pine flavoured extract for baking with. What to do? Then I discovered pine essential oil in a local health food shop. But it had a huge disclaimer on it saying not to be taken internally.


Did this deter me? Nah! I researched more and found that pinus sylvestris oil as its proper name is, is approved in food. It also states it is not expected to be potentially toxic or harmful. Read more here. But as other sites say it can be an irritant – so I am not recommending you use pine essential oil in these cupcakes.

But as I say, I did, and I was fine. I added only 4 small drops to the mix and it gave a delicate piny flavour that complimented these egg-less chocolate cupcakes well.

The tree part is my marshmallow fluffy frosting dyed with some green food colouring. I piped this on as high as it would go to the cupcakes. I then fridges them to make the mallow a bit firmer, before dotting the chocolate drops into the ‘foliage’! I did make some stars for the tops out of white chocolate, but they were a bit pants as you can see. or you could say they have a child-like simplicity to them! Whatever, I'm sure you could do better than me. Or just buy some edible stars.

Ingredients:
125 ml vegetable oil
225 grams granulated sugar
1 teaspoon vanilla extract
35 grams cocoa powder
250 ml milk
1 teaspoon bicarbonate of soda
150 grams plain flour
1 teaspoon vinegar
Adapted from Cooks.com

Green Food Dye
Coloured Chocolate drops
Stars

Method:
Pre-heat the oven to 180C. Place 12 cupcake liners in a cupcake tray. Sift together the flour and bicarb and set aside.

In the bowl of a mixer, beat together the oil, sugar, vanilla and cocoa powder until smooth. Add one third of the flour then mix, one half the milk then mix, repeat with the flour, milk then end with the last third of flour. Lastly add the vinegar and stir through.


Divide the batter between the twelve cases and bake in the oven for 15 to 20 minutes or until a toothpick comes out clean from the centre. Allow to cool completely.


Make the marshmallow frosting as directed and add green food colouring, as much as you dare. Level the cupcakes by cutting the top off each one until flatter. Then in a piping bag, fitted with a star tip, swirl on the green frosting as high as you can.


Place the cupcakes into the fridge to chill for a couple of hours. This lets the marshmallow set. Remove from the fridge and add the chocolate drops as lights and a star on top.


The cupcakes are very chocolaty and even without the egg hold well together. The marshmallow frosting is a nice contrast and fun to eat your way through! Enjoy!

Disclaimer: I am not recommending the use of pine (pinus sylvestris) essential oil in these. However if you do, substitute the vanilla extract for only 3 to 4 small drops of the pine oil. 

I am entering these into this month’s Alphabakes hosted alternately by Caroline at Caroline Makes and this month by Ros at The More Than Occasional Baker. This month’s letter is spookily X! So Xmas trees are perfect!


I'm also entering these into Calendar Cakes hosted by Laura Loves Cakes and this month by Rachel at Dollybakes. The theme is Jingle Bell Rock so these are perfect!!


Saturday, 14 December 2013

Chocolate Heaven with Sainsbury's


Are you looking for last minute stocking filler ideas?

When Sainsbury's asked if I would like to sample some of their Taste The Difference chocolates, having such a sweet tooth, of course I said yes.

I was surprised to receive 9 big bars in the mail, but I didn’t complain and neither did my tasting panel i.e. my work colleagues (as you can tell from the empty packs above).

Here’s what we thought of each of the bars;


Swiss Dark Chocolate (72% cocoa solids) – for true dark chocolate fans. Smooth but rich due to the high cocoa content. Perfect for using in recipes.

Belgian Milk Chocolate with Caramelised Biscuit – a delicious creamy chocolate with added crunch – it has those Speculoos biscuits that I love through it. A hit with the tasters.

Belgian White Chocolate – Delicious, very creamy and reminded me of Milkybar (this didn’t make it to the office!)

Belgian Dark Chocolate (72% cocoa solids) with candied orange – Another darkly bitter chocolate but with sweet pops of chewy candied orange. This was well liked in the office with its contrast of sweet and bitter.

Swiss Milk Chocolate with a hint of hazelnut – A very subtle hint of hazelnut going on, but smooth and creamy mostly. This was another favourite in the office.

Swiss White Chocolate – Another nice white chocolate. I didn’t find it as creamy as the Belgian white and think adults would prefer the taste of this one.


Swiss Milk Chocolate with Praline Filling – This was amazing and we all agreed it was like eating Nutella flavoured chocolate. Amazing!

Swiss Milk Chocolate with Marc De Champagne Filling – This was not for me. I’m not a fan of booze in my chocolates and this tasted very boozy to me. But on the flipside my colleague Wendy loved this and scoffed most of this bar herself (could’ve sworn she was tipsy!!)

Swiss Milk Chocolate with Dark Caramel Filling – Another big hit, the gooey caramel filling was very dark and almost had a burnt taste to it, which we all loved.  Gone in a flash.


So that was our little sampling session of chocolate bars from Sainsbury's. The bars all retail at around £1.40, so perfect as a little add-on gift for any chocolate lover!

Disclosure Statement: I received the chocolate free to sample. I was not committed to writing a favourable review. Any opinions expressed are my own.

Thursday, 12 December 2013

After Eight Meringue Gelato Cake with Spiced Cranberry Sauce


Now, where were we? Oh, that’s right! I was making deliciousness using After Eight mints. The nice people over at 'A8HQ' asked me if I’d like to knock up a couple of recipes using those oh so familiar after dinner mints.


Last time, was my Very Merry Minty Shortbread Squares, which were like a minty caramel shortbread. Check it out, if you haven't done so already.

This recipe however is for ‘afters’ fittingly. I was going to my friend Claire’s for dinner and I was taking along the dessert. I wanted to make something that Claire’s whole family would love, which comprises a husband, a 16 year old teenage boy and a 11 year old boy. Surely this would be perfect for everyone!

The dessert was inspired by Nigella’s recipe for her meringue gelato cake. Also by my love of Viennetta, the layered frozen creamy dessert I used to have when growing up.

Instead of the ice-cream which the Viennetta had in it, this has whipped cream, chopped chocolate and crushed meringues, layered with After Eight mints in a loaf tin. It was then frozen and sliced when ready to eat. Nigella's recipe is a bit booze laden, so I omitted this for the kids.

This is quite festive I think, but to add another seasonal sparkle, I made a very quick, spiced cranberry sauce to go with it. This was some cranberry sauce out of the jar, heated with a touch of water to make it a bit thinner. I then added cinnamon and allspice to give it that familiar winter spice hit. This complemented the layers of meringue, cream and mint perfectly.

Yield: One loaf tins worth of Cake

Cake Ingredients:
300 ml of double cream
50 grams dark chocolate, chopped finely into thin shards
1 tsp vanilla extract
1 tbsp caster sugar
6 crushed meringue nests
Approx: 24 After Eight mints

Adapted from Nigella on BBC Food

Spiced Sauce Ingredients:
3 large dessert spoons of cranberry sauce
1 tbsp hot water
½ tsp ground cinnamon
¼ teaspoon allspice

Method:
Line a loaf tin with clingfilm, with enough overhang to wrap over the top of the cake.

In the bowl of a mixer, beat the cream until thick and you can see it hold it’s shape. During the beating process add the sugar, and vanilla.


When thick, fold in the chopped chocolate and crushed meringue. Transfer this to a disposable icing bag, or you can dollop with a spoon and smooth things with a knife.


Begin with a layer of cream on the bottom of the loaf tin (which will end up being the top). Add a layer of After Eights on top of this and then add another layer of cream. 


Repeat until you have used up all of the cream. Always finish with the cream mix and smooth this off with a knife or off-set spatula. Fold the clingfilm over the top and gently push down to make sure everything is tightly packed. Place into the freezer for eight (fittingly) hours or overnight.


To make the sauce, place the cranberry sauce in a saucepan and gently heat until it becomes looser and add the tablespoon of hot water, stirring things together. Add the spices and mix well.


To serve, allow the cake to rest out of the freezer for about 10 minutes before serving and then use a knife dipped in boiling water to slice through the cake. Drizzle some sauce on the side and you are ready to enjoy.


Who wouldn’t love this combo of cream, meringues, chocolate and mint? Well, Claire and her family (and I) certainly did. I enjoyed my dinner and left just After Eight. Enjoy!

Disclosure Statement: I received the After Eight items for free and also received a gift voucher to purchase ingredients for baking with. Any opinions expressed are my own.